
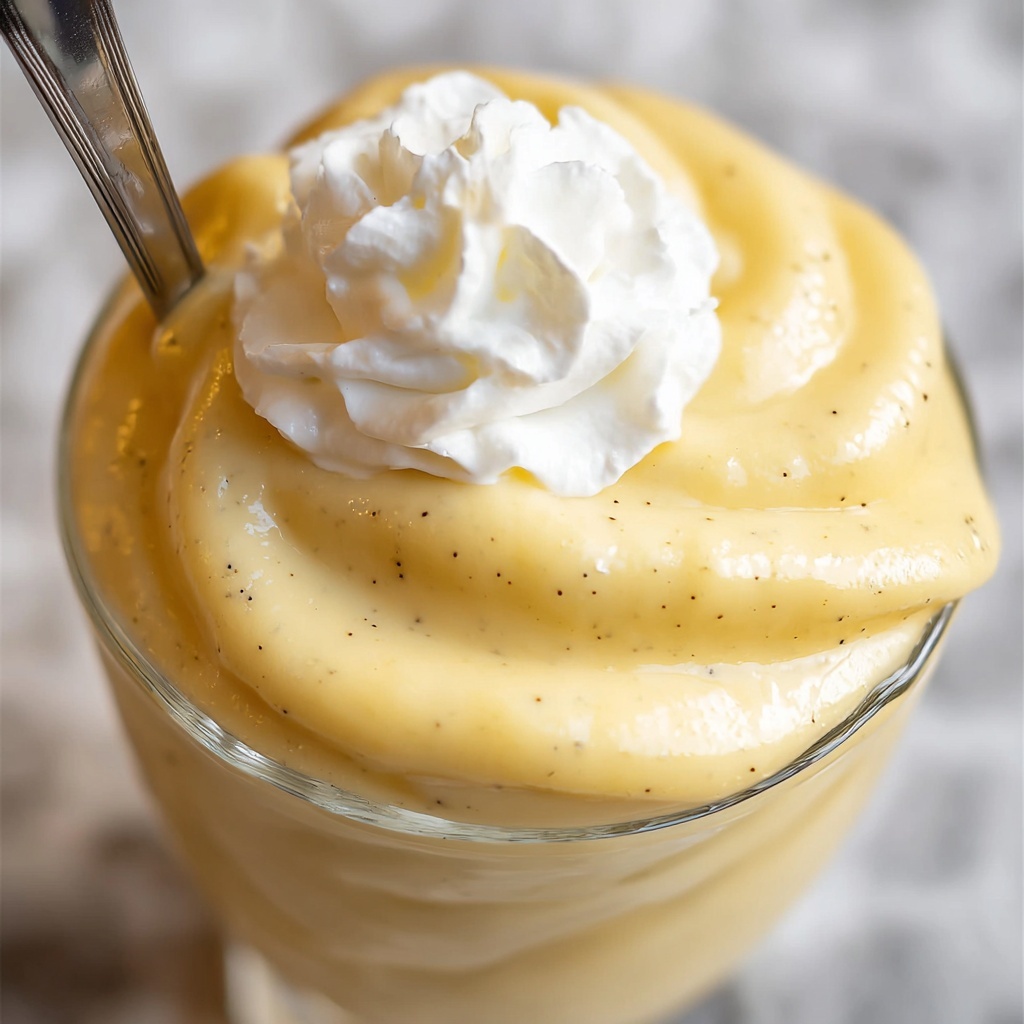
If you have a soft spot for classic desserts that feel like a warm hug, then this Vanilla Pudding from Scratch Recipe is about to become your new favorite comfort food. It’s creamy, rich, and bursting with real vanilla flavor, crafted with simple ingredients that come together in a delightful dance of textures and tastes. There’s just something so satisfying about making pudding the old-fashioned way, with fresh eggs and vanilla bean, instead of relying on instant mixes—don’t you agree? This recipe yields a luscious treat that’s perfect on its own or as the star player in many indulgent desserts.
Ingredients You’ll Need
Using just a handful of pantry staples, this Vanilla Pudding from Scratch Recipe celebrates how a few well-chosen ingredients can create something truly exceptional. Each one plays an essential role in delivering that silky texture and deep vanilla aroma we all love.
- 4 large egg yolks: These provide the creamy base and natural thickening power.
- 1/2 cup granulated sugar: Balances sweetness and helps create a smooth texture.
- 1/2 cup packed brown sugar: Adds a subtle caramel note; can substitute with granulated sugar for a purer vanilla flavor.
- 1/2 teaspoon kosher salt: Enhances all the flavors and keeps everything bright.
- 3 tablespoons cornstarch: The magic thickener that makes the pudding wonderfully rich and velvety.
- 1 cup whole milk (cold): Used to blend the dry ingredients into a smooth mixture without lumps.
- 2 cups whole milk (warm): Infused with vanilla to deepen the pudding’s flavor.
- 1 vanilla bean or 1 tablespoon vanilla extract: The star ingredient that lends that unmistakable, fragrant vanilla essence.
- 2 tablespoons butter: Adds silkiness and gloss to the final pudding.
How to Make Vanilla Pudding from Scratch Recipe
Step 1: Prepare the Egg Mixture
Start by placing the 4 large egg yolks into a clean 3-quart saucepan, which acts like a mixing bowl for now. This little trick saves you from using an extra bowl and keeps your workflow smooth. Remember, the egg whites are just waiting to become your next omelette, so don’t toss them!
Step 2: Add Sugar, Salt, and Cornstarch
Next, add the granulated sugar, packed brown sugar, kosher salt, and cornstarch directly into the saucepan with the egg yolks. These ingredients mix up your pudding’s sweetness, structure, and subtle depth, so get ready for that magical transformation.
Step 3: Combine with Cold Milk
Pour in the cold whole milk and use a hand mixer on high speed to blend the mixture for at least one full minute. This is the secret to a perfectly smooth base without any pesky lumps, so don’t rush this step!
Step 4: Warm the Vanilla-Infused Milk
In a separate glass measuring cup, place your warm milk along with the scraped seeds of your vanilla bean and the pod itself. Microwave this until it starts to bubble gently at the edges—this step intensifies the vanilla flavor and readies the milk for the cooking stage. Be sure to discard the vanilla pod afterward.
Step 5: Temper the Eggs with Hot Milk
Turn your hand mixer on medium speed and slowly pour the hot milk into your egg mixture while it’s running. This step requires a steady hand and a bit of patience to prevent scrambling the eggs. If you want the smoothest pudding possible, use a strainer when pouring to catch any vanilla bits or curdled pieces.
Step 6: Cook the Pudding Base on Stove
Once combined, transfer the saucepan to the stove on medium heat. Stir constantly with a whisk—preferably a flat one—to keep the pudding from sticking or forming lumps. In just a few minutes, you’ll see the mixture bubble and thicken, which means it’s nearly done. Keep whisking vigorously for 15 to 45 seconds to ensure it’s perfectly cooked.
Step 7: Whip Air into the Pudding
Remove your saucepan from heat and give the pudding another whirl with your hand mixer. This step is where it transforms from a dense custard into a light, fluffy vanilla dream. It’s like giving your pudding a joyful little pep talk!
Step 8: Add Butter and Vanilla Extract
Stir in the butter for that final lush texture and glossy finish. If you didn’t use a vanilla bean earlier, now’s the time to fold in a tablespoon of vanilla extract for all that fragrant warmth.
Step 9: Optional Strain for Ultra-Smoothness
If you’re particular about silky texture, strain your pudding through a fine sieve into a clean bowl to catch any lingering lumps or vanilla pod bits. This is the step that turns homemade into restaurant quality!
Step 10: Cover and Chill Properly
Cover your pudding with plastic wrap pressed directly onto its surface to prevent a skin from forming. Chill it in the refrigerator for at least 2 to 4 hours, or speed things up by popping it in the freezer for the first 30 minutes—but remember to move it to the fridge afterward to protect the pudding’s delicate texture.
Step 11: Ready to Serve
When it’s time to enjoy, remove the plastic wrap and give your pudding a gentle whisk to bring back that smooth, dreamy consistency. Now you’re all set to dive into one of the best desserts to come from your own kitchen.
How to Serve Vanilla Pudding from Scratch Recipe
Garnishes
Classic whipped cream never fails—light, airy, and the perfect balance to vanilla pudding’s richness. Sprinkle a few crumbled Nilla wafers or graham crackers on top for a nostalgic crunch, or add fresh berries for a refreshing burst of color and flavor. A dusting of cinnamon or nutmeg can also add a lovely aromatic touch.
Side Dishes
Pair this pudding with simple, buttery cookies or a warm slice of pound cake to create a well-rounded dessert experience. If you’re thinking brunch, it’s fabulous alongside warm toast and coffee, or even paired with fruit-forward dishes like baked apples or poached pears to give your palate a lovely contrast.
Creative Ways to Present
Channel your inner artist by layering vanilla pudding with crushed cookies and fruit in parfait glasses. Or serve it as a custard base for a homemade trifle. For a fun twist, spoon pudding into hollowed-out pastry shells to serve as individual dessert cups. Presentation can be as playful or elegant as you want!
Make Ahead and Storage
Storing Leftovers
Vanilla pudding keeps beautifully in an airtight container in the fridge for up to 3 days. Make sure it’s well covered to maintain moisture and avoid absorbing any fridge odors. Before serving leftovers, just give it a good stir to restore that lovely smooth texture.
Freezing
Freezing is a no-go for this Vanilla Pudding from Scratch Recipe since the texture will suffer badly. The starch breaks down, causing the pudding to become watery once thawed. It’s best to enjoy it fresh or within a few days of making for ultimate decadence.
Reheating
If you want to warm it gently, do so on the stove over low heat with constant stirring. Be careful not to overheat or boil it, as that can cause the pudding to curdle. A quick zap in the microwave on low power can work too, but only in short bursts with stirring in between.
FAQs
Can I use milk alternatives for this Vanilla Pudding from Scratch Recipe?
While whole milk is ideal for creaminess and flavor, you can experiment with alternatives like almond or oat milk. Just keep in mind that these may affect the texture and richness, and you might need to tweak the amount of cornstarch for thickening.
Why do I need to temper the eggs with hot milk?
Tempering prevents the eggs from scrambling when they hit the heat. Slowly combining the hot milk with the eggs while mixing gently raises their temperature, ensuring a smooth, creamy custard rather than little cooked bits.
Can I make this pudding vegan or dairy-free?
This classic recipe relies on eggs and whole milk, so making it vegan would require significant substitutions like using cornstarch as the base with plant milk and an egg replacer. The texture and flavor wouldn’t be quite the same, but there are other great vegan pudding recipes out there!
How important is it to scrape the vanilla bean seeds?
The seeds add those beautiful black specks and a concentrated vanilla flavor that really elevates the pudding. If you don’t have a vanilla bean, vanilla extract is a good substitute, but fresh beans make it extra special.
Why is there a film on top when pouring hot milk?
The film is simply coagulated proteins that can form when milk heats rapidly. It’s best not to stir it back in, as it can make lumps in your pudding. Pour slowly and use a strainer to catch any bits for the smoothest result.
Final Thoughts
Making this Vanilla Pudding from Scratch Recipe is like discovering a timeless family secret that you’re now sharing with your kitchen companions. Every spoonful brings that nostalgic warmth, creamy texture, and irresistible vanilla glow that feels both special and comforting. Whether it’s a casual treat or the finishing touch to a dinner party, I promise you’ll want to keep this recipe close—because sometimes, the best desserts are the ones made with a little patience, love, and real ingredients.
Print
Vanilla Pudding from Scratch Recipe
- Prep Time: 5 minutes
- Cook Time: 5 minutes
- Total Time: 10 minutes prep and cook, plus 2-4 hours chilling
- Yield: 6 servings
- Category: Dessert
- Method: Stovetop
- Cuisine: American
- Diet: Vegetarian
Description
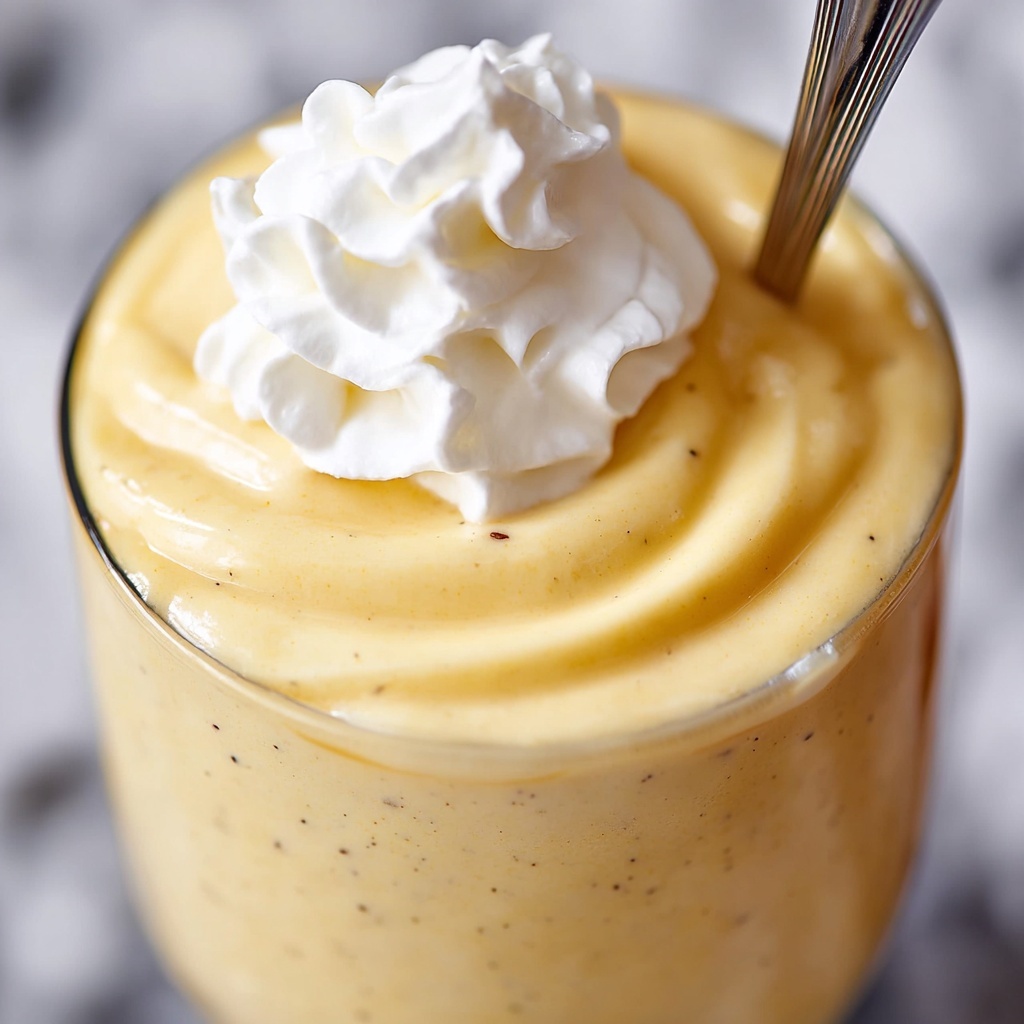
This homemade vanilla pudding recipe from scratch is a rich, creamy, and luscious dessert perfect for any occasion. Made with simple ingredients like egg yolks, sugars, whole milk, and vanilla, it delivers a classic, comforting vanilla flavor with a smooth and fluffy texture enhanced by a touch of butter. The pudding is cooked on the stovetop and chilled for a velvety finish, ready to be enjoyed with whipped cream or your favorite crunchy toppings.
Ingredients
Base Ingredients
- 4 large egg yolks
- 1/2 cup granulated sugar
- 1/2 cup brown sugar, packed (or replace with granulated sugar for a pure vanilla flavor)
- 1/2 teaspoon kosher salt
- 3 tablespoons cornstarch
Milk & Vanilla
- 1 cup whole milk (cold)
- 2 cups whole milk (warm)
- 1 vanilla bean (or 1 tablespoon vanilla extract)
Finishing Touch
- 2 tablespoons butter
Instructions
- Prepare Egg Mixture: Add 4 large egg yolks to a 3-quart saucepan off the heat to use as a mixing bowl. Reserve the egg whites for another use.
- Add Dry Ingredients: Mix in 1/2 cup granulated sugar, 1/2 cup packed brown sugar (or substitute with granulated sugar), 1/2 teaspoon kosher salt, and 3 tablespoons cornstarch to the egg yolks.
- Incorporate Cold Milk: Pour 1 cup of cold whole milk into the saucepan and use a hand mixer on high speed for at least 1 minute until the mixture is completely smooth and well combined.
- Warm Vanilla Milk: In a microwave-safe container, add 2 cups whole milk. If using a vanilla bean, split it lengthwise, scrape the seeds into the milk, and add the pod as well. Microwave for 2-3 minutes until the milk starts to bubble and foam around the edges. Remove immediately and discard the vanilla pod.
- Combine Hot Milk with Egg Mixture: With the hand mixer running on medium, slowly pour the hot milk into the egg mixture, straining it if needed to remove any vanilla pod bits. Do not scrape in any milk film that forms on top.
- Beat and Heat: Continue beating the combined mixture until it becomes foamy, then place the saucepan over medium heat on the stove.
- Cook While Stirring: Using a whisk, stir the mixture constantly, especially the edges and corners, to prevent sticking. Cook for 2-3 minutes until it bubbles, then whisk vigorously for another 15-45 seconds to thicken.
- Final Beat: Remove the pudding from heat and beat it once more with the hand mixer to aerate and make it light and fluffy.
- Add Butter and Vanilla Extract: Stir in 2 tablespoons butter, and if you used vanilla extract instead of a bean, add 1 tablespoon now for enhanced flavor.
- Strain for Smoothness: For an ultra-smooth pudding, strain it through a fine sieve into a clean bowl to remove any lumps or curdled bits.
- Cover to Prevent Skin: Immediately cover the pudding surface with plastic wrap, pressing it directly onto the pudding to eliminate air and prevent a skin from forming.
- Chill: Refrigerate the pudding for at least 2-4 hours to fully set. Optionally, speed up chilling by placing it in the freezer for 30 minutes but be sure to transfer it to the fridge afterward to avoid texture damage.
- Serve: When ready to serve, remove plastic wrap, whisk pudding to smooth it out, and serve cold with whipped cream. Optional toppings include Nilla wafers or crumbled graham crackers.
Notes
- Reserving the egg whites for another recipe helps reduce waste.
- You can substitute the brown sugar with more granulated sugar for a purer vanilla flavor.
- Scraping the seeds from the vanilla bean enhances the natural vanilla flavor and adds visual appeal.
- Constant stirring while cooking prevents lumps and ensures smooth pudding consistency.
- Beating the pudding after cooking adds air for a lighter texture.
- Covering pudding directly with plastic wrap prevents an unpleasant skin layer.
- Freezing pudding ruins its texture by breaking the starch-liquid bonds; always refrigerate after chilling briefly in the freezer.
- Serve with whipped cream or crunchy sides like Nilla wafers for a delightful contrast.


