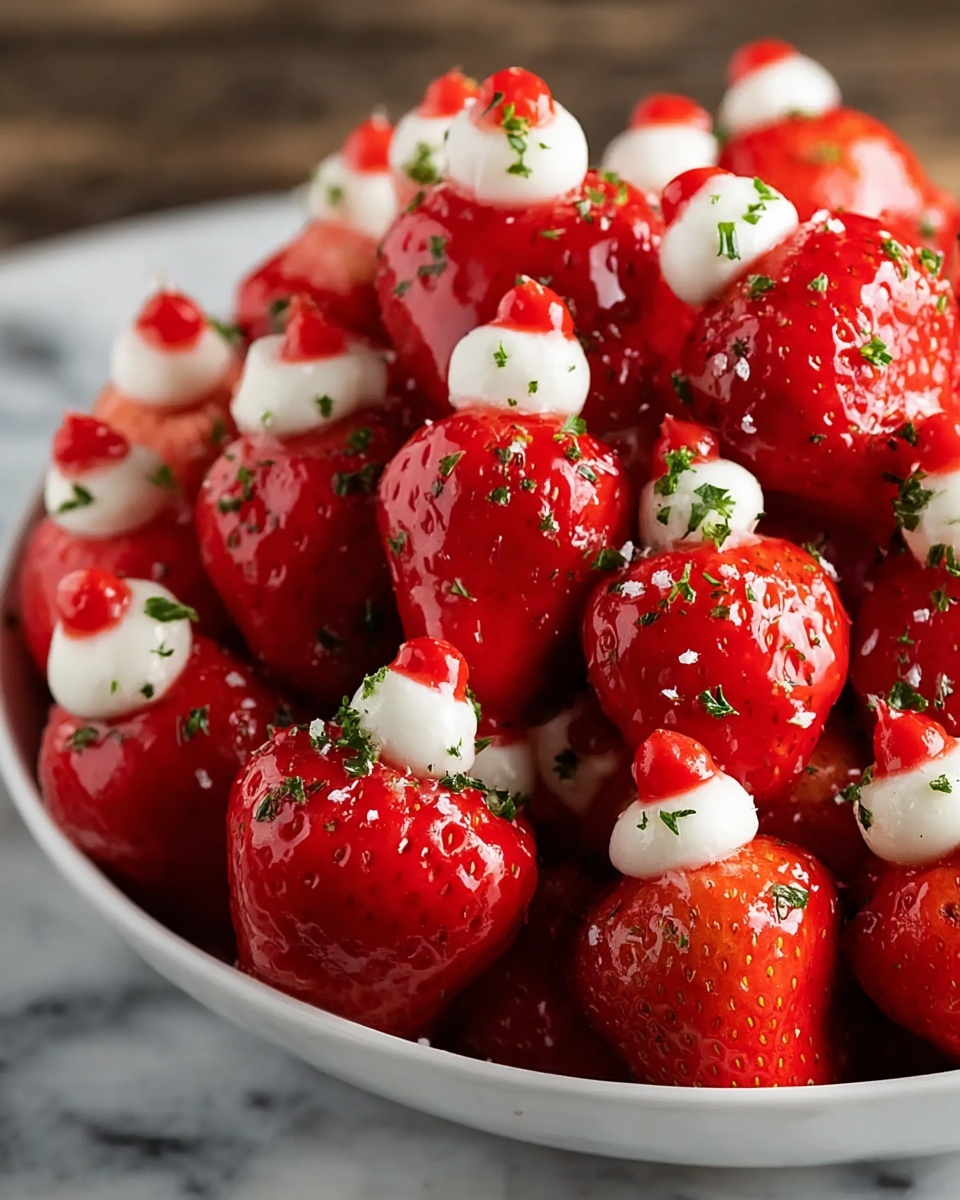
If you’re looking for an adorable, crowd-pleasing treat this holiday season, the Strawberry Santas Recipe is your go-to festive favorite. These little Santa-shaped delights combine fresh strawberries with a creamy, sweet filling and charming details that mimic Santa’s hat and beard, making them as fun to make as they are to eat. With just a handful of simple ingredients and a bit of creativity, you can bring a bit of cheerful whimsy to any holiday party or family gathering. Get ready to impress your guests with a dessert that’s as delightful in looks as it is in taste!

Ingredients You’ll Need
This recipe calls for a few basic but essential ingredients, each playing a special role in bringing the Strawberry Santas to life. The freshness of the strawberries, the richness of the cream cheese filling, and the decorative touches all come together to create a perfect balance of flavor, texture, and festive color.
- 8-ounce package cream cheese, softened: The creamy base for Santa’s fluffy beard and body, softened to blend easily.
- 1 1/4 cups powdered sugar: Adds sweetness and smooth texture to the cream cheese mixture.
- 20 large strawberries: Fresh, ripe, and sturdy, these form the Santa bodies and hats.
- 1.3-ounce tube black decorating icing: Used to create Santa’s cute little eyes with precision.
- 20 round red sprinkles or 1 (.67-ounce) tube orange/red decorating icing: Perfect for Santa’s nose and adding a pop of holiday color.
How to Make Strawberry Santas Recipe
Step 1: Prepare the Cream Cheese Filling
Begin by beating the softened cream cheese in a mixing bowl until it’s light and fluffy. Slowly add in the powdered sugar, lowering the mixer speed to avoid a powdered sugar mess, and keep mixing until the filling is silky smooth and well combined. This creamy mixture will give your Strawberry Santas that luscious and sweet “beard” texture they need.
Step 2: Shape the Strawberries
Trim the stems off each strawberry carefully to create a flat bottom, turning the berry into a cone shape—this is Santa’s body. Next, slice off the tip of each strawberry about three-quarters of the way up. These smaller pieces will become Santa’s iconic hat. Set these smaller cones aside for the next step.
Step 3: Pipe the Cream Cheese “Santa Body”
Fill a piping bag fitted with a medium or large round tip, such as a Wilton 2A, with the cream cheese filling. On the larger base of each strawberry, pipe a generous swirl of the filling to mimic Santa’s fluffy beard and body. Make sure to create two layers for that full, voluminous Santa look—this is what makes them so irresistibly cute and tasty.
Step 4: Add the Facial Details
Using the black decorating icing, carefully dot two eyes right in the center of the cream cheese swirl. For Santa’s nose, place one red sprinkle or use the red/orange decorating icing to pipe a small round nose just below the eyes. These little facial touches bring your Strawberry Santas to life and add heartwarming personality.
Step 5: Top with the Santa Hat
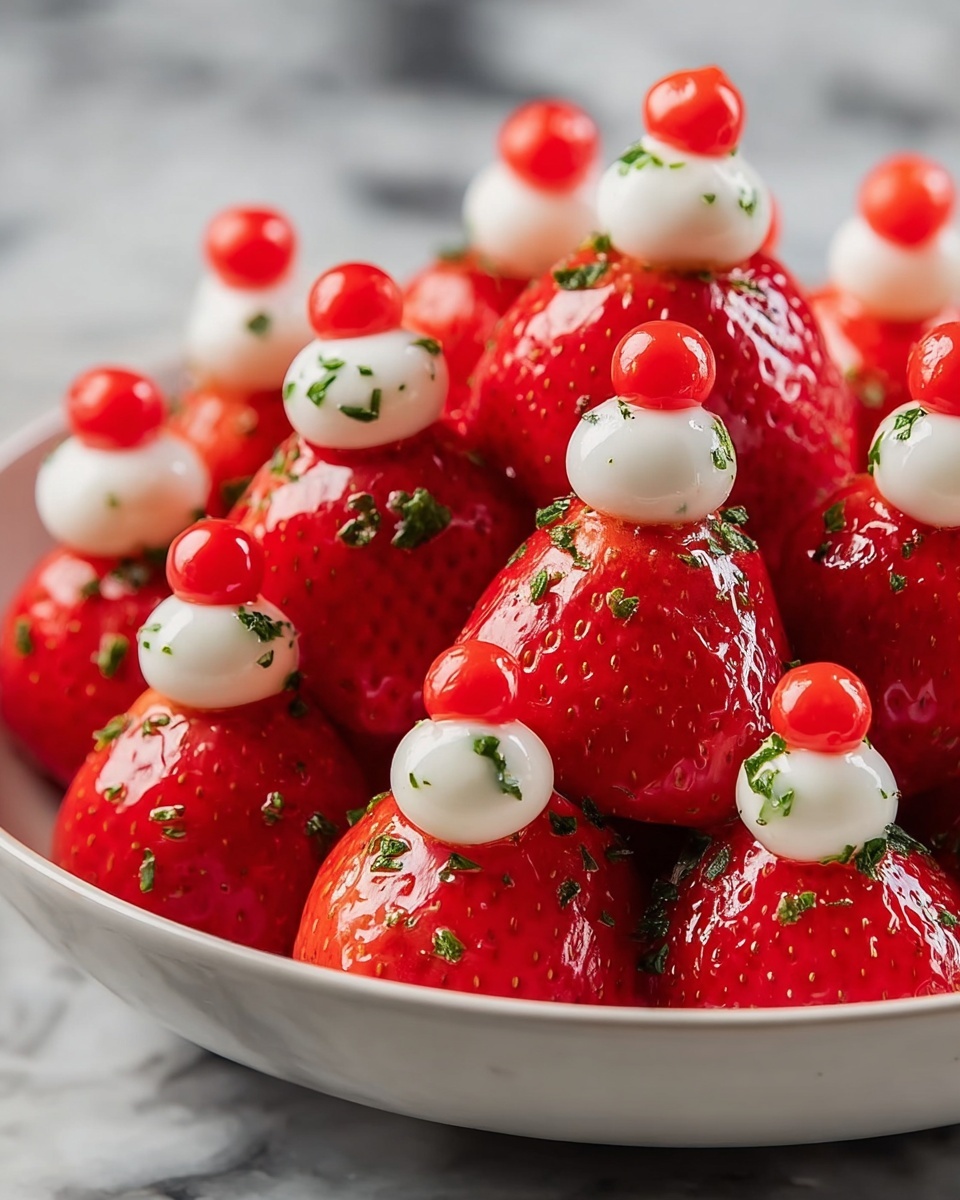
Place the smaller strawberry cone (the hat) on top of the cream cheese “body.” Then, pipe a tiny dot of cream cheese at the tip of the hat to create the classic fluffy pom-pom. This finishing detail seals the festive look perfectly and makes these treats look professionally crafted.
Step 6: Chill and Store
Serve your Strawberry Santas immediately for the freshest taste and best presentation. If you need to prepare them ahead of time, store them carefully in the refrigerator for up to 2 to 3 days. Make sure to keep them in a container with enough space so the decorations don’t get squished or ruined.
How to Serve Strawberry Santas Recipe
Garnishes
For an extra festive touch, sprinkle a little powdered sugar around the serving platter to mimic snow, or add fresh mint leaves to brighten the display. A scattering of tiny edible silver balls or crushed peppermint candy on the side can elevate the dessert into a holiday centerpiece worthy of any party.
Side Dishes
Strawberry Santas pair wonderfully with light treats like mini vanilla cupcakes, chocolate-dipped pretzels, or peppermint bark. These sides complement the creamy and fruity flavors while adding variety to your holiday dessert spread.
Creative Ways to Present
Try serving your Strawberry Santas atop individual mini cupcake liners to keep them neat and portable. Another fun idea is to place them on skewers along with marshmallows and other fruit to create a festive dessert kabob. For parties, arrange them on a platter decorated with holly leaves or cinnamon sticks for a rustic, charming look.
Make Ahead and Storage
Storing Leftovers
If you have any Strawberry Santas leftover, store them in an airtight container in the refrigerator. Make sure to place a piece of parchment paper between layers if stacking is necessary to protect the delicate decorations. They’ll stay fresh and tasty for up to three days.
Freezing
Freezing is not recommended for Strawberry Santas because the texture of fresh strawberries and cream cheese filling can be compromised upon thawing. The berries may become watery, and the cream cheese could separate or lose its fluffy consistency.
Reheating
Since these little treats are best enjoyed chilled, reheating is not advised. Serve them straight from the refrigerator for the best visual appeal and delicious creaminess.
FAQs
Can I use frozen strawberries for the Strawberry Santas Recipe?
It’s best to use fresh, firm strawberries because frozen ones tend to be too watery and soft, which makes shaping difficult and affects the overall texture of the dessert.
What if I don’t have a piping bag?
You can use a resealable plastic bag with a tiny corner snipped off to pipe the cream cheese mixture. It works just as well for creating those charming fluffy swirls on the berries.
Can I make these vegan or dairy-free?
Absolutely! Substitute the cream cheese with a vegan or dairy-free cream cheese alternative and ensure your decorating icings and sprinkles are also vegan-friendly. The strawberries bring all the natural freshness you need!
How far ahead can I make Strawberry Santas Recipe before serving?
You can prepare these up to two days in advance. Just keep them refrigerated in a container with enough space so they don’t get squished, and add the final decorative touches if desired right before serving.
What other fruit can I use if I don’t like strawberries?
Strawberries are ideal because of their shape and color, but you could experiment with firm cherry tomatoes for savory versions or small pears sliced similarly for a creative twist. Just keep in mind the flavor profile will change.
Final Thoughts
I truly hope you give the Strawberry Santas Recipe a try this holiday season! They are charming, easy to make, and bring a festive spirit to your table that everyone will adore. Whether you’re making memories with family or impressing guests at a party, these sweet little Santas are guaranteed to spread holiday cheer bite by bite. Happy decorating and happy eating!
Print
Strawberry Santas Recipe
- Prep Time: 30 minutes
- Cook Time: 0 minutes
- Total Time: 30 minutes
- Yield: 20 Strawberry Santas
- Category: Dessert
- Method: No-Cook
- Cuisine: American
- Diet: Vegetarian
Description
Delightfully festive and easy-to-make Strawberry Santas featuring fresh strawberries filled with creamy sweetened cream cheese and decorated with black and red icing to create adorable Santa faces. Perfect for holiday parties or a fun family treat.
Ingredients
Cream Cheese Filling
- 8-ounce package cream cheese, softened
- 1 1/4 cups powdered sugar
Strawberries & Decorations
- 20 large strawberries
- 1.3-ounce tube black decorating icing
- 20 round red sprinkles or 1 (.67-ounce) tube orange/red decorating icing
Instructions
- Prepare the cream cheese filling: In a mixing bowl, beat the softened cream cheese with a mixer until light and fluffy. Gradually add the powdered sugar and continue to beat on low speed until the mixture is smooth and fully combined.
- Prepare the strawberries: Cut the stems off each strawberry to create a flat base and shape the strawberry into a cone. Then, slice each strawberry about 3/4 of the way up from the bottom to separate the smaller cone portion which will be used as Santa’s hat. Set the smaller cones aside.
- Fill the strawberry body: Transfer the cream cheese mixture into a piping bag fitted with a medium or large round tip (such as Wilton 2A). Pipe two generous swirls of the cream cheese filling onto the larger bottom portion of each strawberry to form Santa’s body.
- Add Santa’s face details: Use the black decorating icing to pipe two small dots for Santa’s eyes directly onto the cream cheese swirls. For the nose, place a red sprinkle or pipe a small dot using the red/orange decorating icing.
- Assemble Santa hats and finishing touches: Place the previously cut smaller strawberry cone on top of the cream cheese swirl as Santa’s hat. Pipe a small dot of cream cheese onto the tip of the hat to represent the pom-pom.
- Serving and storage: Serve the Strawberry Santas immediately for the freshest taste or store them gently in the refrigerator for up to 2-3 days. Ensure they are covered or placed in a container with enough space to prevent damage to the delicate decorations.
Notes
- Make sure the cream cheese is fully softened to achieve a smooth filling.
- Use fresh, firm strawberries for best results to maintain the shape.
- If you don’t have decorating icing tubes, substitute with small piping bags or toothpicks for detailing.
- These treats are best enjoyed the same day but can be refrigerated for a couple of days.
- Handle decorated strawberries carefully to avoid smudging the icing.
- Perfect for holiday parties, kids’ snacks, or as a cute dessert option.

