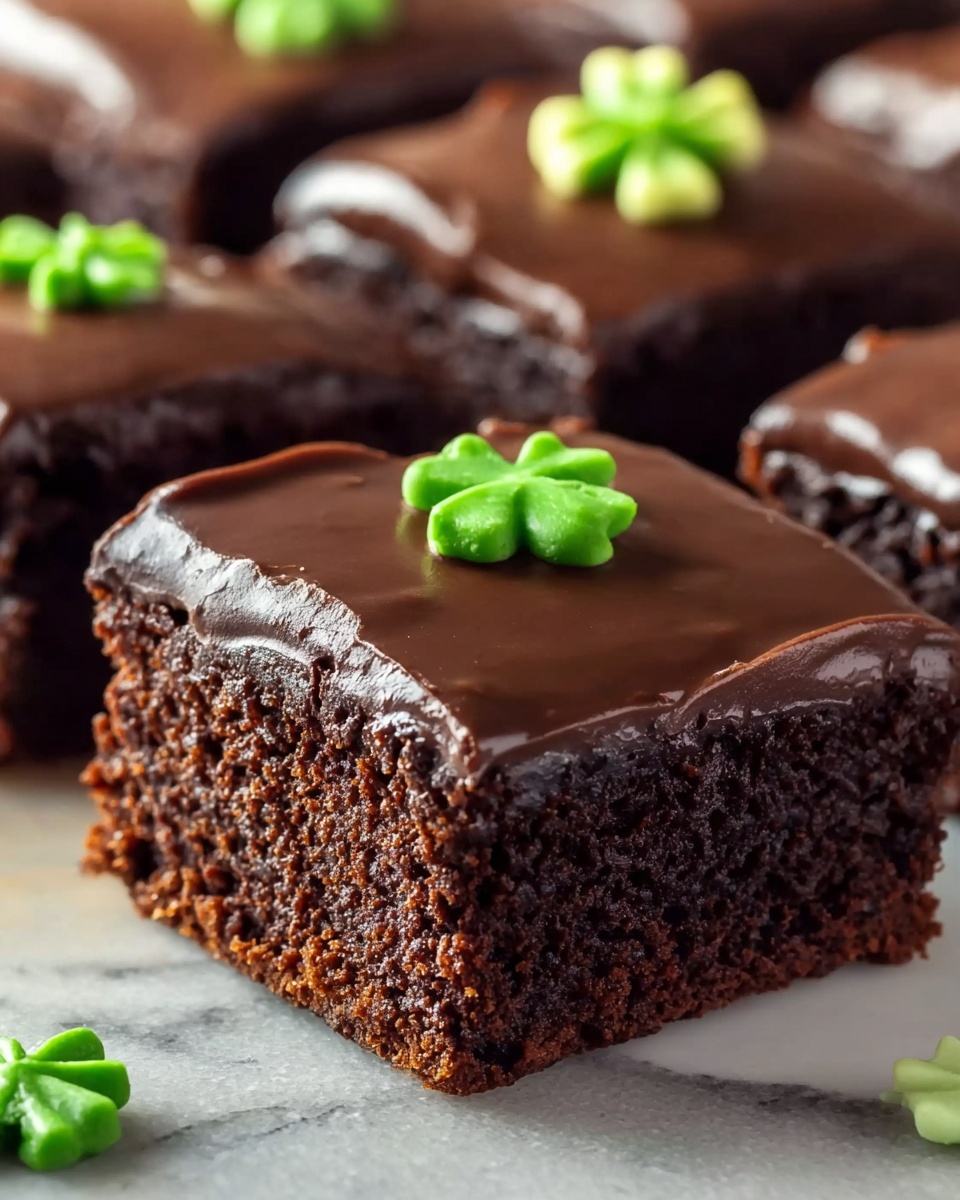
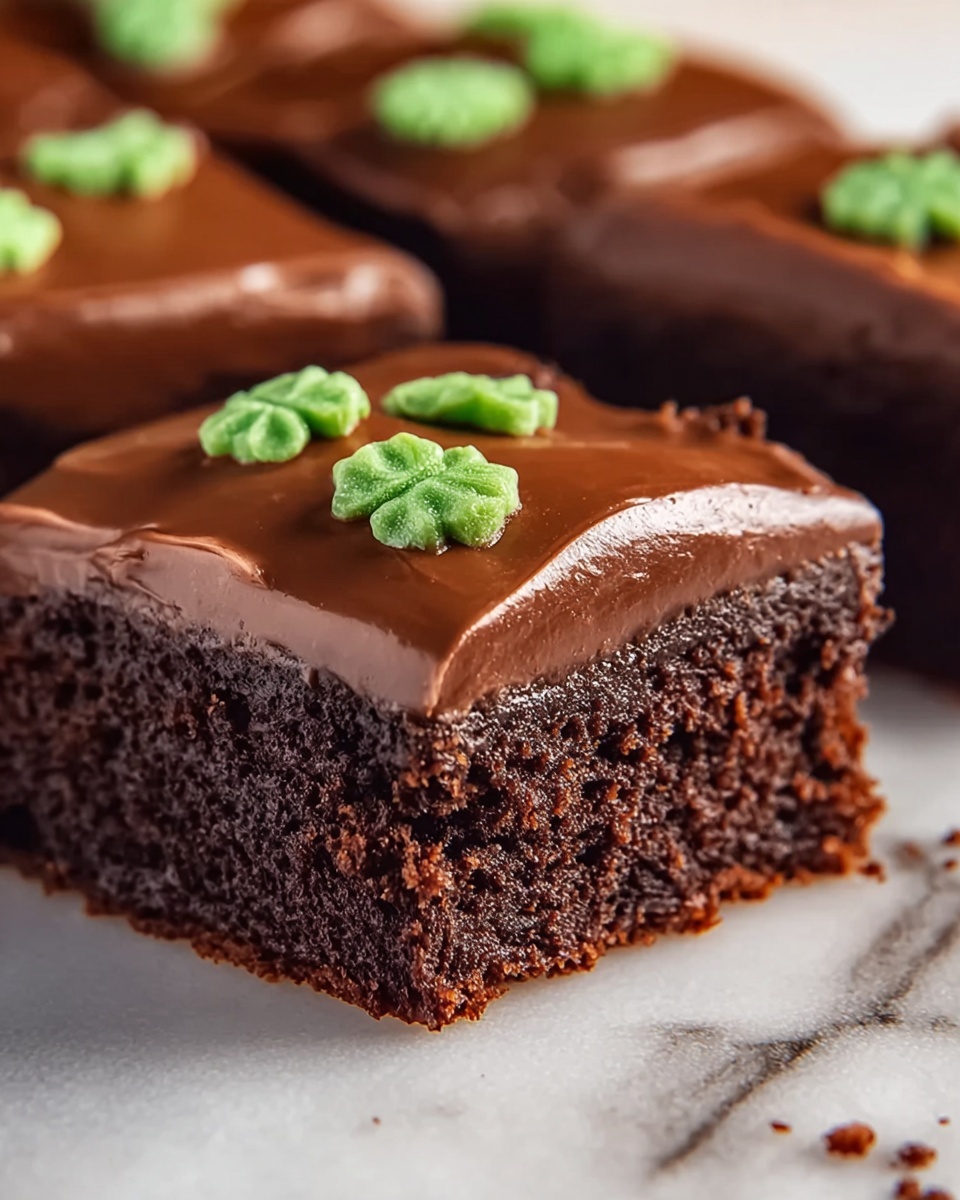
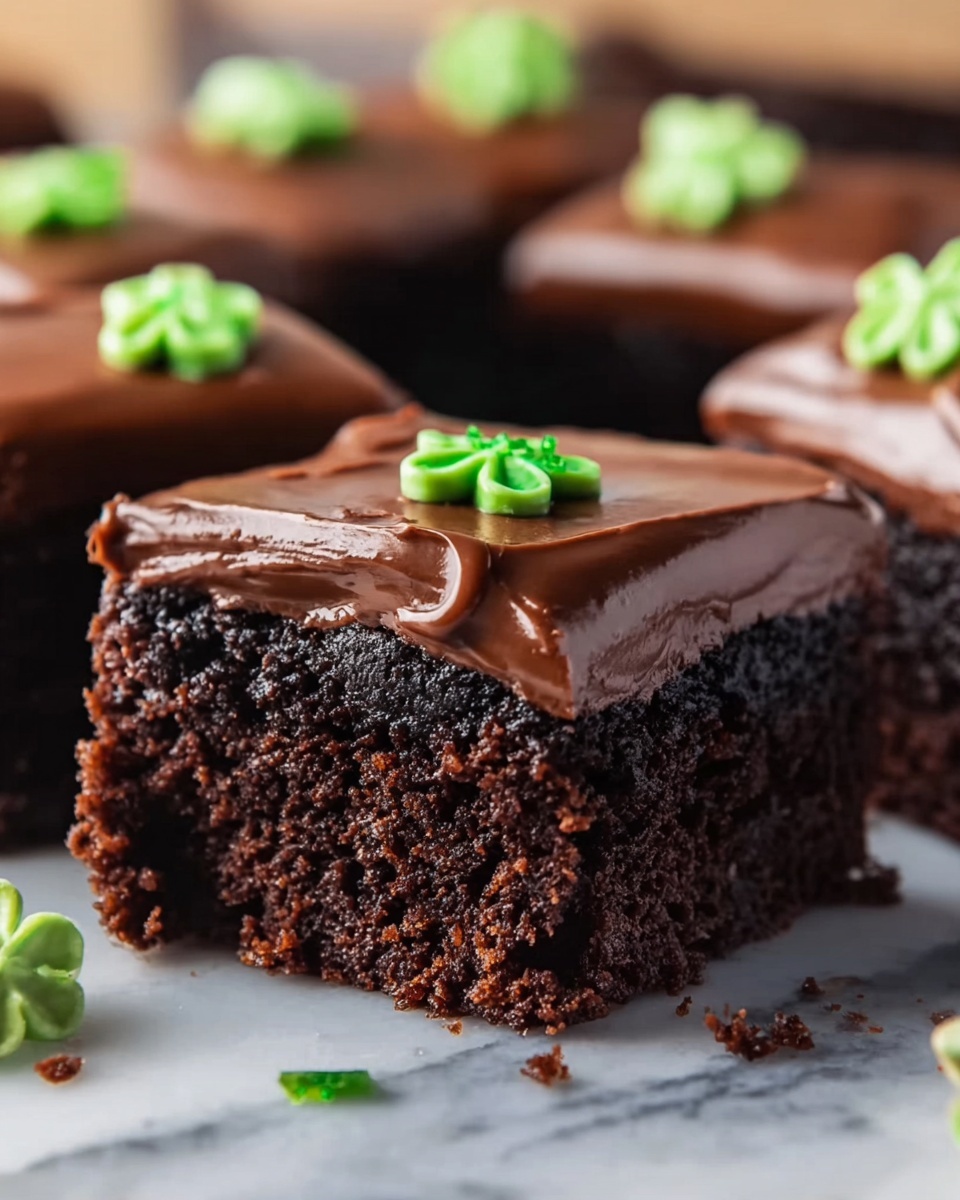
If you are searching for the perfect festive treat to brighten up your Green Day celebration, look no further than this delightful St. Patrick’s Day Frosted Bite Brownies Recipe. These little gems pack all the rich, fudgy goodness of a classic brownie into perfectly sized bites topped with a luscious, vibrant green frosting that brings a joyful pop of color and flavor. Their adorable size makes them ideal for sharing, snacking, or adding a whimsical touch to your holiday dessert table. Get ready to impress friends and family alike with a dessert that’s both simple to make and impossible to resist.
Ingredients You’ll Need
Each ingredient in this recipe plays a key role in creating the perfect balance of fudgy texture, creamy frosting, and festive flair. Everything is wonderfully straightforward, making it easy to gather what you need for these crowd-pleasing brownie bites.
- 1 box (18–20 oz) brownie mix: The base that brings rich chocolate flavor with convenience and consistency.
- Eggs, oil, and water: Used as directed on the brownie mix box to create the perfect batter.
- ½ cup unsalted butter, softened: Adds creaminess and structure to the frosting.
- 2 cups powdered sugar: Sweetens and thickens the frosting into a smooth, fluffy delight.
- 2 tablespoons milk: Helps achieve the perfect frosting consistency.
- ½ teaspoon vanilla extract: Infuses the frosting with a warm, aromatic depth.
- Green food coloring: Brings that iconic St. Patrick’s Day green, making the bites festive and fun.
- Green sprinkles or shamrock confetti: Adds texture and festive visual appeal on top.
- Mini gold chocolate coins or decorations (optional): A playful nod to the holiday’s luck and treasure themes.
How to Make St. Patrick’s Day Frosted Bite Brownies Recipe
Step 1: Prepare the Brownie Bites
Start by preheating your oven to 350°F and greasing a mini muffin pan to ensure your brownie bites come out easily. Next, mix the brownie batter according to the instructions on your box — this step is foolproof and sets the stage for the fudgy richness you’re aiming for. Fill each mini muffin cup about three-quarters full with batter for perfectly portioned bites that bake evenly.
Step 2: Bake the Brownies
Bake for 12 to 15 minutes, but beware of overbaking! You want a toothpick inserted into the center to come out with moist crumbs rather than clean — that guarantees a fudge-like texture. Once baked, let the brownie bites cool in the pan for five minutes so they firm up slightly before carefully transferring them to a wire rack to cool completely. This cooling step is crucial for frosting success.
Step 3: Make the Frosting
Now, let’s craft that dreamy green frosting. In a medium bowl, beat the softened butter with powdered sugar, milk, and vanilla extract until the mixture is smooth and fluffy, about 3 to 5 minutes. This luscious frosting will be the crown jewel atop your brownies. Gradually add the green food coloring, mixing well until you reach the vibrant shade that screams St. Patrick’s Day fun.
Step 4: Frost and Decorate
Use a piping bag fitted with a star tip for an elegant bakery-style swirl, or simply spread the frosting generously with a knife or spatula if you’re going for rustic charm. Finish each bite with green sprinkles, shamrock confetti, or those cute mini gold chocolate coins for a festive burst of color and texture. For best presentation, chill the brownies just slightly to set the frosting before serving.
How to Serve St. Patrick’s Day Frosted Bite Brownies Recipe
Garnishes
Creative garnishing lifts the St. Patrick’s Day Frosted Bite Brownies Recipe from delightful to spectacular. Adding edible glitter or tiny shamrock-shaped candies enhances the holiday spirit and makes each bite irresistible. You can even dust a bit of powdered sugar for a lightly frosted look that contrasts beautifully with the green.
Side Dishes
Pair these rich brownie bites with fresh fruit, like sliced strawberries or a citrusy fruit salad, to balance the sweetness and add freshness. A simple scoop of vanilla ice cream also complements the fudgy texture perfectly, creating a dessert duo that guests will rave about.
Creative Ways to Present
For a fun St. Patrick’s Day party centerpiece, arrange your frosted brownie bites on a decorative platter with green ribbons or place them inside mini cupcake liners in alternating festive colors. Gift these bites in a festive box tied with a green bow for a charming homemade gift that will spread smiles and luck.
Make Ahead and Storage
Storing Leftovers
These St. Patrick’s Day Frosted Bite Brownies Recipe treats store wonderfully in an airtight container at room temperature for up to 3 days. Keeping them covered ensures the frosting stays moist and the brownies remain soft and enticing.
Freezing
If you want to extend their shelf life, you can freeze the unfrosted brownie bites in a single layer before frosting. Once frozen solid, transfer them to a freezer bag for up to 2 months. Thaw completely at room temperature before frosting to preserve the best texture and flavor.
Reheating
To gently warm leftover brownie bites, microwave them for about 10 seconds to soften without melting the frosting. This brief heat-up bursts the fudgy magic back into every bite, making them taste freshly baked and just as indulgent.
FAQs
Can I use homemade brownie batter instead of a box mix?
Absolutely! Feel free to use your favorite homemade brownie recipe; just adjust the baking time based on your batter’s thickness and moisture. The St. Patrick’s Day Frosted Bite Brownies Recipe is versatile and welcomes homemade touches.
What if I want to make these gluten-free?
You can substitute with a gluten-free brownie mix or homemade gluten-free batter. Just ensure all other ingredients, like sprinkles and decorations, are also gluten-free to keep the treat safe and enjoyable.
Can the frosting be made dairy-free?
Yes, swap the unsalted butter for a dairy-free spread and use your favorite plant-based milk. The texture might be slightly different but still creamy and delicious enough to achieve that festive green frosting magic.
Is it necessary to chill the brownies after frosting?
Chilling helps set the frosting so it holds its shape and looks neat, especially if piping. However, if you’re eager to indulge right away, serving them immediately is fine — just be gentle to avoid smudging the frosting.
How far in advance can I prepare these brownies?
You can bake and frost these brownies up to one day ahead. Store them in an airtight container in the refrigerator to keep them fresh, and let them come to room temperature before serving for the best flavor and texture.
Final Thoughts
There’s just something magical about the St. Patrick’s Day Frosted Bite Brownies Recipe that brings joy to any celebration — small in size but big on flavor and charm. Whether you’re baking for kids, party guests, or simply to treat yourself, these frosted bites combine ease, festivity, and pure deliciousness in every mouthful. I wholeheartedly encourage you to try this recipe and watch it become a beloved new holiday favorite.
Print
St. Patrick’s Day Frosted Bite Brownies Recipe
- Prep Time: 15 minutes
- Cook Time: 15 minutes
- Total Time: 30 minutes
- Yield: 24 brownie bites
- Category: Dessert
- Method: Baking
- Cuisine: American
- Diet: Vegetarian
Description
Celebrate St. Patrick’s Day with these delightful Frosted Bite Brownies, featuring mini brownie bites topped with creamy green frosting and festive decorations. Perfect for parties or a sweet treat, these bite-sized desserts combine rich, moist brownie flavor with a fluffy, colorful frosting for an irresistible holiday indulgence.
Ingredients
Brownie Bites
- 1 box (18–20 oz) brownie mix (plus eggs, oil, and water as directed on package)
- Butter or non-stick spray for greasing pan
Frosting
- ½ cup unsalted butter, softened
- 2 cups powdered sugar
- 2 tablespoons milk
- ½ teaspoon vanilla extract
- Green food coloring, to desired shade
Decoration
- Green sprinkles or shamrock confetti
- Mini gold chocolate coins or festive decorations (optional)
Instructions
- Preheat and Prepare Pan: Preheat your oven to 350°F (175°C). Grease a mini muffin pan thoroughly with butter or non-stick spray to prevent sticking.
- Make Brownie Batter: Prepare the brownie batter according to the package directions. This usually involves mixing the brownie mix with eggs, oil, and water as instructed, until smooth.
- Fill Mini Muffin Cups: Spoon the brownie batter into the mini muffin pan cups, filling each about three-quarters full to allow room for rising.
- Bake Brownie Bites: Bake in the preheated oven for 12–15 minutes, or until a toothpick inserted into the center comes out with moist crumbs but no raw batter.
- Cool Brownie Bites: Let the brownie bites cool in the pan for 5 minutes, then carefully remove them and place on a wire rack to cool completely before frosting.
- Prepare Frosting: In a medium bowl, beat the softened butter, powdered sugar, milk, and vanilla extract with a mixer or whisk until smooth and fluffy. Add green food coloring gradually until reaching your desired shade.
- Frost the Brownie Bites: Using a piping bag fitted with a star tip or a spoon, apply the green frosting onto the cooled brownie bites evenly.
- Decorate: Sprinkle with green sprinkles or shamrock confetti, and optionally add mini gold chocolate coins or other festive decorations on top.
- Chill and Serve: Chill the frosted brownie bites slightly if needed to set the frosting before serving.
Notes
- Use a piping bag with a star tip for a bakery-style look.
- These brownie bites can be made a day ahead and stored in an airtight container to maintain freshness.
- Swap frosting colors and sprinkles to customize for other holidays or parties.
- If frosting is too thick, add a little more milk; if too thin, add more powdered sugar.

