If you have ever dreamed of baking bread with that irresistible tang and airy crumb, then diving into the world of homemade sourdough is a game-changer. The Sourdough Starter Recipe: How to Make a Live Fermented Starter from Whole Grain Flours Recipe is your perfect introduction to creating a natural, living culture that will breathe life into your bread baking adventures. This starter harnesses the power of wild yeast and beneficial bacteria from whole grain flours, resulting in a robust, flavorful base. It’s surprisingly simple, wildly rewarding, and will forever change how you think about bread at home.
Ingredients You’ll Need
Creating your sourdough starter is wonderfully straightforward, relying on just a few humble ingredients. Each one plays a vital role in fostering the wild yeast and bacteria that will work their magic in your starter.
- Whole Grain Rye or Whole Wheat Flour: Packed with natural enzymes and nutrients, this flour jumpstarts fermentation and gives your starter complex flavors.
- All-Purpose Flour: Used to feed and maintain the starter, it provides a reliable source of carbohydrates for the yeast and bacteria to consume.
- Filtered or Spring Water: Using clean, chlorinated-free water ensures your microbes thrive without interference.
How to Make Sourdough Starter Recipe: How to Make a Live Fermented Starter from Whole Grain Flours Recipe
Step 1: Mix Your Initial Flour and Water
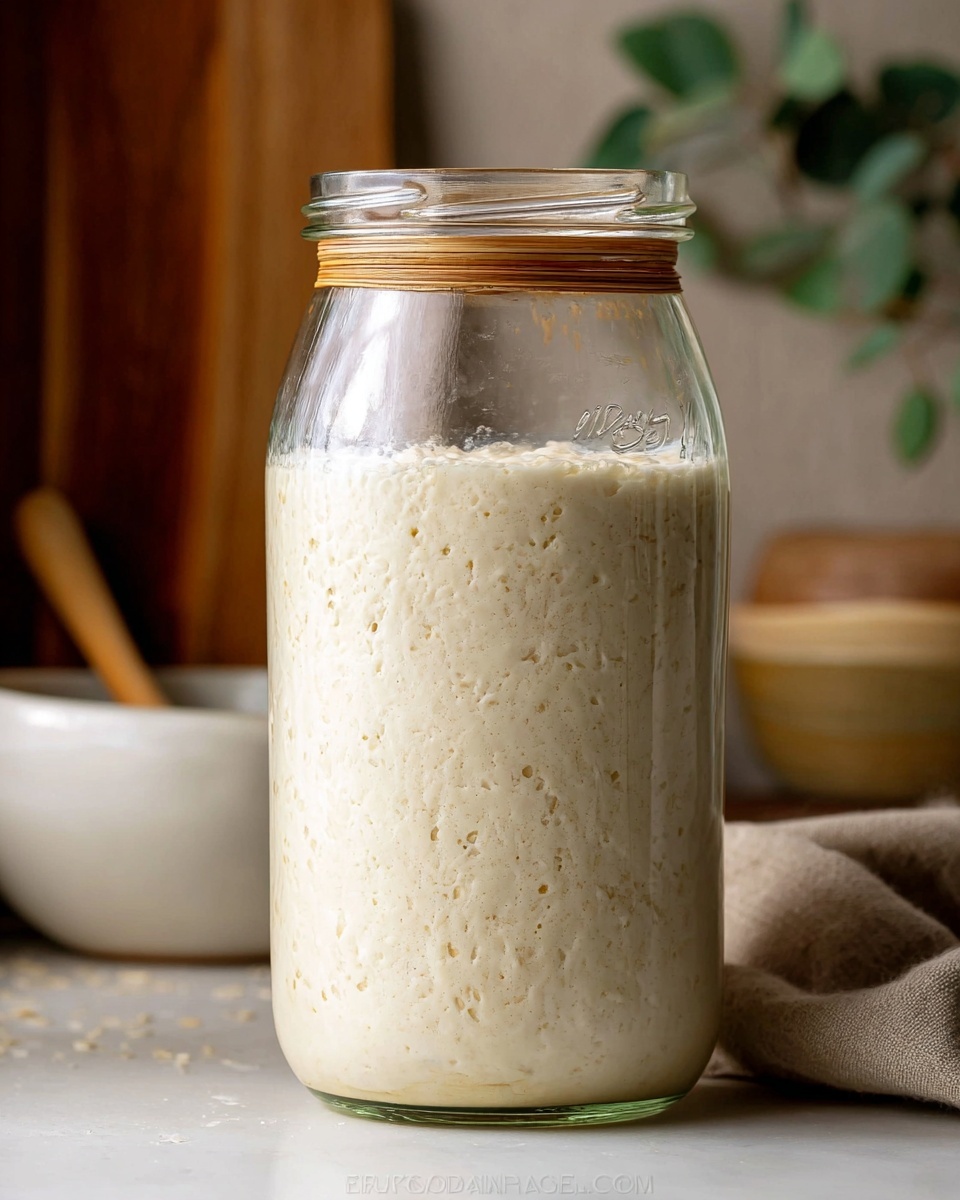
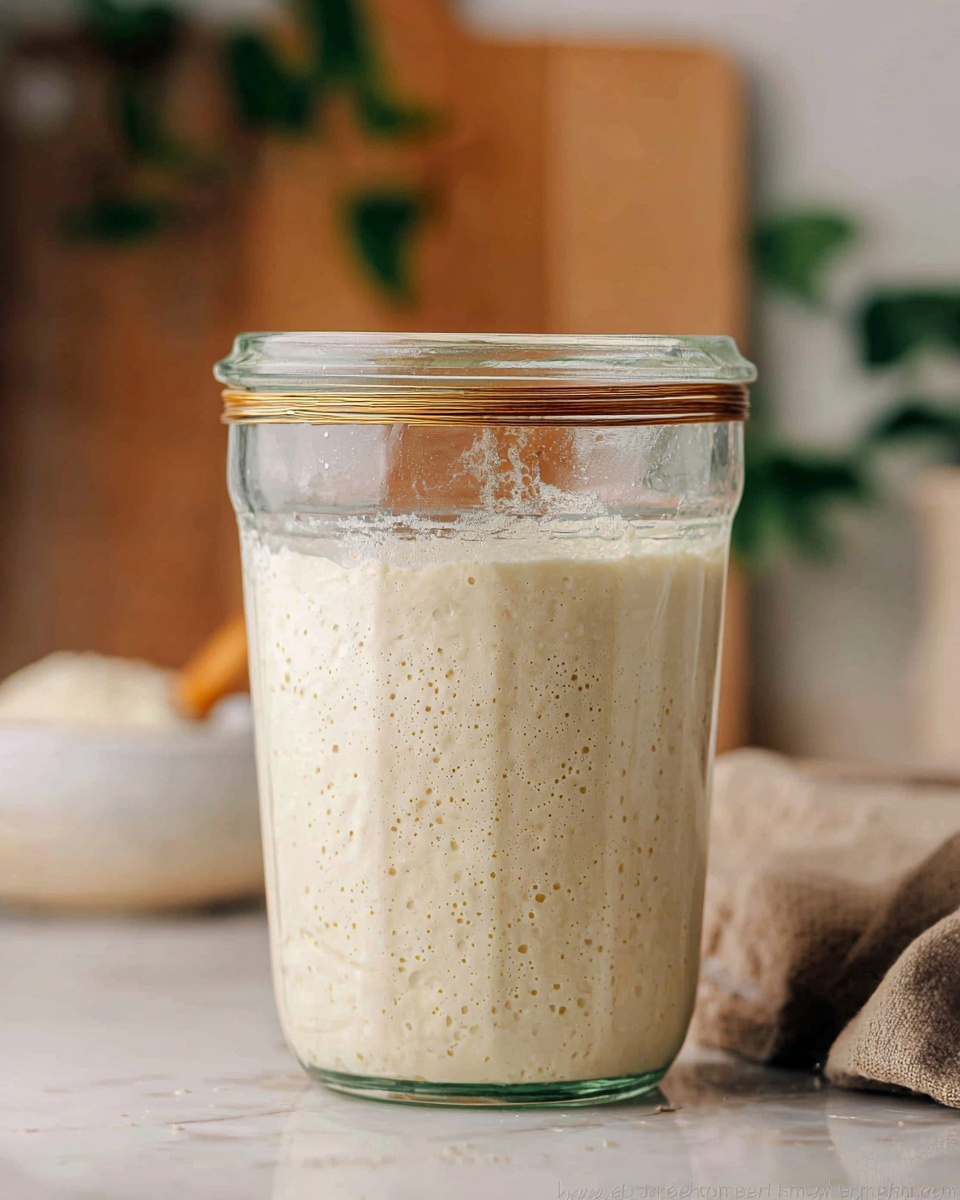
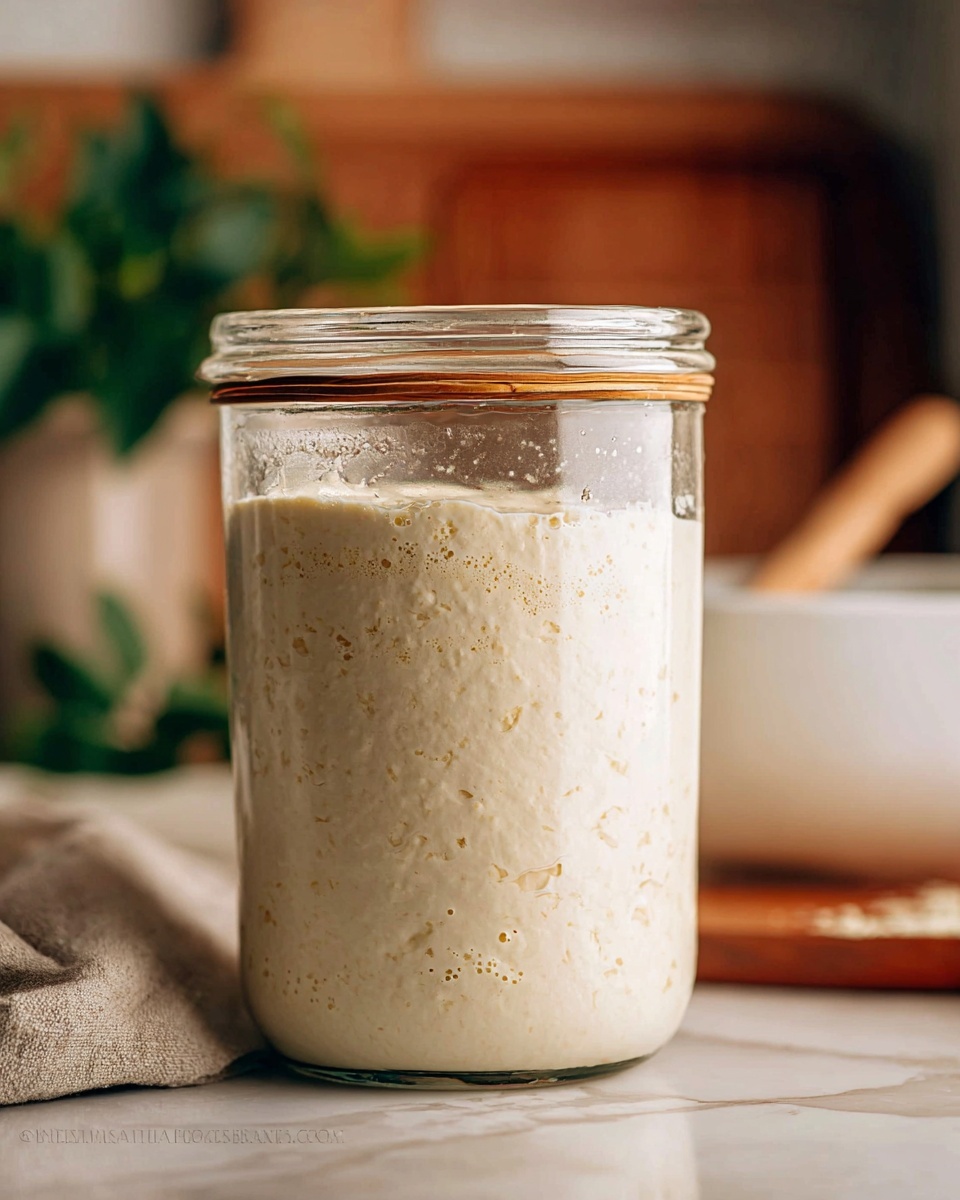
Start by combining 100 grams of whole grain rye or whole wheat flour with 100 grams of filtered water. Stir until you get a thick but smooth batter-like consistency. This is your starter’s initial feeding and the foundation for your wild yeast culture to begin flourishing.
Step 2: Let It Rest and Ferment
Cover your mixture loosely to allow airflow, then leave it at room temperature, ideally around 70°F (21°C), for 24 hours. You might start to see bubbles forming, which is a promising sign of fermentation, but it’s perfectly normal if nothing shows up yet.
Step 3: Feed Your Starter
After the first 24 hours, discard about half of your starter. Then add 50 grams of whole grain flour, 50 grams of all-purpose flour, and 100 grams of water. Stir thoroughly to combine and cover again. This feeding repeats daily to build strength and activity in your starter.
Step 4: Repeat Feedings for About a Week
Continue the daily routine of discarding and feeding at roughly the same time each day. By days five to seven, your starter should exhibit plenty of bubbles, a pleasant sour smell, and have doubled in volume within a few hours of feeding — signs it’s ready for baking.
Step 5: Maintain Your Starter
Once bubbly and active, you can maintain your starter by feeding it once a week if refrigerated or daily if kept at room temperature. This ongoing care keeps your live fermented culture vibrant and ready for your bread projects.
How to Serve Sourdough Starter Recipe: How to Make a Live Fermented Starter from Whole Grain Flours Recipe
Garnishes
While sourdough starter itself isn’t served directly, it acts as the heart of countless delicious breads. Once your starter is bubbly and lively, you’ll delight in seeing how it imparts a chewy crust and tangy notes to your loaves, which pair beautifully with herbs, seeds, or even a sprinkle of sea salt on freshly baked bread.
Side Dishes
Bread made from your sourdough starter makes a wonderful companion to soups, salads, or creamy cheeses. The natural tang of sourdough elevates simple meals, adding depth that can turn everyday dishes into memorable feasts.
Creative Ways to Present
For a fun twist, consider shaping your sourdough bread into braids, rolls, or rustic boule shapes. You can also incorporate mix-ins like olives, nuts, or dried fruit to showcase the versatility of your live fermented starter and impress guests at your table.
Make Ahead and Storage
Storing Leftovers
If you have leftover starter, you can store it in the refrigerator, tightly covered. Feeding it once a week will keep it alive and bubbling, ready for your next baking day. Always bring it back to room temperature and feed it a couple of times before baking to revitalize the culture.
Freezing
Freezing your starter isn’t typically recommended because freezing can put your microbes to sleep or harm them. If you do choose to freeze, make sure to feed it and let it peak before placing in an airtight container, then allow plenty of time and repeated feedings to reactivate it when thawed.
Reheating
Your sourdough starter doesn’t really require reheating, but if it’s been refrigerated or cooled down, bringing it back to room temperature before feeding will give the best results. Warm water during feeding encourages the yeast to wake up and multiply faster.
FAQs
Can I use regular tap water to make the starter?
While tap water usually works, some chlorinated waters can inhibit the growth of the natural yeast and bacteria in your starter. Using filtered or spring water gives your starter the best chance to thrive.
How long does it take to get a fully active sourdough starter?
Typically, a strong, bubbly starter takes about 5 to 7 days with regular feedings. Patience is key — your starter will tell you when it’s ready by doubling in size and showing plenty of bubbles.
Can I use only whole grain flour for feeding my starter?
Whole grain flours are excellent for starting your culture but can be quite dense. Including some all-purpose flour in feedings helps balance the starter’s activity and keeps it manageable and consistent.
What does it mean if my starter develops a pink or orange tint?
If your starter shows any pink or orange hues, this usually signals unwanted bacterial growth. It’s best to discard that batch and start fresh. Always keep your starter in a clean container and feed regularly.
Do I need any special equipment to make this starter?
You really just need a clean jar or container, a spoon or spatula, flour, water, and patience. No fancy gadgets necessary. The beauty of this recipe is its simplicity and accessibility.
Final Thoughts
Embarking on the journey of the Sourdough Starter Recipe: How to Make a Live Fermented Starter from Whole Grain Flours Recipe is like making a lifelong friend in your kitchen. This living culture brings such joy and creativity, transforming everyday flour and water into something magical. Don’t hesitate to try it yourself — your homemade sourdough adventures are waiting to begin, and the satisfaction of baking bread with your own starter is truly unmatched.
Print
Sourdough Starter Recipe: How to Make a Live Fermented Starter from Whole Grain Flours Recipe
- Prep Time: 5 minutes
- Cook Time: 0 minutes
- Total Time: 7 days (active starch fermentation timeframe)
- Yield: Approximately 700 g of active starter
- Category: Starter Preparation
- Method: No-Cook
- Cuisine: International
- Diet: Vegan
Description
This Sourdough Starter Recipe guides you through the simple, natural process of cultivating a live sourdough starter using whole grain rye or wheat flour and all-purpose flour. Perfect for baking artisanal sourdough bread at home, this starter develops rich natural yeast and bacteria over 7 days, ensuring a robust and tangy flavor in your bread. The recipe emphasizes organic ingredients and filtered water to promote a healthy fermentation process.
Ingredients
Initial Starter
- 100 g Whole Grain Rye Flour or Whole Wheat Flour (preferably organic; about 3/4 cup)
- 100 g Filtered or Spring Water (room temperature)
Feeding Ingredients
- 500 g All-purpose Flour (preferably organic, unbleached)
- 500 g Filtered or Spring Water (room temperature)
Instructions
- Mixing the Starter: In a clean container, combine 100 g of whole grain rye or wheat flour with 100 g of filtered water at room temperature. Stir well until there are no dry patches, and a thick, porridge-like consistency forms. Cover loosely and leave at room temperature (around 70-75°F) to allow natural fermentation to begin.
- Daily Feeding: For the next 7 days, discard half of the starter mixture. Feed the remaining starter with 250 g of all-purpose flour and 250 g of filtered water (both at room temperature). Stir thoroughly, cover loosely, and let sit at room temperature.
- Observation and Maintenance: Each day, observe the starter’s activity. It should begin to bubble and rise, signaling active fermentation. The starter will develop a pleasantly sour aroma. Continue daily feedings until the starter doubles in size within 6-8 hours of feeding, indicating readiness for baking.
- Storage: Once active, you can keep your starter at room temperature with daily feedings or refrigerate it, feeding once a week. Before baking, bring it to room temperature and feed until bubbly and active.
Notes
- Use filtered or spring water to avoid chlorine, which can inhibit fermentation.
- Organic flours promote healthier fermentation due to natural yeasts and bacteria.
- Keep your starter in a loosely covered container to allow airflow but prevent contamination.
- Starter readiness is indicated by doubling in size and a bubbly texture within hours after feeding.
- If a layer of liquid (hooch) forms on top, stir it back in or pour off – it indicates hunger and needs feeding.


