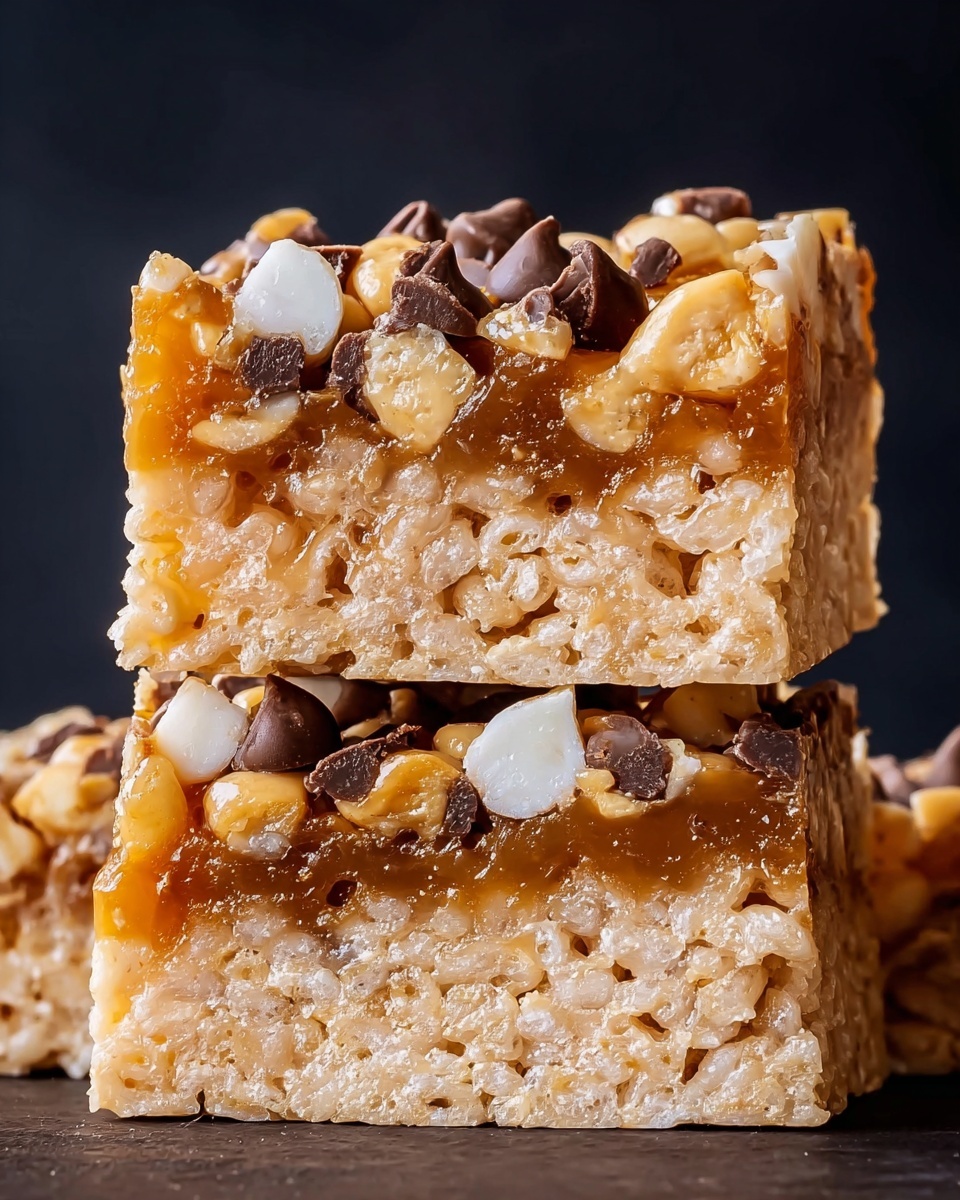
If you have a soft spot for nostalgic, chewy treats with a perfect harmony of gooey marshmallow, toasted coconut, caramel, and chocolate, this Samoa Rice Krispie Treats Recipe is going to become an instant favorite. It takes the classic Rice Krispies treat to new heights by layering in those iconic Samoa cookie flavors we all adore, creating an irresistible snack that’s as fun to make as it is to eat. Whether you’re whipping them up for a party, a cozy night in, or just because, these bars offer a delightful combo of textures and flavors that never fail to impress.
Ingredients You’ll Need
All of these ingredients are pantry-friendly staples that come together quickly to build a rich, multi-layered treat. Each one plays a special role, from the crunch of crispy cereal to the luscious layers of caramel and chocolate that make every bite feel like a celebration.
- 6 cups Rice Krispies cereal: The classic crispy base that gives this treat its signature crunch and lightness.
- 3 tablespoons unsalted butter: Helps melt the marshmallows smoothly and adds a subtle richness.
- 1 package (10 oz) marshmallows: The glue that holds everything together with a perfectly gooey texture.
- 1/2 teaspoon vanilla extract: Adds warmth and depth to the marshmallow mixture without overpowering.
- 1 1/2 cups sweetened shredded coconut: Toasted to golden perfection for incredible flavor and texture.
- 1/2 cup caramel sauce: Brings that iconic rich, buttery sweetness every Samoa fan craves.
- 1/2 cup chocolate chips: Melted into a smooth drizzle that finishes everything off with a luscious touch.
- 1 tablespoon coconut oil: Ensures the chocolate drizzle is silky smooth and easy to spread.
How to Make Samoa Rice Krispie Treats Recipe
Step 1: Melt the Butter and Marshmallows
Start by gently melting the butter over low heat in a large pan, creating a silky base that lets the marshmallows melt without burning. Then toss in the marshmallows and stir consistently until your mixture turns into a smooth, creamy cloud of sweetness ready to bind everything together.
Step 2: Stir in Vanilla Extract
Once the marshmallows are fully melted, remove your pan from the heat and swirl in the vanilla extract. This little addition lifts the flavor and brings a subtle aromatic note that truly elevates the marshmallow base.
Step 3: Combine Rice Krispies with Marshmallow Mixture
Now, slowly fold in the Rice Krispies cereal, stirring carefully so each crunchy piece gets coated in that luscious marshmallow goodness. This step is key to ensuring every bite has the perfect balance of crisp and gooey.
Step 4: Press the Mixture into Your Baking Dish
Pour the sticky mixture into a greased 9×13-inch pan, then use a spatula or clean hands to press it evenly down. Don’t pack it too tightly — you want the bars to stay light and chewy!
Step 5: Toast the Coconut
While your treat base sets, take the shredded coconut on a quick trip to a dry skillet over medium heat. Stir frequently and watch as the coconut turns golden brown, releasing that irresistible nutty aroma that’ll signal it’s perfectly toasted.
Step 6: Spread the Toasted Coconut
Once toasted and fragrant, sprinkle the coconut evenly atop your Rice Krispie layer, giving the treat a wonderful flavor and textural contrast that’s signature to Samoa-inspired desserts.
Step 7: Drizzle on the Caramel
Take your half cup of luscious caramel sauce and drizzle it generously over the coconut layer. It’s the golden goo that ties the whole dish to that beloved Samoa cookie flavor profile. Let your bars sit at room temperature for about 15 minutes to set slightly before moving on.
Step 8: Melt and Drizzle the Chocolate
In a small microwave-safe bowl, combine the chocolate chips and coconut oil. Heat in 30-second bursts, stirring well between, until silky smooth. Then, gently drizzle the melted chocolate all over your caramel-coconut layers for an irresistible finishing touch.
Step 9: Let Set and Cut into Squares
Allow the bars to sit until the chocolate has firmed up completely — this can take about 20-30 minutes at room temperature. Then cut into 12 to 16 generous squares depending on your sweet tooth and serving needs.
How to Serve Samoa Rice Krispie Treats Recipe
Garnishes
To make these bars even more festive, sprinkle a little extra toasted coconut or finely chopped pecans on top of the chocolate drizzle. A light dusting of sea salt can also highlight the sweet caramel and chocolate, adding a delightful salty-sweet balance.
Side Dishes
These treats shine on their own but also pair wonderfully with fresh berries or a scoop of vanilla ice cream for an indulgent dessert experience. A hot cup of coffee or milk complements the sweet layers perfectly for any occasion.
Creative Ways to Present
Arrange your Samoa Rice Krispie Treats Recipe squares on a pretty platter lined with parchment paper for parties. You can also cut smaller bite-sized pieces and serve them on decorative toothpicks for easy snacking. Wrapping individual bars in wax paper makes a charming homemade gift anyone would love.
Make Ahead and Storage
Storing Leftovers
Keep your finished bars fresh by storing them in an airtight container at room temperature. They’ll stay chewy and delicious for up to 3 days — probably long enough for them to disappear!
Freezing
If you want to prepare them in advance, these treats freeze beautifully. Wrap each bar individually in plastic wrap and store in a freezer-safe container. Thaw at room temperature when you’re ready for a sweet treat.
Reheating
While these bars are best enjoyed as they are, you can warm them slightly in the microwave for about 10 seconds if you prefer a softer, gooier bite. Just be careful not to overheat and melt the chocolate topping.
FAQs
Can I use mini marshmallows instead of a regular marshmallow package?
Absolutely! Mini marshmallows actually melt faster and more evenly, making them a great alternative if you don’t have a big marshmallow bag on hand.
Is there a way to make these treats gluten-free?
Yes! Ensure you use gluten-free Rice Krispies cereal, as some brands may contain malt flavoring derived from barley. All other ingredients are naturally gluten-free.
Can I substitute the caramel sauce with homemade caramel?
You can definitely use homemade caramel if you want a personal touch. Just make sure it’s thick enough to hold on top of the coconut layer without running off.
What kind of chocolate works best for the drizzle?
Semi-sweet chocolate chips are the classic choice, but milk or dark chocolate chips also work beautifully depending on your sweetness preference.
Can I add nuts to this recipe?
If you love crunch, chopped pecans or macadamia nuts folded into the coconut or sprinkled on top add a wonderful texture and flavor contrast.
Final Thoughts
I can’t recommend this Samoa Rice Krispie Treats Recipe enough—it’s a true crowd-pleaser that brings together the best flavors of your favorite cookie in a fast, fun treat. Whether you’re a longtime fan or discovering the combination for the first time, these bars deliver comfort and sweetness in every bite. Go ahead and try making them soon—you’ll wonder how you ever enjoyed Rice Krispies treats any other way!
Print
Samoa Rice Krispie Treats Recipe
- Prep Time: 10 minutes
- Cook Time: 10 minutes
- Total Time: 20 minutes
- Yield: 12 to 16 squares
- Category: Dessert
- Method: Stovetop
- Cuisine: American
Description
These Samoa Rice Krispie Treats are a delightful twist on the classic treat, featuring layers of toasted coconut, rich caramel, and a chocolate drizzle. Easy to make and perfect for sharing, these bars combine crunchy cereal with gooey marshmallows and indulgent toppings for a truly irresistible dessert.
Ingredients
Base Layer
- 6 cups Rice Krispies cereal
- 3 tablespoons unsalted butter
- 1 package (10 oz) marshmallows
- 1/2 teaspoon vanilla extract
Toppings
- 1 1/2 cups sweetened shredded coconut
- 1/2 cup caramel sauce
- 1/2 cup chocolate chips
- 1 tablespoon coconut oil (for the chocolate drizzle)
Instructions
- Prepare the marshmallow mixture: In a large pan, melt the butter over low heat. Add the marshmallows and stir continuously until melted and smooth.
- Add vanilla: Remove the pan from heat and stir in the vanilla extract for enhanced flavor.
- Combine cereal: Gradually add the Rice Krispies cereal to the marshmallow mixture, stirring gently until every piece is fully coated.
- Form the base: Spread the coated cereal mixture evenly into a greased 9×13-inch baking dish, pressing down lightly to create a uniform layer.
- Toast the coconut: In a dry skillet over medium heat, toast the shredded coconut for 3 to 4 minutes, stirring frequently until golden brown and fragrant.
- Add toasted coconut: Evenly sprinkle the toasted coconut over the Rice Krispies base layer in the baking dish.
- Drizzle caramel: Pour the caramel sauce over the coconut layer, spreading gently to cover the surface. Allow the bars to set at room temperature for about 15 minutes.
- Melt chocolate: In a small microwave-safe bowl, melt the chocolate chips with the coconut oil in 30-second intervals, stirring after each, until smooth and glossy.
- Final drizzle and setting: Drizzle the melted chocolate evenly over the caramel and coconut layer. Let the bars set fully before cutting into 12 to 16 squares for serving.
Notes
- For best results, use sweetened shredded coconut to mimic the traditional Samoa flavors.
- Ensure the coconut is stirred constantly while toasting to prevent burning.
- Allow the bars to cool and set completely before cutting to maintain clean edges.
- You can substitute caramel sauce with homemade caramel for a richer taste.
- Store treats in an airtight container at room temperature for up to 3 days.


