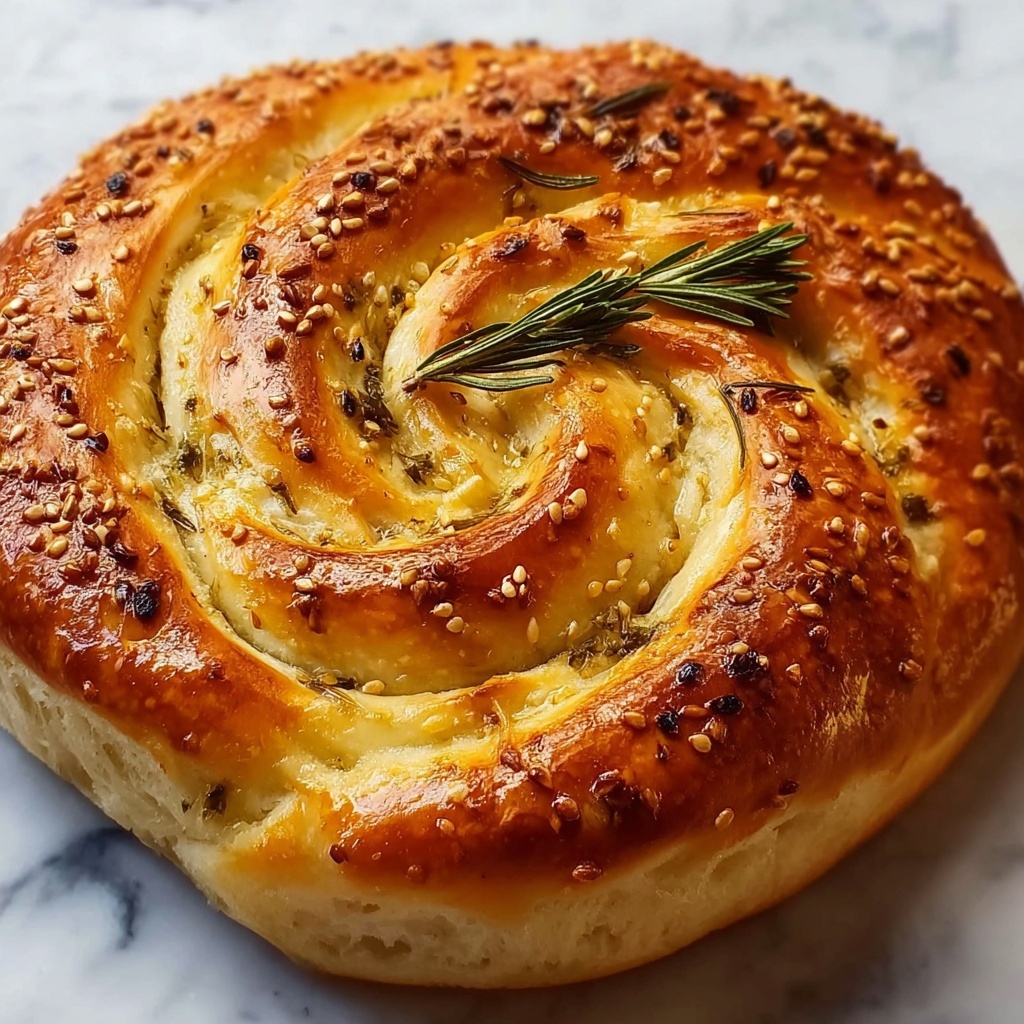
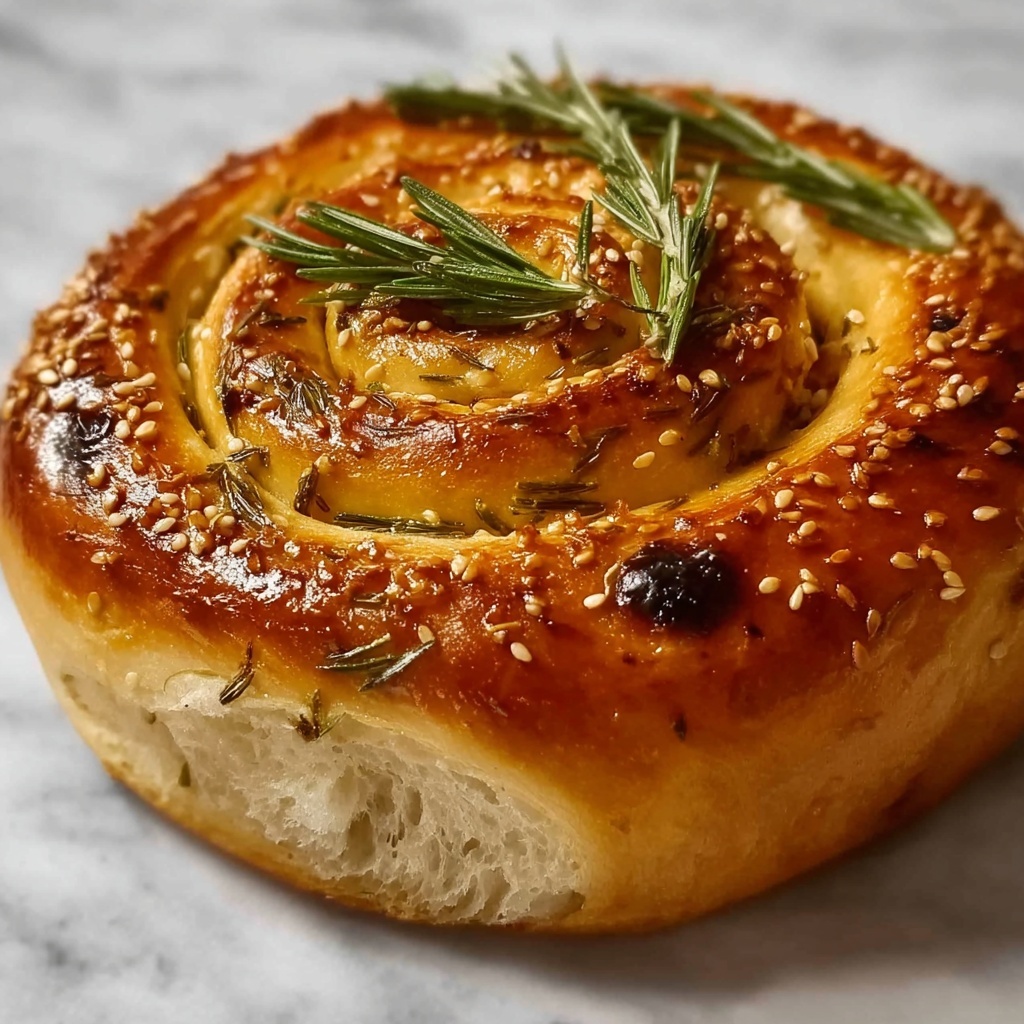
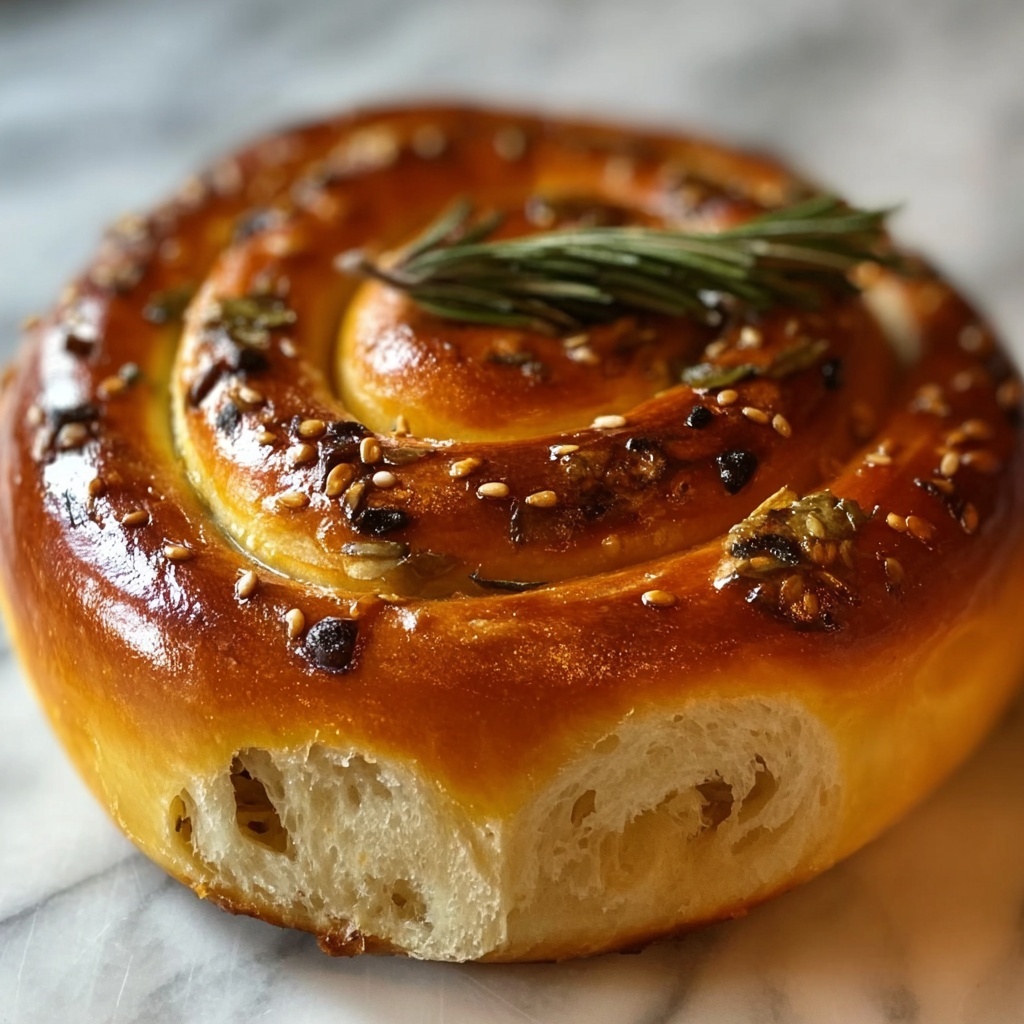
If you love the charm of a crusty loaf fresh from the oven with the aromatic lift of herbs and garlic, then you are going to adore this Rustic No Knead Rosemary Garlic Bread Recipe. It’s a wonderfully approachable bread that brings together fragrant rosemary, pungent garlic, and a golden, chewy crust without any demanding kneading or complicated steps. This recipe makes baking feel like a warm kitchen ritual rather than a chore, capturing that rustic, homemade goodness perfect for sharing with friends and family.
Ingredients You’ll Need
The beauty of this Rustic No Knead Rosemary Garlic Bread Recipe lies in its simplicity. Each ingredient is carefully chosen to build layers of flavor and texture, from the tender crumb to the crisp crust, making every bite a delight worth savoring.
- All-purpose flour: The base of our bread, providing structure and a tender crumb.
- Garlic, minced: Adds a fantastic depth of flavor that permeates the entire loaf.
- Fresh rosemary, finely chopped: Brings a fresh, piney aroma that’s the star herb of this recipe.
- Kosher salt: Balances flavors and enhances the dough’s taste.
- Freshly ground black pepper: Offers a gentle kick that complements the savory notes.
- Instant yeast: The magic that helps the dough rise effortlessly overnight.
- Water, at room temperature: Hydrates the flour and activates the yeast, vital for the dough’s formation.
- Cornmeal: Used to dust the skillet, it ensures a crispy bottom crust with a lovely texture.
How to Make Rustic No Knead Rosemary Garlic Bread Recipe
Step 1: Prepare the Dough
Begin by tossing together the flour, minced garlic, fresh rosemary, kosher salt, freshly ground black pepper, and instant yeast in a large bowl. This blend of dry ingredients sets the stage for the bread’s flavor — every element contributes a unique note, from aromatic herbs to seasoning.
Step 2: Add Water and Mix
Pour in the room temperature water and mix gently with a wooden spoon or your hand. The goal is to combine everything into a wet, sticky dough. This step is quick, about 30 seconds, so don’t overthink it — rustic bread is all about easy and natural texture.
Step 3: Let the Dough Rise
Cover the bowl tightly with plastic wrap to keep moisture in and let the dough rest at room temperature. Over 18 to 24 hours, this slow rise encourages incredible flavor development, with tiny bubbles appearing on the surface — a sign that your bread is coming to life.
Step 4: Prepare the Skillet and Shape the Dough
Lightly oil a 10-inch cast iron skillet or coat it with nonstick spray, then sprinkle the cornmeal on the bottom. This creates a delightful crunch on the crust’s underside. On a lightly floured surface, gently shape your dough into a round to fit snugly into the skillet.
Step 5: Proof the Dough in the Skillet
Place the dough in the prepared skillet and cover it with a clean dishtowel. Let it stand at room temperature for about 2 hours until it has doubled in size and retains a slight dent when poked — perfect proofing for that rustic texture.
Step 6: Bake Your Bread to Perfection
Preheat your oven to 450 degrees Fahrenheit. Slide the skillet with your dough into the oven and bake for 30 to 40 minutes, until the crust turns a beautiful golden brown. The aroma of rosemary and garlic roasting will fill your kitchen, making it impossible to wait for that first slice.
How to Serve Rustic No Knead Rosemary Garlic Bread Recipe
Garnishes
For a simple yet elegant touch, finish your bread with a brush of olive oil and a sprinkle of flaky sea salt right after baking. Fresh rosemary sprigs can be added on the side for aroma, and a light drizzle of melting butter amplifies the savoriness, inviting everyone to dive in.
Side Dishes
This Rustic No Knead Rosemary Garlic Bread Recipe pairs beautifully with hearty soups like tomato basil or creamy mushroom, as well as fresh salads bursting with citrus or balsamic vinaigrette. It’s equally great when served alongside roasted chicken or grilled vegetables, making it versatile enough for any meal.
Creative Ways to Present
Try slicing your bread thick and using it for gourmet sandwiches loaded with fresh mozzarella, roasted peppers, and pesto. Or toast leftover pieces to create crunchy crostinis topped with goat cheese and sun-dried tomatoes—your guests will be wowed by the rustic charm and incredible flavor.
Make Ahead and Storage
Storing Leftovers
To keep your rustic bread fresh, wrap it tightly in plastic wrap or store in an airtight container at room temperature. It’s best enjoyed within 2 days to maintain its perfect texture, but you can refresh the crust by warming it in a hot oven for a few minutes.
Freezing
If you want to enjoy this bread later, freezing is a great option. Slice it first for easy thawing, then wrap the pieces well in freezer-safe bags. When ready, pull slices out as needed — no need to defrost fully, simply warm them lightly before serving to regain that fresh-baked taste.
Reheating
Reheat your Rustic No Knead Rosemary Garlic Bread Recipe by placing it in a preheated oven at 350 degrees Fahrenheit for about 10 minutes. This revives the crusty exterior while softening the inside, making it as delightful as when freshly baked.
FAQs
Can I use dried rosemary instead of fresh?
Absolutely! If fresh rosemary isn’t available, substitute dried rosemary at half the amount since it’s more concentrated. The bread will still have that lovely herbal aroma, just make sure to crumble the dried rosemary finely for even distribution.
What’s the secret to the no knead method?
The no knead technique relies on time rather than muscle power. By mixing a wet dough and letting it rest for a long time, gluten develops naturally, giving you a nicely textured bread without any kneading required.
Do I need a cast iron skillet?
A cast iron skillet works best because it retains and distributes heat evenly, helping develop a crunchy crust. However, if you don’t have one, you can use a heavy ovenproof pan or a Dutch oven with similar results.
Can I add other herbs or ingredients?
Definitely! Feel free to experiment by adding thyme, oregano, or even olives and sun-dried tomatoes to make this Rustic No Knead Rosemary Garlic Bread Recipe your own. Just keep the moisture balance in mind to maintain the dough’s texture.
Is this bread good for sandwiches?
This bread is fantastic for sandwiches thanks to its chewy crumb and flavorful crust. It holds up well to various fillings, making it a perfect base for robust, hearty sandwiches or simple buttered slices.
Final Thoughts
There’s something truly special about baking bread that fills your home with inviting aromas and results in a warm, rustic loaf that feels like a hug from the oven. Try the Rustic No Knead Rosemary Garlic Bread Recipe—you’ll find it’s as much fun to make as it is delicious to eat. Whether for family dinners, casual get-togethers, or quiet moments with a cup of tea, this bread always brings joy to the table.
Print
Rustic No Knead Rosemary Garlic Bread Recipe
- Prep Time: 10 minutes
- Cook Time: 40 minutes
- Total Time: 20 hours 50 minutes
- Yield: 8 servings
- Category: Bread
- Method: Baking
- Cuisine: American
- Diet: Vegetarian
Description
This Rustic No Knead Rosemary Garlic Bread recipe offers an easy way to bake a fragrant, crusty loaf with minimal effort. Infused with fresh rosemary and garlic, the bread requires no kneading and utilizes a long fermentation period to develop flavor and a perfect texture. Baked in a cast iron skillet with a crisp golden crust, it’s an ideal homemade artisan bread for any meal.
Ingredients
Dry Ingredients
- 3 cups all-purpose flour
- 1 tablespoon finely chopped fresh rosemary (or more, to taste)
- 1 ¼ teaspoons kosher salt
- ¾ teaspoon freshly ground black pepper
- ½ teaspoon instant yeast
Other Ingredients
- 3 cloves garlic, minced
- 1 ½ cups water, at room temperature
- 2 tablespoons cornmeal
Instructions
- Prepare the Dough: In a large bowl, combine the all-purpose flour, minced garlic, finely chopped fresh rosemary, kosher salt, freshly ground black pepper, and instant yeast to create an evenly mixed dry base.
- Mix Wet Ingredients: Add 1 ½ cups of room temperature water to the dry ingredients. Using a wooden spoon or your hand, mix until a wet, sticky dough forms, which should take about 30 seconds.
- Initial Fermentation: Cover the bowl tightly with plastic wrap and leave it at room temperature. Allow the dough to ferment until the surface is dotted with bubbles, approximately 18 to 24 hours, which helps develop flavor and gluten structure.
- Prepare the Baking Vessel: Lightly oil a 10-inch cast iron skillet or spray it with nonstick spray. Then sprinkle the skillet with cornmeal to prevent sticking and add a rustic texture to the bread’s crust.
- Shape the Dough: On a lightly floured surface, gently shape the dough into a round ball without deflating it entirely, preserving the air bubbles for a light crumb.
- Proof the Dough: Place the shaped dough into the prepared skillet. Cover it with a clean dishtowel and let it stand at room temperature until the dough doubles in size and does not spring back easily when poked with a finger, about 2 hours.
- Preheat the Oven: Set your oven to 450°F (232°C) and allow it to come to temperature fully before baking to ensure proper crust development.
- Bake the Bread: Place the skillet with the proofed dough into the preheated oven. Bake until the bread is a golden brown color, approximately 30 to 40 minutes. Remove from oven and cool before slicing.
Notes
- Long fermentation is key to flavor and texture; do not rush the initial 18-24 hour fermentation.
- Use a cast iron skillet or a heavy oven-safe pan to mimic a bread oven environment and create a crispy crust.
- If you prefer, you can substitute fresh rosemary with dried rosemary, but reduce the amount slightly as dried herbs are more concentrated.
- Allow bread to cool completely before slicing to avoid a gummy texture.
- Store leftover bread in a paper bag for up to 2 days or freeze for longer storage.


