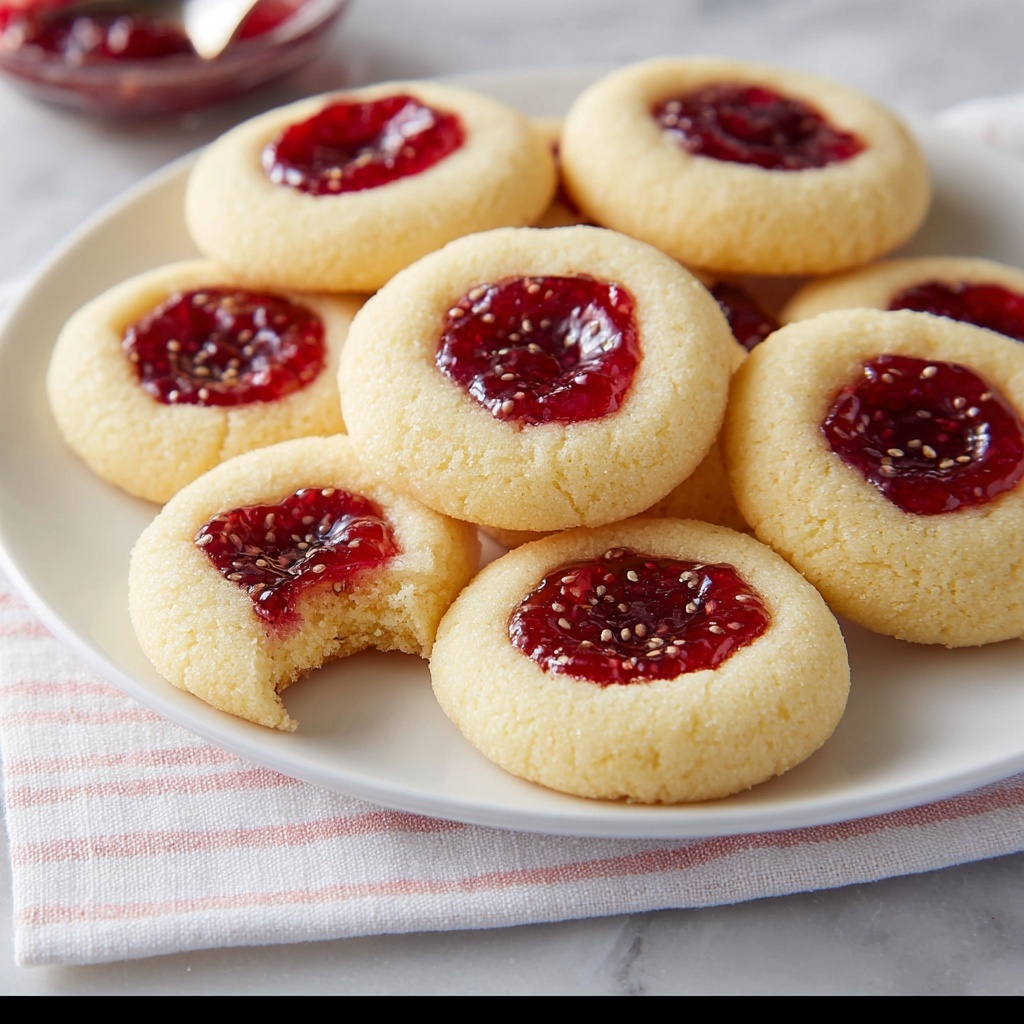
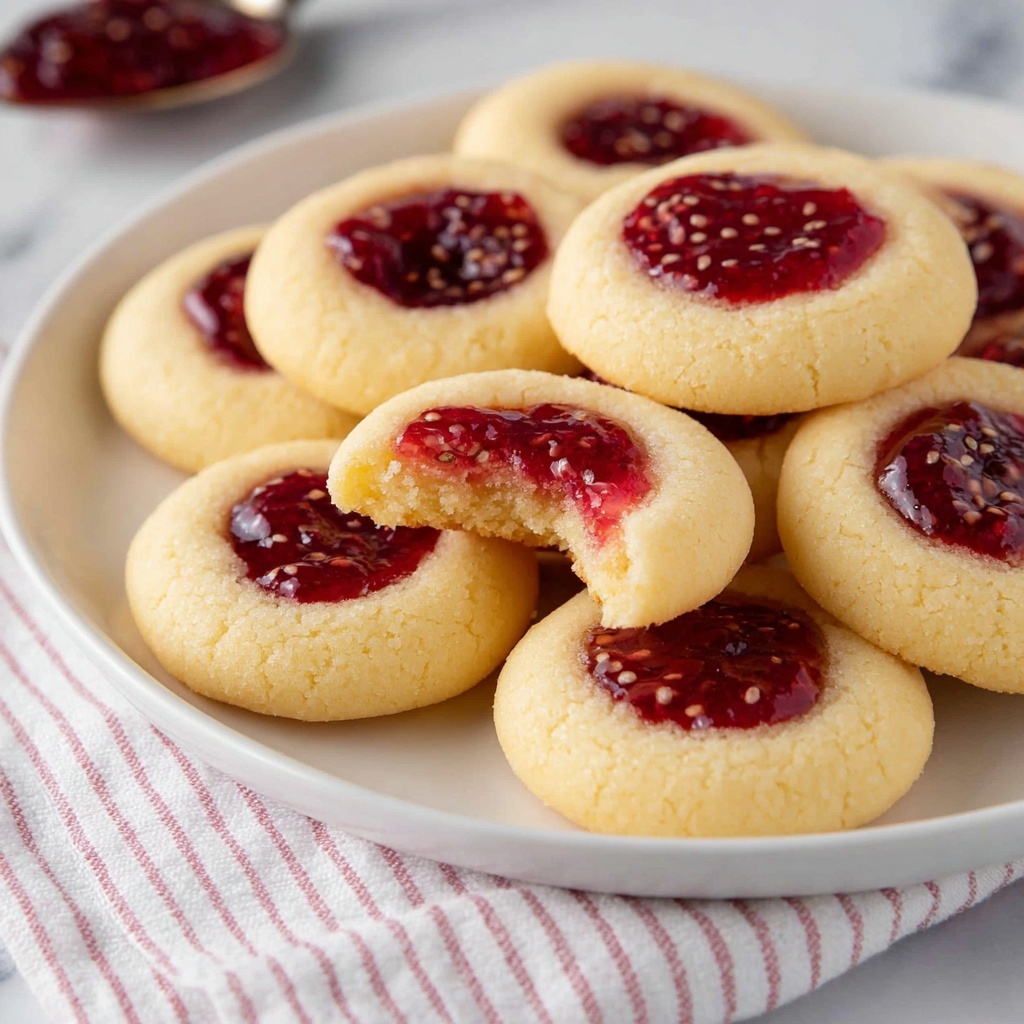
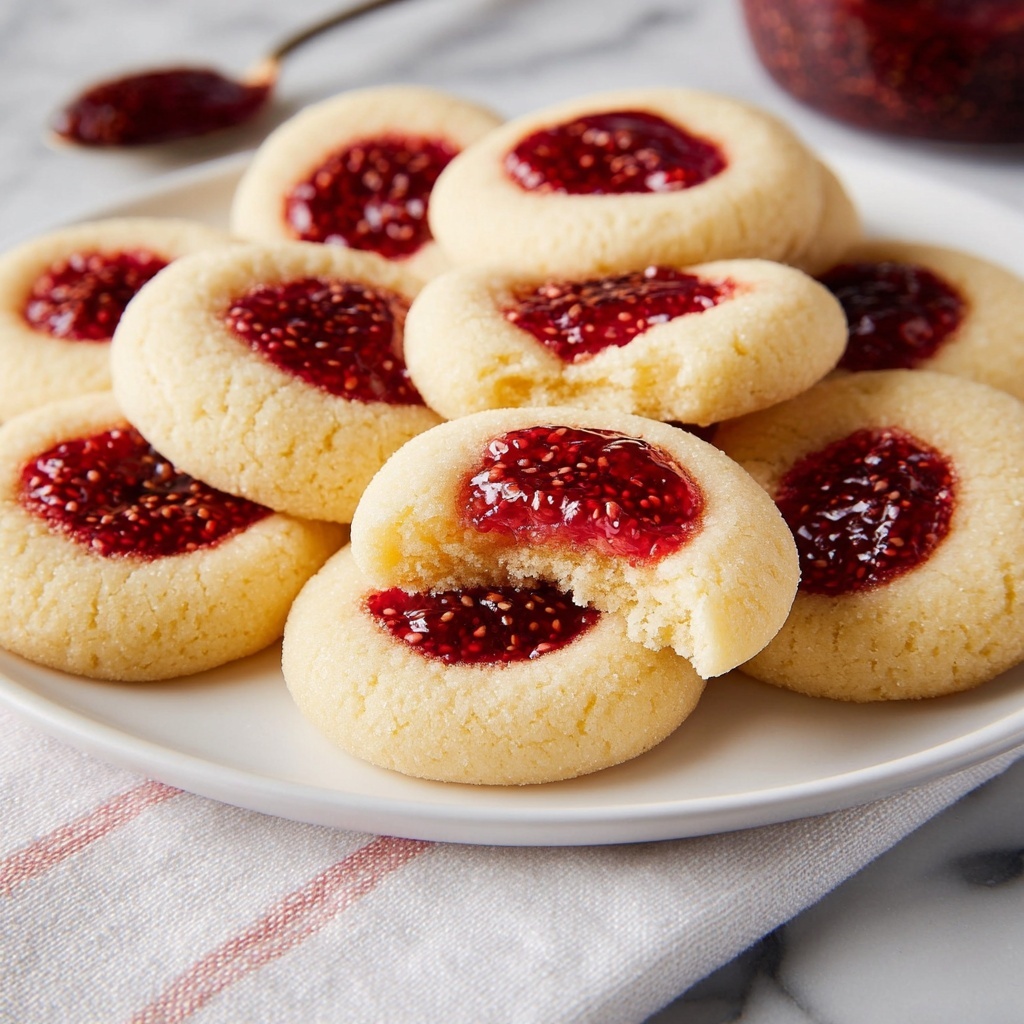
If you’ve been searching for a delightful, melt-in-your-mouth treat that combines buttery goodness with a burst of fruity sweetness, the Raspberry Thumbprint Cookies Recipe is exactly what you need. These classic cookies offer a tender, buttery base with a perfectly nestled dollop of raspberry jam, creating a beautiful harmony of textures and flavors. Whether you’re baking for a special occasion or just craving a homemade sweetness, this recipe will quickly become one of your favorites to make and share.
Ingredients You’ll Need
This Raspberry Thumbprint Cookies Recipe calls for simple, pantry-friendly ingredients that come together to create something truly special. Each ingredient plays its part, from the rich butter that ensures tender cookies to the vibrant raspberry jam that adds a pop of flavor and color.
- 2 & 1/4 cups (270g) all-purpose flour: Provides structure while keeping cookies tender.
- 1/2 teaspoon kosher salt: Enhances the sweetness and balances flavors perfectly.
- 1 cup unsalted butter, room temperature: Adds richness and a soft texture.
- 1 cup (200g) granulated sugar, divided: Sweetens and helps create a delightful sugar crust.
- 1 large egg: Binds the ingredients together for a cohesive dough.
- 1/2 teaspoon almond extract: Infuses a subtle nutty undertone that elevates the flavor.
- 1/2 teaspoon vanilla extract: Brings warmth and depth to the cookie’s flavor.
- 1/2 cup raspberry jam or raspberry preserve: The jewel in the cookie’s crown providing that irresistible fruity center.
How to Make Raspberry Thumbprint Cookies Recipe
Step 1: Combine Dry Ingredients
Start by tossing together the flour and salt in a medium bowl. This ensures the salt is evenly distributed throughout the flour, which is crucial for balanced flavor in every bite. Set this mixture aside as you prepare the wet ingredients.
Step 2: Cream Butter and Sugar
Using a stand mixer with a whisk attachment or a hand mixer, beat the softened butter together with 3/4 cup of sugar until the mixture turns light and fluffy. This process incorporates air into the dough, which will give your cookies that wonderful tender crumb and slight lift. Don’t forget to scrape down the sides of the bowl to mix everything evenly.
Step 3: Add Egg and Extracts
Mix in the egg, vanilla extract, and almond extract until everything is fully combined. The egg helps bind the dough, while the extracts add layers of flavor that complement the raspberry jam beautifully.
Step 4: Incorporate the Flour Mixture
With your mixer on low, gradually add half the flour mixture, stirring just until it’s incorporated. Repeat with the remaining flour mixture. Be careful not to overmix at this stage — you want to maintain a soft dough without developing the gluten too much, keeping your cookies tender.
Step 5: Chill the Dough
Form the dough into a ball, wrap it tightly in plastic wrap or place it in an airtight container, then refrigerate for at least 1 hour. If you have the time, chilling overnight gives the flavors a chance to meld and firms up the dough, making it easier to work with and resulting in a better texture.
Step 6: Prepare for Baking
Preheat your oven to 350° F and line two cookie sheets with parchment paper. Remove the dough from the fridge, letting it rest at room temperature for about 10 minutes if it’s been chilled overnight — this slight warming ensures easier rolling.
Step 7: Shape and Sugar the Dough Balls
Divide the dough into 24 even portions, rolling each into roughly 1-inch balls. Coat each ball in the reserved 1/4 cup of sugar before placing them 1 inch apart on the baking sheets — this sugary coating adds a lovely sweet crust as the cookies bake.
Step 8: Make the Indents
Press a 1/2 teaspoon measuring spoon or your thumb into the center of each cookie ball to create a small well. This little thumbprint is what makes these cookies stand out, providing the perfect spot to hold the jam filling.
Step 9: Fill with Raspberry Jam
Gently spoon raspberry jam into each indent, mounding it slightly above the surface. The jam will flatten as the cookies bake, so a bit of extra is just right — but be careful not to overfill to avoid any overflow during baking.
Step 10: Bake and Cool
Bake your cookies for 11 to 12 minutes or until their edges turn a delicate golden brown. Once out of the oven, transfer them to a wire rack to cool completely — the cookies firm up as they cool, locking in that tender texture and gorgeous jam center.
How to Serve Raspberry Thumbprint Cookies Recipe
Garnishes
Sprinkling a light dusting of powdered sugar over these cookies just before serving not only adds a touch of elegance but enhances their sweetness beautifully. Fresh raspberries or a small sprig of mint on the side can add vibrant color and freshness, making each bite feel like a special treat.
Side Dishes
These cookies pair wonderfully with a hot cup of tea or freshly brewed coffee, balancing the rich buttery flavor and tart raspberry jam. For a brunch or dessert spread, serve alongside a creamy yogurt parfait or fresh fruit salad to create a well-rounded and inviting table.
Creative Ways to Present
Turn these cookies into charming gifts by stacking them in a pretty box lined with parchment paper, tied with a rustic ribbon. For gatherings, arrange them on a tiered dessert stand for a stunning visual impact. You might even try filling the thumbprints with flavored cream cheese for a delightful twist on the classic.
Make Ahead and Storage
Storing Leftovers
After cooling, store your Raspberry Thumbprint Cookies in an airtight container at room temperature. They’ll stay fresh and delicious for up to 5 days, making them a perfect make-ahead treat for busy weeks or holiday celebrations.
Freezing
If you want to keep these cookies longer, freeze them in a single layer on a baking sheet first, then transfer to an airtight container or freezer bag. Properly stored, they will maintain their flavor and texture for up to 3 months. Thaw them at room temperature when you’re ready to enjoy.
Reheating
To refresh the cookies after storage or freezing, warm them gently in a 300° F oven for about 5 minutes. This brings back their soft texture and enhances the aroma of the raspberry jam, making them taste freshly baked all over again.
FAQs
Can I use other types of jam in this Raspberry Thumbprint Cookies Recipe?
Absolutely! While raspberry jam is classic and delicious, these cookies work wonderfully with strawberry, apricot, or even fig preserves. Feel free to experiment with your favorite flavors to personalize the cookies.
Is it necessary to chill the dough?
Chilling the dough is highly recommended as it lets the flavors develop and prevents the cookies from spreading too much during baking, resulting in thicker, tender cookies.
Can these cookies be made gluten-free?
Yes, you can substitute the all-purpose flour with a gluten-free flour blend designed for baking. Just ensure your blend contains xanthan gum or a similar binder to keep the dough together.
Why do the cookies need to be rolled in sugar before baking?
Rolling the dough balls in sugar adds a delightful crunchy texture to the cookie exterior, creating a lovely contrast to the soft interior and sweet jam center.
How do I prevent the jam from running over during baking?
Use just enough jam to fill the thumbprint indent, slightly mounded but not overflowing. If you add too much, the jam will spill over and bake onto the sheet, so less is definitely more here.
Final Thoughts
There’s something truly magical about the Raspberry Thumbprint Cookies Recipe that makes every bite feel like a little celebration. The ease of making them paired with their beautiful balance of buttery textures and vibrant raspberry jam makes them a must-try for any home baker. I can’t wait for you to bake a batch and fall in love with these charming cookies just like I did!
Print
Raspberry Thumbprint Cookies Recipe
- Prep Time: 20 minutes
- Cook Time: 11 minutes
- Total Time: 1 hour 31 minutes
- Yield: 24 cookies
- Category: Dessert
- Method: Baking
- Cuisine: American
Description
Delight in these classic Raspberry Thumbprint Cookies, featuring a buttery, tender dough with a sweet and tangy raspberry jam center. Perfectly crisp at the edges and soft in the middle, these cookies are a timeless treat ideal for any occasion.
Ingredients
Dry Ingredients
- 2 & 1/4 cups (270g) all-purpose flour
- 1/2 teaspoon kosher salt
Wet Ingredients
- 1 cup unsalted butter, room temperature
- 1 cup (200g) granulated sugar, divided
- 1 large egg
- 1/2 teaspoon almond extract
- 1/2 teaspoon vanilla extract
Filling
- 1/2 cup raspberry jam or raspberry preserve
Instructions
- Combine Dry Ingredients: In a medium bowl, toss together the all-purpose flour and kosher salt; set this mixture aside for later use.
- Cream Butter and Sugar: Using a stand mixer fitted with a whisk attachment or a hand mixer, beat the unsalted butter with 3/4 cup of granulated sugar on medium speed until the mixture becomes light and fluffy, about 3 to 4 minutes. Scrape down the bowl sides as needed to ensure even mixing.
- Add Egg and Extracts: Incorporate the large egg, vanilla extract, and almond extract into the creamed butter and sugar mixture until combined thoroughly.
- Incorporate Flour Mixture: With the mixer set on low, gradually add half of the flour and salt mixture, mixing just until combined. Repeat with the remaining flour mixture, being careful not to overmix the dough.
- Chill the Dough: Form the dough into a large ball, wrap it tightly in plastic wrap or place in an airtight container, then refrigerate for at least 1 hour, or preferably overnight, to firm up.
- Prepare for Baking: Preheat your oven to 350°F (175°C). Line two baking sheets with parchment paper. Remove the dough from the refrigerator and allow it to rest at room temperature for about 10 minutes if chilled overnight, making it easier to handle.
- Shape Cookies: Divide the chilled dough into 24 equal portions. Roll each portion into a smooth 1-inch ball and coat with the reserved 1/4 cup of granulated sugar. Place the cookies about 1 inch apart on the prepared baking sheets.
- Create Indents: Using a 1/2 teaspoon measuring spoon or your thumb, gently press an indent into the center of each cookie ball, being careful not to press too hard to maintain the cookie shape.
- Fill with Jam: Spoon raspberry jam into each indent, mounding it slightly as the jam will flatten during baking. Avoid overfilling to prevent the jam from spilling over.
- Bake: Bake the cookies in the preheated oven for 11 to 12 minutes, or until the edges are lightly golden brown.
- Cool: Remove the cookies from the oven and transfer them to a wire rack to cool completely before serving.
Notes
- For best flavor and texture, chill the dough overnight.
- Use quality raspberry jam or preserves for the best filling taste.
- Be gentle when creating the thumbprint to avoid breaking the cookies.
- These cookies can be stored in an airtight container at room temperature for up to 5 days.
- To add variety, you can substitute raspberry jam with other fruit preserves like apricot or strawberry.

