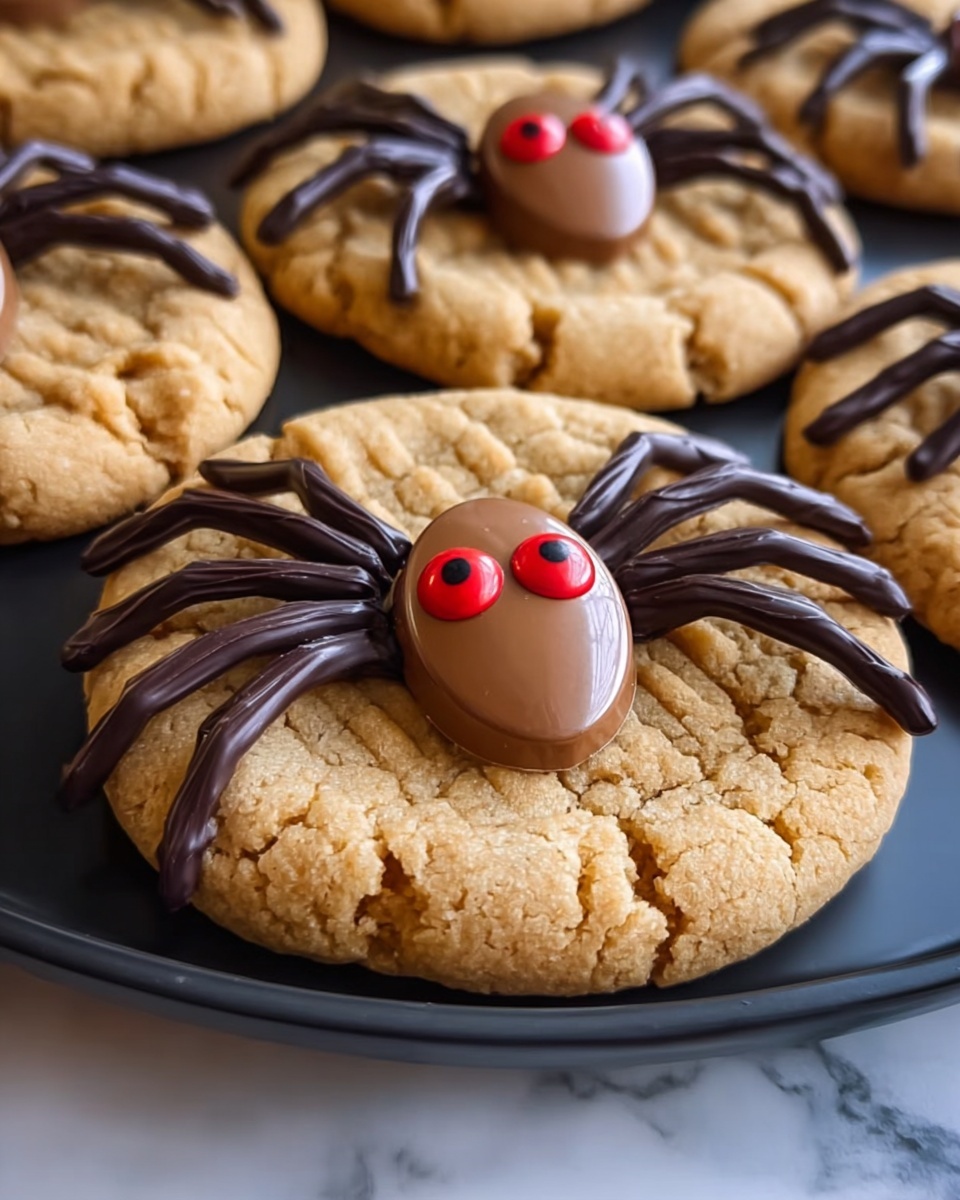
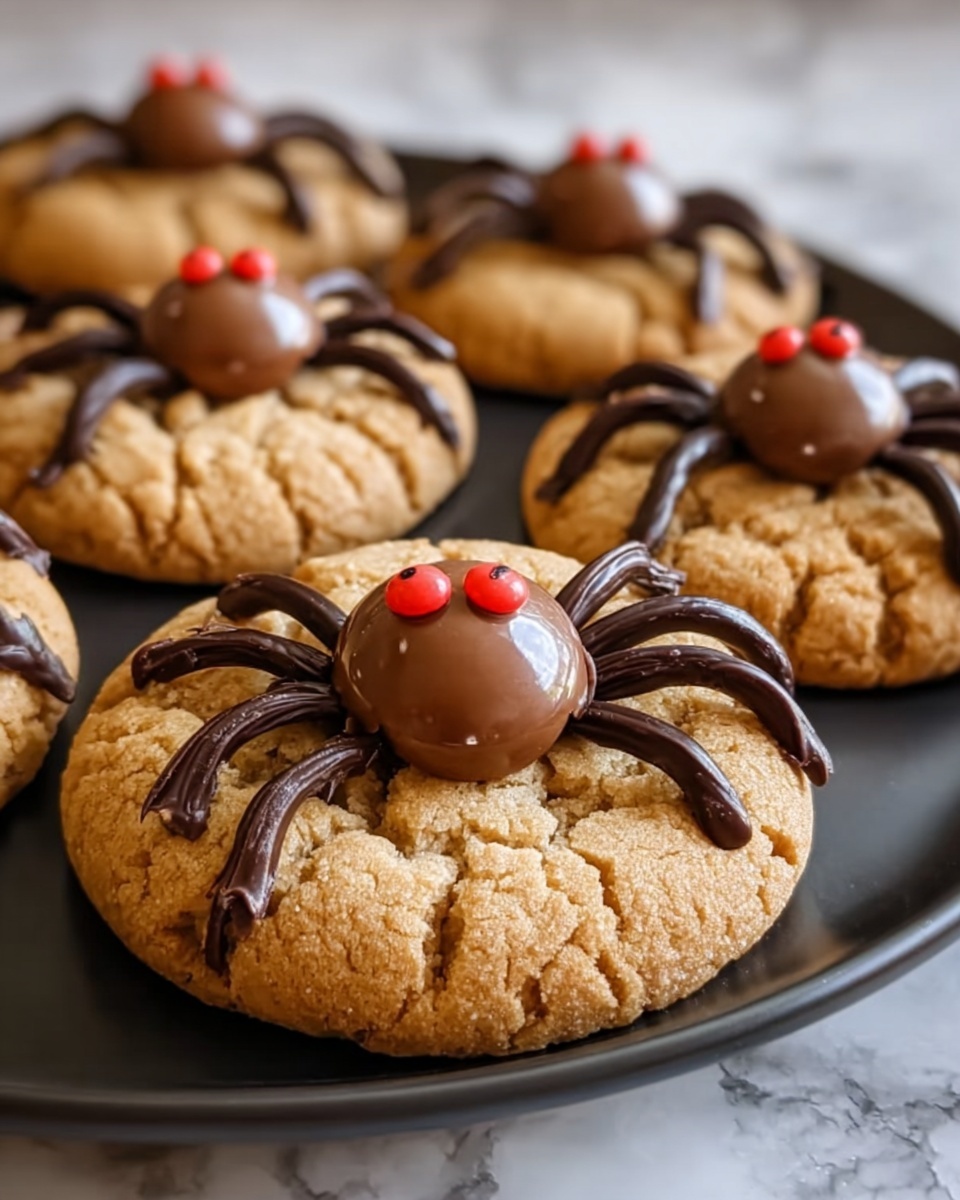
Get ready to delight your Halloween guests with a real showstopper: Peanut Butter Spider Cookies: A Spooky Twist for Halloween Recipe. These aren’t your ordinary peanut butter cookies. They combine a rich, creamy peanut butter flavor with soft, sugar-coated dough, topped with chocolate legs and Whoppers to create the cutest little spider shapes that are perfect for any Halloween celebration. Whether you’re baking with kids or just want a fun, festive treat, these cookies bring spooky vibes and delicious taste together in one irresistible bite.

Ingredients You’ll Need
This recipe relies on simple, classic baking ingredients that come together beautifully to create perfect texture and flavor. Each element contributes something special, whether it’s the peanut butter’s creamy richness or the sweet crunch from the sugar coating. Let’s dive into what you’ll need:
- All-purpose flour (1 ½ cups): The foundation that gives the cookies their perfect, chewy structure.
- Baking soda (½ teaspoon): Helps the cookies rise just right and keeps them fluffy.
- Baking powder (½ teaspoon): Adds a bit of extra lift for a soft crumb.
- Salted butter, softened (½ cup): Adds moisture, richness, and enhances all the flavors.
- Granulated sugar (½ cup): Sweetens the dough and creates a slight crunch when rolled.
- Brown sugar, packed (½ cup): Brings a deeper, caramel-like sweetness to the mix.
- Large egg (1): Binds all the ingredients together, keeping the dough tender.
- Creamy peanut butter (½ cup, not natural): The star of the show, adding creamy, nutty goodness and perfect chewiness.
- Vanilla extract (1 teaspoon): Enhances all the flavors with a warm, sweet aroma.
- Whoppers (44 total – 22 large, 22 small): These malted milk balls become the spider’s body and head, adding texture and a chocolatey crunch.
- Semi-sweet chocolate chips (1 cup / 6 ounces): Melted to craft the spider’s creepy legs.
- White cake decorating gel (1 small tube): Perfect for painting on spooky, expressive spider eyes.
- Granulated sugar (¼ cup, for rolling): Keeps cookie edges crispy and adds sparkle.
- Black nonpareil sprinkles (optional): Tiny dots to finish the spider’s eyes, making them extra lifelike.
How to Make Peanut Butter Spider Cookies: A Spooky Twist for Halloween Recipe
Step 1: Prep Your Oven and Baking Sheets
Start by preheating your oven to 375°F (190°C). Line two baking sheets with parchment paper or silicone mats—this creates a non-stick surface for baking and easy cleanup. It’s a small but important step that helps your cookies come out perfectly shaped and tidy.
Step 2: Mix Dry Ingredients
In a medium bowl, whisk together the all-purpose flour, baking soda, and baking powder. This blend makes sure your cookies rise just right and have the perfect texture. Set the bowl aside while you move on to the wet ingredients.
Step 3: Cream Wet Ingredients
Using a large mixing bowl, cream together the softened butter, granulated sugar, brown sugar, and creamy peanut butter until the mixture becomes light and fluffy. This usually takes a few minutes with a hand or stand mixer. Then, beat in the egg and vanilla extract until fully combined. This step creates the luscious, creamy base for your cookie dough.
Step 4: Combine Wet and Dry
Gradually add the dry ingredient mixture into your wet mixture. Stir gently but thoroughly until a thick dough forms. This keeps the consistency perfect for forming into balls without sticking too much or drying out.
Step 5: Shape and Sugar Coat
Using about 2 tablespoons of dough for each cookie, roll the dough into balls. Then, roll each ball in the ¼ cup of granulated sugar, coating them completely. This adds a sparkle to your cookies and a slight crunch along the edges, making every bite fun and textured. Place the sugar-coated dough balls on the prepared baking sheets, spacing them apart so they have room to spread.
Step 6: Bake the Cookies
Bake your cookies at 375°F for about 8 to 10 minutes. Look for edges that are nicely golden and firm to the touch while keeping the centers soft. Removing them at just the right time ensures a perfect soft-chewy texture that balances the crunchy sugar coating.
Step 7: Add Whopper Bodies and Heads
While the cookies are still warm, gently press one large Whopper onto each cookie to serve as the spider’s body. Then, place one small Whopper just above to form the head. The heat helps the candies stick perfectly to the warm dough—as it cools, they become a stable foundation for decorating.
Step 8: Chill to Set
Pop the cookies in the fridge for a few minutes so they cool down and firm up. Chilling makes them easier to decorate and prevents the chocolate and icing from melting when applied.
Step 9: Melt and Prepare Chocolate for Legs
Melt the semi-sweet chocolate chips in the microwave in 30-second bursts, stirring in between until completely smooth. Let the melted chocolate cool just a bit before transferring it to a small piping bag or zip-top bag with a tiny corner snipped off. This allows you to pipe precise spider legs.
Step 10: Pipe Spider Legs
Using the melted chocolate, pipe eight “legs” onto each spider cookie. Create four legs on each side of the large Whopper body by making small “V” shaped strokes. This step brings the spider design to life and adds rich chocolate flavor for extra wow-factor.
Step 11: Decorate Eyes
Use the white cake decorating gel to dot two eyes on the small Whopper head. For extra detail, place a tiny black nonpareil sprinkle in the center of each white dot, giving the spiders an eerily cute and realistic gaze that kids and adults will adore.
Step 12: Let Cookies Set Before Serving
Allow your Peanut Butter Spider Cookies: A Spooky Twist for Halloween Recipe to fully set at room temperature, or speed things along by chilling them again briefly. Once set, they hold their shape beautifully and are ready to charm everyone at your Halloween festivities.
How to Serve Peanut Butter Spider Cookies: A Spooky Twist for Halloween Recipe
Garnishes
Consider adding a sprinkle of edible glitter or a dusting of powdered sugar around your spider cookies to create a spooky cobweb effect on your serving platter. Fresh mint leaves can add a fresh pop of color that contrasts wonderfully with these dark, chocolatey critters.
Side Dishes
Serve these peanut butter spiders alongside a creamy vanilla milkshake or a warm mug of hot chocolate for a comforting, festive treat. For adult parties, a glass of chilled cream liqueur adds an elegant pairing to balance the sweetness and texture.
Creative Ways to Present
Display your cookies on a black or orange platter layered with faux spider webs to amplify the Halloween fun. Another cute idea is to serve them inside a hollowed-out pumpkin or around a cauldron filled with candy corn for an extra spooky centerpiece.
Make Ahead and Storage
Storing Leftovers
Store leftover cookies in an airtight container at room temperature for up to 3 days. The chocolate legs may soften slightly over time, but the cookies stay deliciously chewy and ready to enjoy.
Freezing
You can freeze unbaked dough balls rolled in sugar by placing them on a baking sheet until firm, then storing them in a freezer-safe bag for up to 3 months. When ready to bake, simply bake straight from frozen, adding a minute or two to the bake time.
Reheating
Warm leftover cookies in a microwave for 10-15 seconds to soften the peanut butter center and to bring back that freshly-baked feel. Avoid prolonged heating to preserve the chocolate decoration intact.
FAQs
Can I use natural peanut butter for this recipe?
Natural peanut butter tends to be oilier and can sometimes change the texture of the cookies. For best results and to keep the dough consistency perfect, use creamy peanut butter that is not natural.
What if I don’t have Whoppers? Can I substitute?
Absolutely! Round malt balls are ideal, but you can also use chocolate-covered malted milk balls or even small truffles. The key is having two sizes to form the spider’s body and head.
How can I make these cookies vegan or dairy-free?
Swapping butter for a vegan butter substitute and using egg replacers can work, but keep in mind this might slightly affect the texture and spread. Also, be sure to find vegan Whoppers or similar candies.
Can these cookies be made ahead for a party?
Yes! You can bake and assemble the cookies a day or two before your event. Just store them in an airtight container in the refrigerator and decorate with eyes and legs shortly before serving for the freshest appearance.
What’s the best way to pipe chocolate legs neatly?
Using a piping bag with a fine tip or a plastic bag with a small corner cut off helps you draw precise legs. Practice on parchment paper first if you want to get comfortable before decorating your cookies.
Final Thoughts
Peanut Butter Spider Cookies: A Spooky Twist for Halloween Recipe combine creativity, flavor, and fun into an unforgettable treat for your spooky celebrations. From their soft, buttery base to the playful spider details, these cookies are sure to delight kids and adults alike. Give this recipe a try and watch your Halloween table get that perfect creepy-cute vibe everyone will love.
Print
Peanut Butter Spider Cookies: A Spooky Twist for Halloween Recipe
- Prep Time: 20 minutes
- Cook Time: 10 minutes
- Total Time: 30 minutes
- Yield: 22 cookies
- Category: Dessert
- Method: Baking
- Cuisine: American
Description
Peanut Butter Spider Cookies combine classic peanut butter cookie dough with whimsical Halloween decorations. Featuring a delicious peanut butter cookie base topped with large and small Whopper candies to resemble spider bodies and heads, these cookies are finished with piped melted chocolate legs and candy eyes for a spooky, fun treat perfect for Halloween celebrations.
Ingredients
Dry Ingredients
- 1 ½ cups all-purpose flour
- ½ teaspoon baking soda
- ½ teaspoon baking powder
Wet Ingredients and Mix-ins
- ½ cup salted butter, softened
- ½ cup granulated sugar
- ½ cup brown sugar, packed
- 1 large egg
- ½ cup creamy peanut butter (not natural)
- 1 teaspoon vanilla extract
Decorations and Toppings
- 44 Whoppers (22 large, 22 small)
- 1 cup semi-sweet chocolate chips (6 ounces)
- 1 small tube of white cake decorating gel
- ¼ cup granulated sugar (for rolling)
- Black nonpareil sprinkles (optional, for the spider eyes)
Instructions
- Preheat and Prepare Baking Sheets: Preheat your oven to 375°F (190°C). Line two baking sheets with parchment paper or silicone mats to prevent sticking and ensure even baking.
- Mix Dry Ingredients: In a medium bowl, whisk together the all-purpose flour, baking soda, and baking powder. Set this mixture aside for later incorporation.
- Cream Butter and Sugars: In a large mixing bowl, cream together the softened salted butter, granulated sugar, brown sugar, and creamy peanut butter until the mixture is light and fluffy. Then, beat in the egg and vanilla extract until fully combined.
- Combine Dry and Wet Ingredients: Gradually add the dry flour mixture into the wet ingredients, stirring gently until a thick, well-formed dough comes together.
- Shape and Sugar-Coat Dough Balls: Using a 2-tablespoon scoop, form dough balls. Roll each ball in granulated sugar to give a slight crunch and a sweet coating, then space them evenly on the prepared baking sheets.
- Bake the Cookies: Bake for 8-10 minutes until the edges turn golden and the cookies feel firm to touch. Remove the baking sheets from the oven carefully.
- Add Whopper Spider Bodies: While the cookies are still warm, press one large Whopper candy (for the spider’s body) and one small Whopper (for the head) onto the top center of each cookie to form the spider shape.
- Cool Cookies: Place the decorated cookies in the fridge for a few minutes to cool until they are firm and cool to the touch, making them easier to decorate further.
- Melt Chocolate for Legs: Microwave the semi-sweet chocolate chips in 30-second increments, stirring between each, until completely melted and smooth. Let the chocolate cool slightly before transferring it into a piping bag for decorating.
- Pipe Spider Legs: Use the melted chocolate to pipe eight legs onto each spider cookie. Form each leg in a “V” shape, placing four legs on each side of the large Whopper body to imitate spider legs.
- Create Spider Eyes: Using the white cake decorating gel, add two small dots on the smaller Whopper head to represent eyes. Optionally, add a small black nonpareil sprinkle in the center of each white dot for more realistic eyes.
- Set the Decorations: Let the cookies sit until the chocolate and gel decorations set completely. For quicker setting, refrigerate the cookies again for a few minutes before serving.
Notes
- Use creamy peanut butter instead of natural to ensure the right texture and sweetness.
- Rolling the cookie dough balls in sugar before baking adds an appealing crunch and sparkle.
- Make sure the chocolate is cool but still meltable before piping to avoid melting the candy decorations.
- Refrigerate cookies after assembling decorations to help them set firmly and maintain shape.
- Black nonpareil sprinkles are optional but add a cute and spooky touch to the spider eyes.
- Store these cookies in an airtight container at room temperature for up to 3 days or refrigerate for up to a week.


