
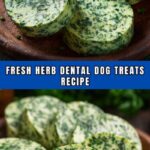
If you’re on the hunt for a delightful way to freshen your furry friend’s breath while giving them a tasty snack, the Parsley & Mint Teeth Cleaner Treats Recipe will quickly become your go-to favorite. Bursting with natural flavors from fresh mint and dried parsley, these homemade dog treats are more than just a snack—they’re a gentle, natural teeth cleaner that supports oral health. Plus, they’re easy to make with simple, wholesome ingredients that you likely already have in your pantry. Let’s dive into this fantastic recipe that your dog will love and you’ll feel great about!
Ingredients You’ll Need
These ingredients are simple, wholesome, and each one plays a vital role in the texture, flavor, and health benefits of your Parsley & Mint Teeth Cleaner Treats Recipe. From nourishing whole wheat flour to fresh herbs, every component comes together perfectly.
- 2 cups whole wheat flour (or oat flour for gluten-free): A hearty base that gives structure and a wholesome chewiness.
- ½ cup rolled oats: Adds a bit of texture and extra fiber to keep your dog feeling satisfied.
- 2 tablespoons dried parsley: This classic natural breath freshener supports oral hygiene beautifully.
- 2 tablespoons fresh mint (finely chopped): Provides a refreshing flavor and helps fight bad breath.
- 1 egg: Binds the ingredients together and adds a bit of protein.
- ⅓ cup coconut oil (melted): Adds moisture and a subtle, delicious richness while promoting a healthy coat.
- ½ cup water or low-sodium chicken broth: Helps bring the dough together with a gentle flavor boost if using broth.
How to Make Parsley & Mint Teeth Cleaner Treats Recipe
Step 1: Preheat and Prepare
Start by preheating your oven to 325°F and lining a baking sheet with parchment paper. This ensures the treats bake evenly and don’t stick, making clean-up a breeze.
Step 2: Mix the Dry Ingredients
In a large bowl, combine the whole wheat flour (or oat flour), rolled oats, dried parsley, and finely chopped fresh mint. Mixing these first helps distribute the herbs evenly, so every treat gets that perfect breath-freshening boost.
Step 3: Add Wet Ingredients and Form Dough
Next, add the egg, melted coconut oil, and your choice of water or low-sodium chicken broth to the dry mixture. Stir well until you get a stiff dough that holds together but isn’t too sticky—this will make rolling and cutting out treats much easier.
Step 4: Roll Out and Cut Shapes
Lightly flour your work surface and roll out the dough to about ¼-inch thickness. Use bone-shaped or square cookie cutters to cut out your treats—this makes them just the right size for your pup’s teeth and adds a bit of fun to the process.
Step 5: Bake and Crisp
Arrange the treats on your prepared baking sheet and bake for 25 to 30 minutes until they’re dry and lightly golden. When baking is done, turn off the oven and leave the treats inside for an extra 15 minutes to firm up and become perfectly crisp—ideal for that teeth-cleaning crunch.
Step 6: Cool Completely
Allow your Parsley & Mint Teeth Cleaner Treats Recipe creations to cool fully before serving. This step ensures they’re safe and tasty for your dog to enjoy right away.
How to Serve Parsley & Mint Teeth Cleaner Treats Recipe

Garnishes
While these treats shine on their own, if you want to add a little flair, sprinkle a tiny pinch of extra dried parsley on top after baking for a touch of color and enhanced aroma. It shows off the natural herbs deliciously and makes the treats look even more inviting.
Side Dishes
These treats make a fantastic companion to your dog’s regular meals or can be given as a reward alongside fresh veggies like carrot sticks or apple slices. Together, they make for a wholesome and varied snack lineup that promotes health from all angles.
Creative Ways to Present
Want to impress your pup? Present the treats in a decorative jar tied with a ribbon or nestled in a handmade dog-themed basket. It’s a charming way to store and offer the Parsley & Mint Teeth Cleaner Treats Recipe while keeping them fresh and ready for snack time.
Make Ahead and Storage
Storing Leftovers
Keep your homemade treats fresh for up to two weeks by storing them in an airtight container at room temperature. This prevents them from drying out and preserves their crunch and flavor, so your dog gets the best every time.
Freezing
If you want to make a big batch and save some for later, these treats freeze beautifully for up to three months. Just place them in a freezer-safe bag or container and thaw a few at a time when your dog is ready for a delicious dental treat.
Reheating
When you take frozen treats out, there’s no need to cook them again. Let them come to room temperature naturally, or pop them in a low oven for a few minutes to regain a little crispness before serving.
FAQs
Are Parsley & Mint Teeth Cleaner Treats Recipe safe for all dogs?
Yes, these treats use dog-friendly ingredients and are generally safe for most dogs. However, if your pet has specific allergies or health conditions, it’s always wise to check with your vet before introducing new treats.
Can I substitute the coconut oil?
You can use olive oil or another dog-safe oil, but coconut oil adds a unique flavor and health benefits such as improving coat and skin health, which make it a preferred choice in this recipe.
How often can I give my dog these treats?
Moderation is key! These treats can be given a few times a week as a snack or reward while helping with fresh breath and teeth cleaning, but always factor them into your dog’s overall diet.
Can I use fresh parsley instead of dried?
Fresh parsley can be used, but because it contains more moisture, you might want to slightly reduce the water or broth in the recipe to keep the dough from becoming too sticky.
Will these treats help with bad breath?
Absolutely! The combination of parsley and mint works naturally to freshen breath and support oral health, making the Parsley & Mint Teeth Cleaner Treats Recipe a smart choice for dogs who could use a little minty boost.
Final Thoughts
Honestly, there’s something so rewarding about making your dog’s treats from scratch, especially when they’re packed with natural ingredients like parsley and mint that actually help their teeth and breath. The Parsley & Mint Teeth Cleaner Treats Recipe is simple, delicious, and the perfect way to show your pup some extra love while caring for their smile. Give it a try—you and your dog will both be so glad you did!
Print
Parsley & Mint Teeth Cleaner Treats Recipe
- Prep Time: 15 minutes
- Cook Time: 30 minutes
- Total Time: 45 minutes
- Yield: 40 small treats
- Category: Pet Treats
- Method: Baking
- Cuisine: Dog Treats
Description
These Parsley & Mint Teeth Cleaner Treats are homemade dog biscuits designed to promote fresh breath and dental health in your furry friend. Made with natural ingredients like whole wheat flour, rolled oats, dried parsley, and fresh mint, they offer a healthy and tasty snack that helps clean your dog’s teeth naturally.
Ingredients
Dry Ingredients
- 2 cups whole wheat flour (or oat flour for gluten-free)
- ½ cup rolled oats
- 2 tablespoons dried parsley
- 2 tablespoons fresh mint (finely chopped)
Wet Ingredients
- 1 egg
- ⅓ cup coconut oil (melted)
- ½ cup water or low-sodium chicken broth
Instructions
- Preheat Oven: Preheat the oven to 325°F (163°C) and line a baking sheet with parchment paper to prevent sticking and ensure even baking.
- Mix Dry Ingredients: In a large bowl, combine the whole wheat flour, rolled oats, dried parsley, and finely chopped fresh mint. Stir well to evenly distribute the herbs throughout the flour mixture.
- Add Wet Ingredients: Crack in the egg, pour in the melted coconut oil, and add the water or low-sodium chicken broth. Stir everything together until a stiff dough forms, ensuring all the flour is hydrated.
- Roll Out Dough: Lightly flour a clean surface and roll out the dough to about ¼-inch thickness, making it thin enough to crisp up but sturdy enough for treats.
- Cut Shapes: Use a small bone-shaped or square cookie cutter to cut the dough into individual treats. Gather any scraps, re-roll, and continue cutting shapes until all dough is used.
- Bake Treats: Arrange the cut treats on the prepared baking sheet, ensuring they are spaced slightly apart. Bake for 25 to 30 minutes, or until the treats are dry and lightly golden on the edges.
- Crisp Up: Turn off the oven, leave the treats inside, and allow them to sit for an additional 15 minutes. This step helps the treats crisp up perfectly for dental cleaning benefits.
- Cool and Store: Remove treats from the oven and let them cool completely on a wire rack before serving or storing to maintain their crunchiness.
Notes
- Store treats in an airtight container for up to 2 weeks.
- For longer storage, freeze treats for up to 3 months.
- Always introduce new treats gradually to your dog’s diet.
- Consult your veterinarian before introducing these treats if your dog has specific dietary restrictions or health concerns.


