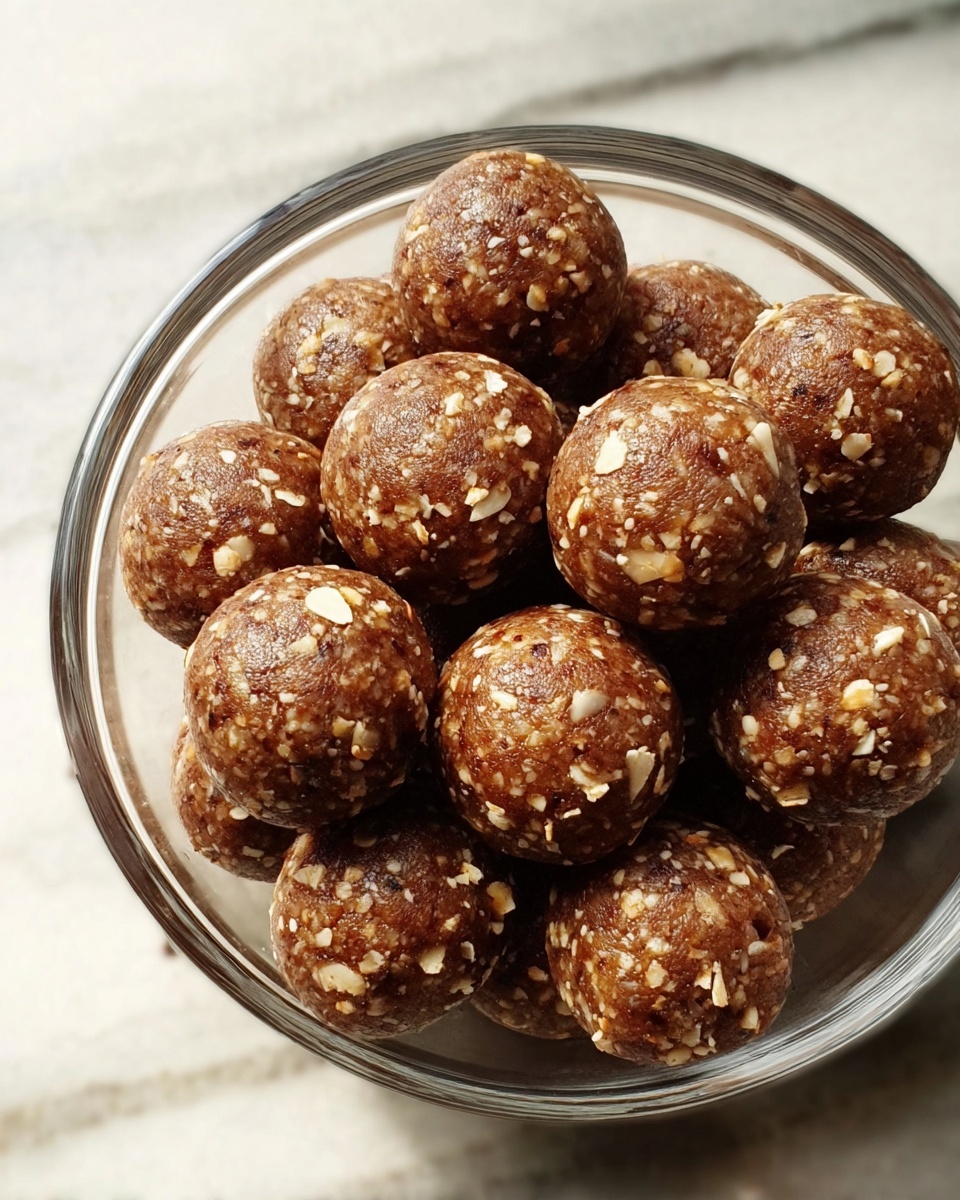
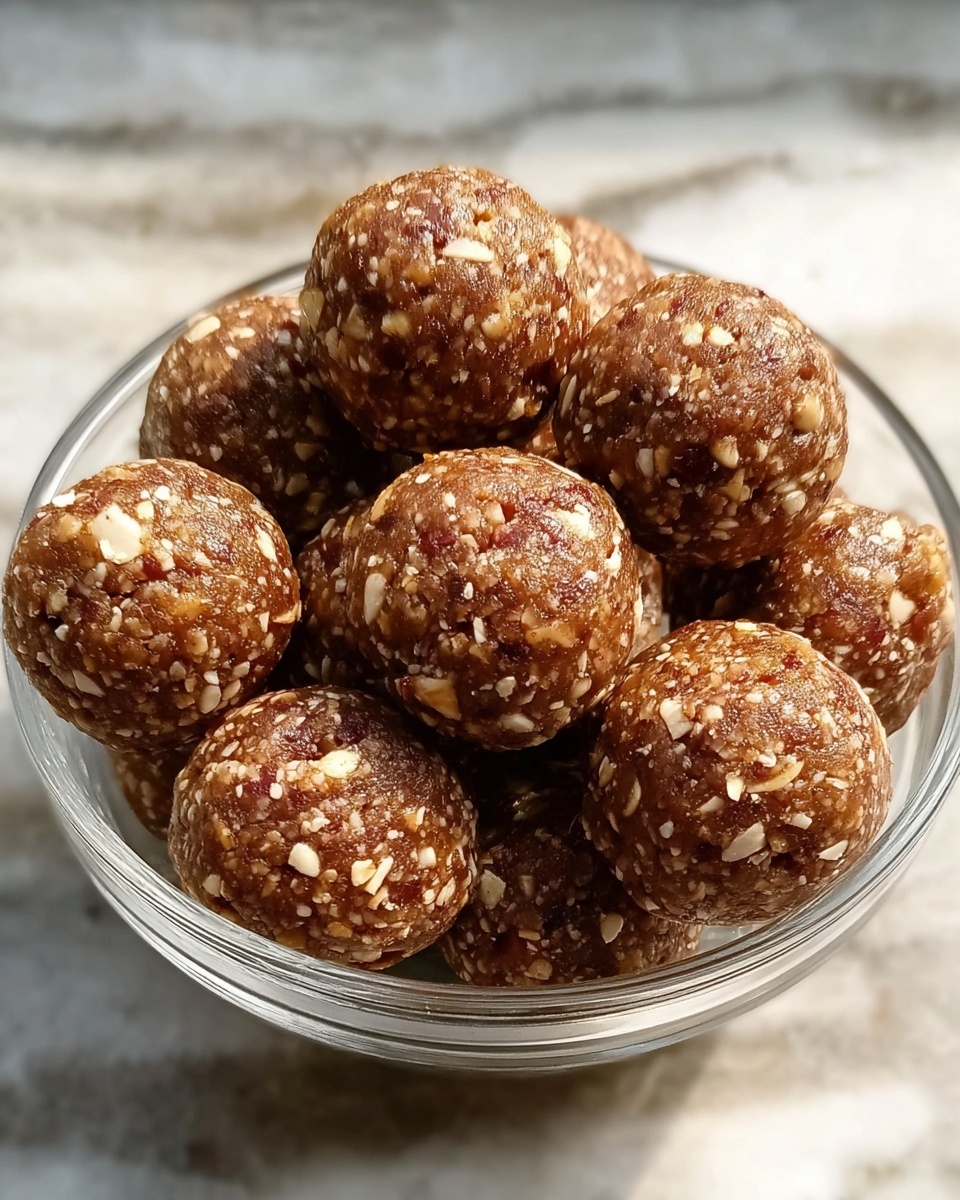
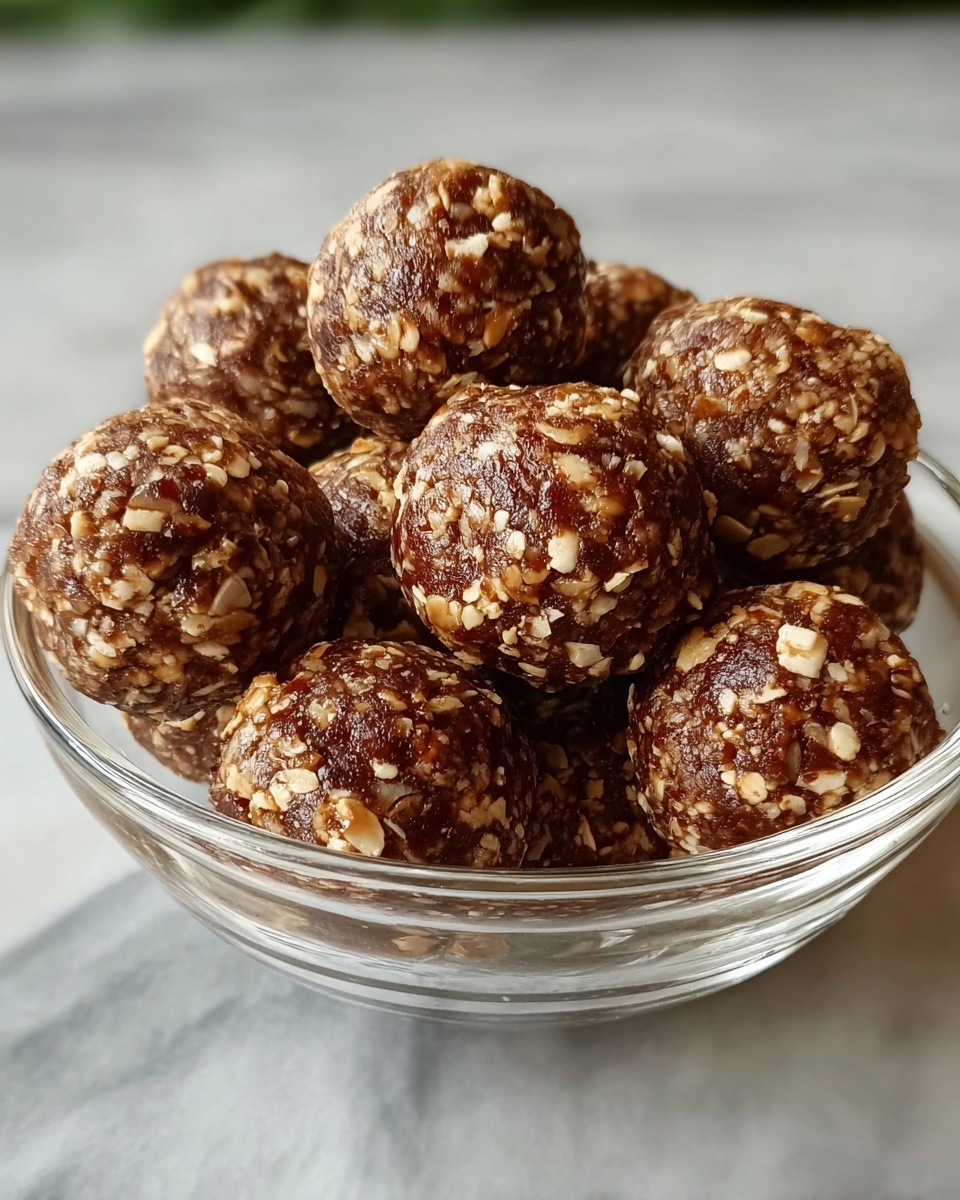
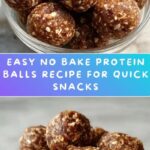
If you’re looking for a delicious and energizing snack that’s as easy to whip up as it is satisfying, you’ve hit the jackpot with this No-Bake Protein Balls Recipe. Packed with wholesome ingredients, these little bites of goodness offer the perfect balance of protein, fiber, and sweetness, making them an ideal treat for busy days, workout boosts, or just whenever you need a quick pick-me-up. What makes this recipe truly special is its simplicity—no oven required, no fuss—just pure, tasty fuel that you can customize to your liking.
Ingredients You’ll Need
Gathering your ingredients is a breeze, and each one plays an essential role in creating the perfect texture, flavor, and nutritional boost. From creamy nut butters to rich protein powder, these components come together to make every bite irresistibly satisfying.
- 1 cup rolled oats: These provide a hearty base with a chewy texture and complex carbs for lasting energy.
- 1/2 cup peanut butter (or almond/cashew butter): Adds creaminess, healthy fats, and a rich nutty flavor that binds everything beautifully.
- 1/4 cup honey or maple syrup: Natural sweetness that complements the nutty tones without overpowering the protein balls.
- 1/2 cup protein powder (vanilla, chocolate, or your choice): The star ingredient for a protein boost, customizable to your favorite flavor.
- 1/4 cup ground flaxseed or chia seeds (optional): For extra fiber, omega-3s, and a nutritional punch.
- 1/4 cup mini chocolate chips (optional): Little bursts of sweet indulgence that make these protein balls even more fun.
- 1/2 teaspoon vanilla extract: Enhances all the flavors with a fragrant warmth.
- 2-3 tablespoons water or milk (any milk of choice): Helps adjust the consistency for easy rolling without drying out the mixture.
How to Make No-Bake Protein Balls Recipe
Step 1: Combine the Dry Ingredients
Start by mixing the rolled oats, protein powder, and ground flaxseed or chia seeds (if using) in a large bowl. This dry foundation helps distribute the flavors evenly and ensures each ball has that perfect chewy texture.
Step 2: Add Nut Butter and Sweetener
Next, add the peanut butter and honey (or maple syrup) to the dry mix. Stir continuously until the mixture starts coming together—this is where the magic happens, as the rich nut butter and sweetener bind the oats and protein powder into a cohesive dough.
Step 3: Mix in the Extras
Fold in the mini chocolate chips and vanilla extract to infuse the mixture with bursts of sweetness and aromatic depth. If the dough feels too dry, slowly add water or milk one tablespoon at a time until it’s sticky enough to hold its shape but not too wet.
Step 4: Shape the Protein Balls
Using your hands, roll the mixture into small bite-sized balls, roughly 1 to 1.5 inches in diameter. Don’t worry if they’re not perfectly uniform—homespun charm counts here!
Step 5: Chill to Set
Place the formed balls on a baking sheet or plate and refrigerate for about 30 minutes. Chilling helps them firm up, making them easier to grab on the go and enhancing the flavors.
How to Serve No-Bake Protein Balls Recipe
Garnishes
To elevate your No-Bake Protein Balls Recipe, consider a light dusting of cocoa powder, crushed nuts, or a sprinkle of shredded coconut. These simple touches add texture, flavor, and an inviting look that tempts both children and adults alike.
Side Dishes
These protein balls pair beautifully with a refreshing smoothie, a cup of herbal tea, or even a glass of milk. Serving alongside fresh fruit or yogurt can also turn them into a mini-meal packed with nutrients and flavor contrast.
Creative Ways to Present
For a fun twist, arrange the protein balls on a platter with colorful edible flowers or place them in mini cupcake liners for a neat and festive presentation—perfect for parties or packed lunches. Layering them in a mason jar with nuts and dried fruits also makes for a charming gift idea or portable snack pack.
Make Ahead and Storage
Storing Leftovers
Leftover no-bake protein balls keep wonderfully in an airtight container in the refrigerator for up to a week. This makes prepping a batch ahead a lifesaver for busy mornings or mid-afternoon cravings.
Freezing
If you want to extend their shelf life even further, freeze the protein balls by laying them on a baking sheet, freezing until firm, then transferring them to a zip-top freezer bag. They maintain their freshness for up to three months and thaw quickly when you need a quick snack.
Reheating
Since these protein balls are best enjoyed chilled or at room temperature, reheating isn’t necessary. If you prefer them slightly softer, allow them to sit at room temperature for a few minutes before popping one in your mouth.
FAQs
Can I use different nut butters in this No-Bake Protein Balls Recipe?
Absolutely! Whether peanut, almond, or cashew butter, each nut butter brings its own unique flavor and texture. Feel free to mix and match to discover your favorite combination.
What kind of protein powder works best?
You can use any protein powder you like, whether it’s whey, plant-based, or collagen. Vanilla or chocolate flavored powders tend to work best for a balanced taste, but don’t hesitate to experiment.
Are these protein balls gluten-free?
They can be! Use certified gluten-free oats if gluten sensitivity is a concern to ensure the recipe remains safe and enjoyable.
Can I add other mix-ins to the recipe?
Definitely! Things like dried fruit, seeds, coconut flakes, or even espresso powder make great additions. Just keep the overall moisture balance in mind so the balls hold together.
Is this recipe kid-friendly?
Yes, kids love these bite-sized treats. They’re sweet and satisfying without any processed sugars, making them a nutritious snack option that children will ask for again and again.
Final Thoughts
Now that you know all about this easy, customizable No-Bake Protein Balls Recipe, I hope you’re as excited as I am to give it a try. These little bites are more than just a snack; they’re a quick boost of energy and nutrition you can feel good about. Perfect for busy days or anytime you want something tasty without the hassle of baking, I’m confident these protein balls will quickly become a beloved staple in your kitchen.
Print
No-Bake Protein Balls Recipe
- Prep Time: 10 minutes
- Cook Time: 0 minutes
- Total Time: 40 minutes
- Yield: 12-15 balls
- Category: Snack
- Method: No-Cook
- Cuisine: American
- Diet: Vegetarian
Description
No-Bake Protein Balls are a quick and easy snack option packed with protein, healthy fats, and natural sweetness. These nutrient-dense bites combine rolled oats, nut butter, protein powder, and optional add-ins like flaxseed and chocolate chips, making them perfect for on-the-go energy, post-workout refueling, or a healthy treat anytime.
Ingredients
Main Ingredients
- 1 cup rolled oats
- 1/2 cup peanut butter (or almond butter or cashew butter)
- 1/4 cup honey or maple syrup (or any sweetener of your choice)
- 1/2 cup protein powder (vanilla, chocolate, or your preferred flavor)
- 1/4 cup ground flaxseed or chia seeds (optional for extra fiber and nutrients)
- 1/4 cup mini chocolate chips (optional, for a sweet touch)
- 1/2 teaspoon vanilla extract
- 2–3 tablespoons water or milk (any milk of choice, or adjust for desired consistency)
Instructions
- Combine Dry Ingredients: In a large mixing bowl, add 1 cup rolled oats, 1/2 cup protein powder, and 1/4 cup ground flaxseed or chia seeds if using. Stir together until evenly mixed.
- Add Wet Ingredients: Add 1/2 cup peanut butter, 1/4 cup honey or maple syrup, and 1/2 teaspoon vanilla extract to the dry mixture. Stir to combine thoroughly.
- Adjust Consistency: Gradually add 2 to 3 tablespoons of water or milk, one tablespoon at a time, mixing until the dough reaches a sticky but workable consistency suitable for rolling.
- Mix in Chocolate Chips: Fold in 1/4 cup mini chocolate chips if desired, gently mixing to distribute them evenly throughout the mixture.
- Shape the Balls: Using your hands, scoop out about a tablespoon of the mixture and roll it into a small ball. Repeat until all mixture is used, yielding approximately 12 to 15 balls.
- Chill to Set: Place the balls on a baking sheet or plate lined with parchment paper and refrigerate for at least 30 minutes to allow them to firm up and hold their shape.
- Serve and Store: Enjoy immediately after chilling or store in an airtight container in the refrigerator for up to one week for a convenient, healthy snack.
Notes
- You can substitute the nut butter with your favorite variety or use sunflower seed butter for a nut-free option.
- Adjust the sweetness to taste by varying the amount or type of sweetener used.
- Add-ins like chopped nuts, dried fruit, or seeds can be included for extra texture and flavor.
- For vegan or dairy-free versions, choose plant-based protein powder and use maple syrup with plant milk instead of honey and dairy milk.
- If the mixture is too dry, add a little more liquid; if too wet, add extra oats or protein powder to balance.
- These balls are perfect for freezing; just thaw a few minutes before eating.


