
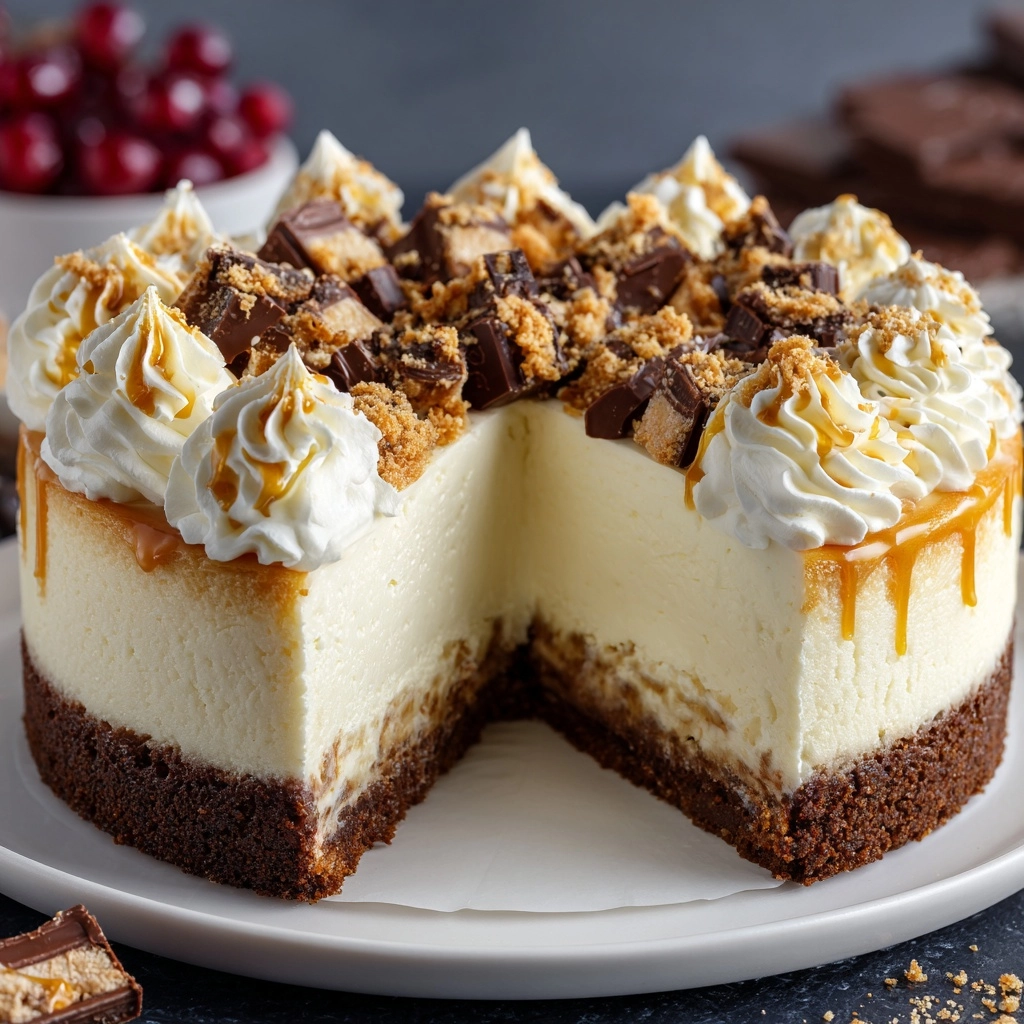
If you’re after a dessert that’s as indulgent as it is effortless, look no further than this No-Bake Cheesecake. Creamy, dreamy, and nestled on a buttery graham cracker crust, this classic treat comes together in just a few steps—no oven required! Each slice delivers velvety richness and a bright, tangy finish thanks to a hint of lemon and vanilla. Whether you top it with clouds of whipped cream, fresh fruit, or your favorite pie filling, No-Bake Cheesecake promises to steal the show at any gathering, or simply spoil you on a quiet evening in.
Ingredients You’ll Need
What I love most about this recipe is how each simple ingredient pulls its weight to create that signature creamy texture and familiar flavor you crave. From the buttery crunch of the crust to the silky-smooth filling, every component adds something special. Let’s take a closer look at what you’ll need!
- Graham cracker crumbs: The foundation of any great No-Bake Cheesecake, lending a sweet, slightly toasty base that holds everything together.
- Granulated sugar: Sweetens the crust and perfectly balances the creaminess of the filling without overpowering it.
- Unsalted butter (melted): Binds your crust and brings that irresistibly rich, melt-in-your-mouth texture.
- Cream cheese (softened): The star of the show! Softening it ensures a smooth, lump-free cheesecake every time.
- Sweetened condensed milk: Adds velvety body and balanced sweetness, making this dessert almost magically smooth.
- Lemon juice: A little acidity lifts the flavors, giving the cheesecake its fresh, bright finish and helping it set.
- Vanilla extract: Deepens the flavor, adding beautiful warmth and aroma to each bite.
- Whipped cream and fresh fruit or pie filling (optional): The perfect finishing touch—dress up your No-Bake Cheesecake as you like for that wow factor!
How to Make No-Bake Cheesecake
Step 1: Make the Crust
Start by stirring together the graham cracker crumbs, sugar, and melted butter in a medium bowl. Mix until every crumb is coated, and the mixture looks and feels just like damp sand. This texture is key! Firmly press it into the base of a 9-inch springform pan, making sure your crust is even and compact—this is what will hold the creamy filling. Pop it in the refrigerator to chill while you move on to the next step.
Step 2: Beat the Cream Cheese
Place the softened cream cheese in a large bowl. With a hand mixer or stand mixer, beat it on medium speed until silky, smooth, and a little bit fluffy. You want to see no lumps here—take your time and let the mixer do its magic for the dreamiest No-Bake Cheesecake texture!
Step 3: Mix in the Filling Ingredients
Add the sweetened condensed milk, lemon juice, and vanilla extract to your perfectly whipped cream cheese. Beat again until everything is fully combined and the mixture is beautifully smooth. Scrape down the sides of the bowl as needed, ensuring no streaks remain. At this point, resist the urge to sneak a spoonful… or don’t, I won’t tell!
Step 4: Assemble and Chill
Pour the luscious cheesecake filling over the chilled crust. Spread it evenly and give the pan a gentle tap on the counter to smooth things out and release any pesky air bubbles. Cover tightly with plastic wrap and chill in the refrigerator for at least 6 hours, or overnight for the best results. This is the hardest part—the wait sets your No-Bake Cheesecake and lets the flavors fully develop.
Step 5: Top and Serve
When your cheesecake is firm and ready, run a thin knife around the edge of the pan to easily release it. Decorate it with clouds of whipped cream, fresh seasonal fruit, or even a glossy berry or cherry pie filling. Now slice, serve, and bask in the well-deserved compliments!
How to Serve No-Bake Cheesecake

Garnishes
Topping your No-Bake Cheesecake is where you can get truly creative! I adore a puff of homemade whipped cream and a tumble of fresh berries—think strawberries, blueberries, or blackberries for stunning color and juicy tartness. For something classic and nostalgic, reach for a can of cherry or blueberry pie filling for a glossy, crowd-pleasing finish. You could even sprinkle on chocolate shavings or drizzle a caramel sauce for extra decadence.
Side Dishes
A rich cheesecake is the ideal main event at dessert time, so I like to pair it with something light and refreshing. Try serving your slices alongside a simple fruit salad, a glass of icy lemonade, or a pot of fresh-brewed coffee to balance the creamy sweetness. For fancy occasions, a tangy raspberry coulis on the side makes every bite sing even more!
Creative Ways to Present
No-Bake Cheesecake doesn’t have to be just one big pie. Make them in individual jars or small ramekins for adorable dinner party mini-desserts, or layer the ingredients in clear glasses for an elegant parfait effect. If you love a chocolate twist, try using chocolate cookie crumbs for the crust and finish with a dusting of cocoa. The possibilities are endless—let your creativity be your guide!
Make Ahead and Storage
Storing Leftovers
One of the best things about No-Bake Cheesecake is how well it keeps. Simply cover any leftover slices tightly with plastic wrap or place in an airtight container, and refrigerate. It will stay fresh for up to 4 days. If you’ve added fruit toppings, you may want to keep those separate until you’re ready to eat, to avoid sogginess.
Freezing
This cheesecake freezes wonderfully, making it a fantastic make-ahead dessert. Wrap the entire pan or individual slices tightly in plastic wrap and then in foil to avoid freezer burn. Freeze for up to 2 months. When ready to enjoy, thaw overnight in the refrigerator. Top just before serving to preserve texture and flavor.
Reheating
No-Bake Cheesecake is meant to be enjoyed chilled, so there’s no need to reheat it! In fact, a cool, creamy slice straight from the fridge is the ultimate treat, especially on a warm day. If frozen, just allow it to thaw fully in the fridge before serving so you don’t lose any of that luxurious texture.
FAQs
Can I make No-Bake Cheesecake without a springform pan?
Absolutely! While a springform pan gives a beautiful, clean edge and makes serving a breeze, you can also use a regular pie dish or even assemble the cheesecake in individual jars or cups. Just make sure to line the base with parchment paper if you want to remove the whole cheesecake easily.
Why does my No-Bake Cheesecake have lumps?
Lumps often happen if the cream cheese isn’t fully softened before mixing. For the smoothest possible filling, set your cream cheese out on the counter an hour ahead, and beat until completely creamy before adding the other ingredients. Scrape down the bowl as you mix for that signature velvety texture.
Can I use low-fat cream cheese or dairy-free alternatives?
Yes, you can substitute low-fat or dairy-free cream cheese, though it may change the texture or flavor slightly. Full-fat cream cheese results in the richest, thickest No-Bake Cheesecake, but lighter versions still set up fairly well, especially if paired with a stabilizer like a little extra lemon juice or cornstarch.
Is it safe to leave No-Bake Cheesecake out of the fridge?
No-Bake Cheesecake needs to stay chilled; otherwise the filling can soften and even spoil quickly due to the dairy ingredients. Keep it refrigerated until right before serving and return leftovers promptly for the best taste and food safety.
What should I do if my cheesecake doesn’t set?
If your No-Bake Cheesecake is still jiggly after chilling, it might just need more time in the refrigerator. Give it a couple more hours. Be sure to use full-fat cream cheese and sweetened condensed milk, and double check your ingredient measurements for best results!
Final Thoughts
A slice of homemade No-Bake Cheesecake is always a reason to smile, no matter the occasion. This recipe blends classic flavor with sheer simplicity, so even beginner bakers can shine. I hope you try it soon, share it with loved ones, and let this fuss-free dessert become a new favorite at your table!
Print
No-Bake Cheesecake Recipe
- Prep Time: 15 minutes
- Cook Time: 0 minutes
- Total Time: 6 hours 15 minutes (including chilling)
- Yield: 8 servings
- Category: Dessert
- Method: No-Bake
- Cuisine: American
- Diet: Non-Vegetarian
Description
This No-Bake Cheesecake recipe is a delightful and easy-to-make dessert that requires no oven time. Creamy and decadent, it features a luscious cream cheese filling on a buttery graham cracker crust, topped with whipped cream and fruit. Perfect for any occasion!
Ingredients
Graham Cracker Crust:
- 1½ cups graham cracker crumbs
- ⅓ cup granulated sugar
- ½ cup unsalted butter, melted
Cheesecake Filling:
- 450g (16 oz) cream cheese, softened
- 1 can (397g / 14 oz) sweetened condensed milk
- ¼ cup lemon juice
- 1 teaspoon vanilla extract
Topping (Optional):
- Whipped cream
- Fresh fruit or pie filling
Instructions
- Graham Cracker Crust: In a medium bowl, mix graham cracker crumbs, sugar, and melted butter until sandy. Press into a 9-inch springform pan and chill.
- Cheesecake Filling: Beat cream cheese until smooth. Add condensed milk, lemon juice, and vanilla. Pour over crust and refrigerate for at least 6 hours.
- Serving: Top with whipped cream and fruit before serving.
Notes
- Ensure cream cheese is fully softened
- For a chocolate variation, use crushed chocolate cookies
- Best consumed within 3–4 days stored in the refrigerator
Nutrition
- Serving Size: 1 slice
- Calories: 410
- Sugar: 26g
- Sodium: 280mg
- Fat: 28g
- Saturated Fat: 17g
- Unsaturated Fat: 9g
- Trans Fat: 0g
- Carbohydrates: 34g
- Fiber: 0g
- Protein: 6g
- Cholesterol: 75mg

