“`html
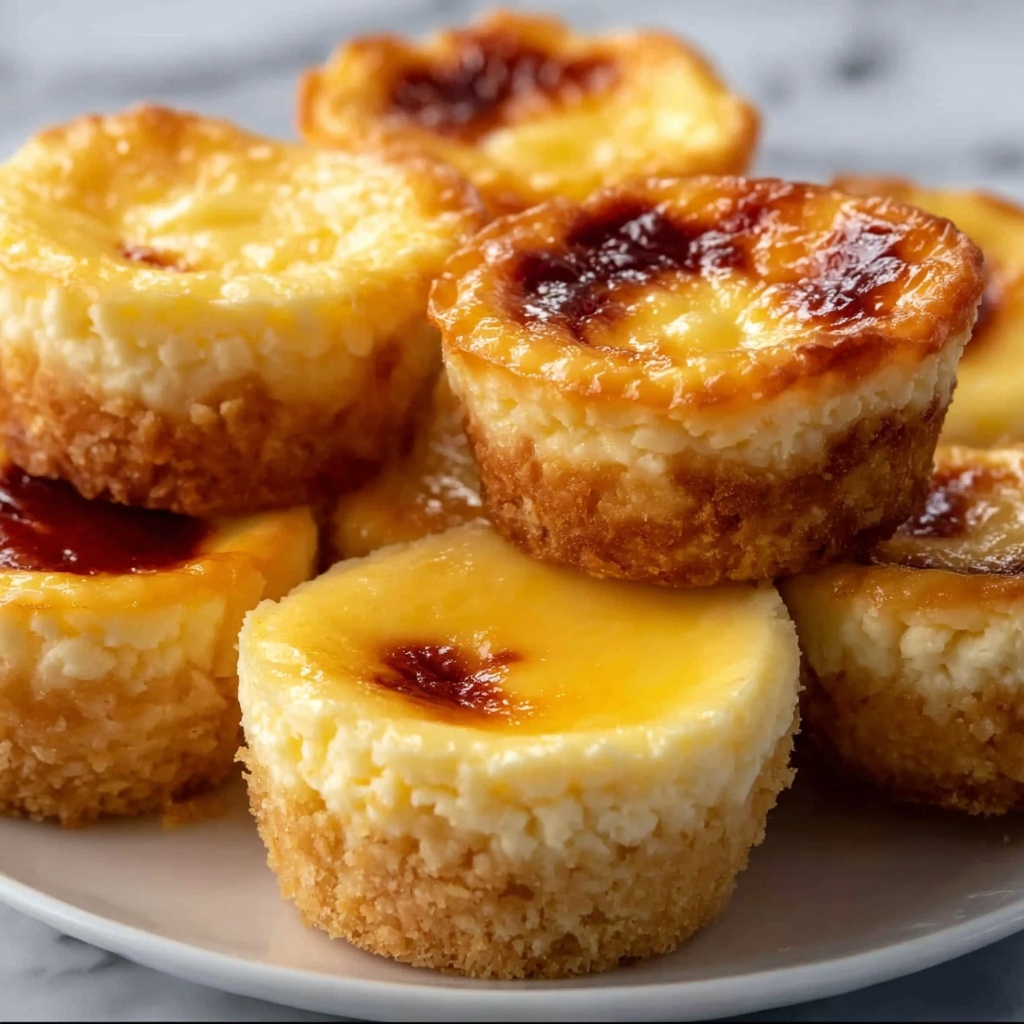
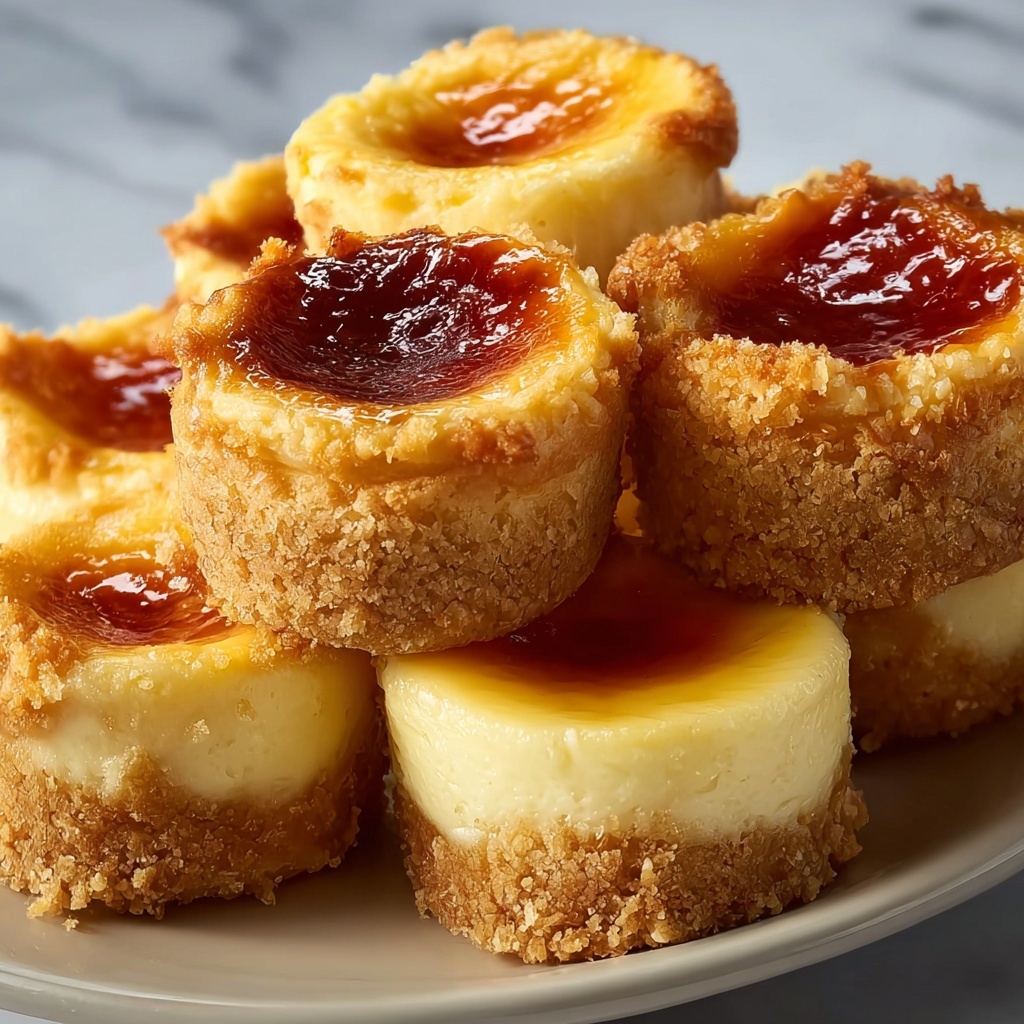
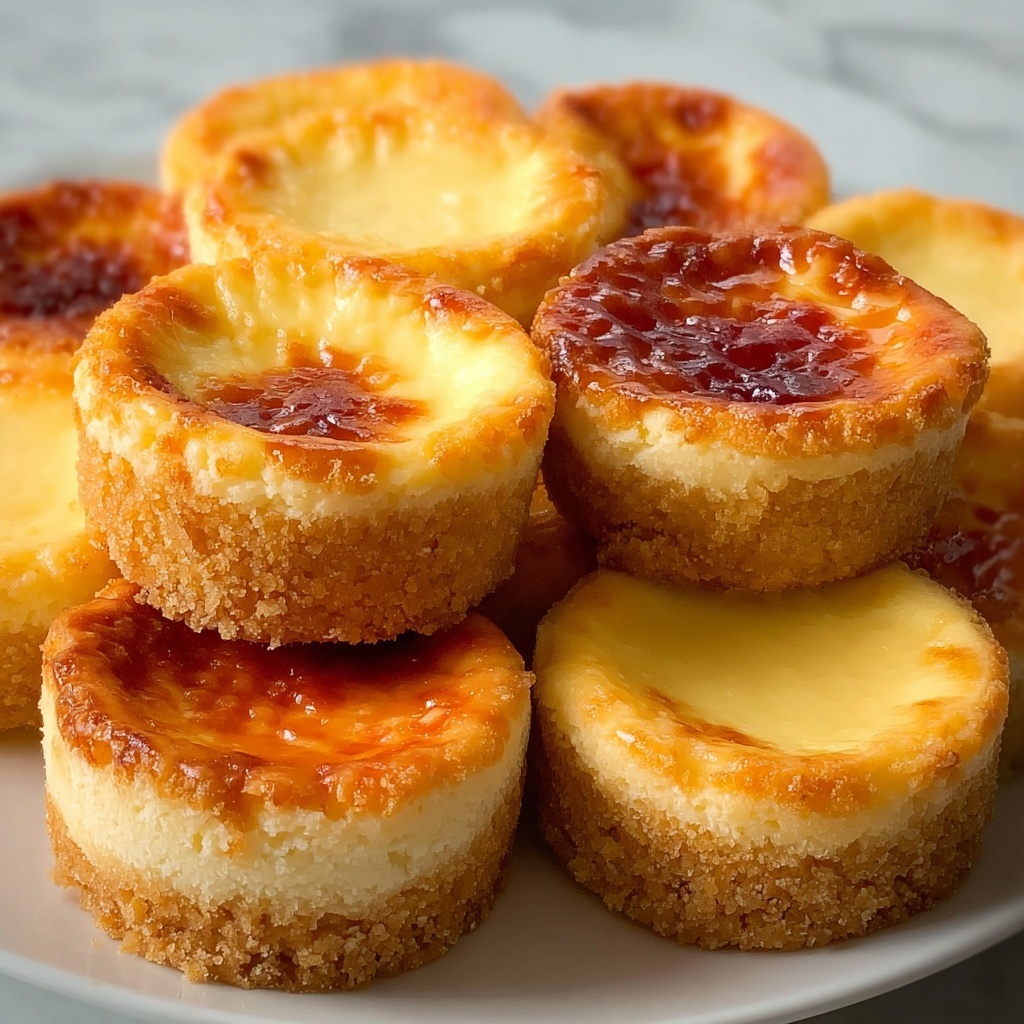
If you’re on the hunt for a delightful little treat that combines creamy, tangy richness with a buttery, crunchy crust, look no further than this Mini Cheesecake Tarts Recipe. These charming bite-sized desserts are a perfect crowd-pleaser, bursting with fresh berries or a drizzle of caramel that makes each tartlet sing with flavor. Whether you’re prepping for a party, a family gathering, or just craving something sweet and elegant, these mini cheesecake tarts are a fantastic choice that delivers huge satisfaction in a petite package.
Ingredients You’ll Need
Getting started with this Mini Cheesecake Tarts Recipe is a breeze thanks to the simplicity and accessibility of the ingredients. Each component brings something key to the table — from the crisp, buttery crust to the fluffy, tangy cream cheese filling that makes these tarts irresistible.
- Graham cracker crumbs: The base of the crust, providing a sweet and crunchy foundation.
- Granulated sugar: Adds sweetness to balance the tartness of the cream cheese.
- Unsalted butter, melted: Binds the crust ingredients together and adds richness.
- Cream cheese, softened: The star of the filling, delivering that classic cheesecake creaminess.
- Powdered sugar: Sweetens the filling with a smooth texture and is also used for whipping cream.
- Vanilla extract: Infuses a warm, aromatic hint that elevates the overall taste.
- Heavy whipping cream: Whipped into stiff peaks, it lightens the filling, giving it that fluffy texture.
- Fresh berries: Blueberries, strawberries, raspberries, or any favorite berries add vibrant color and fresh flavor.
- Chocolate shavings or drizzle: For a decadent touch that pairs beautifully with the creamy filling.
- Caramel sauce: Adds a luscious, sweet depth to the finished tarts.
- Fruit preserves: Apricot, strawberry, or your preferred flavor bring a bright, fruity sweetness for garnish.
How to Make Mini Cheesecake Tarts Recipe
Step 1: Prepare the Crust
Preheat your oven to 350°F (175°C). This step sets the stage for the perfect golden crust that will hold all the creamy goodness. The warmth also helps to slightly toast the graham cracker crumbs, deepening their flavor beautifully.
Step 2: Combine Crust Ingredients
In a medium bowl, mix together the graham cracker crumbs, granulated sugar, and melted butter. Stir until the mixture is evenly combined and feels like damp sand. This ensures each tart shell will have that ideal crumbly, buttery texture we love.
Step 3: Form the Crust in Tart Pans
Spoon about a tablespoon of the crust mixture into each tart pan or muffin tin. Press down firmly using the back of a spoon or your fingertips to create an even, compact base. This will help the crust hold its shape after baking.
Step 4: Bake and Cool the Crusts
Bake the crusts for 5-7 minutes until they turn a lovely golden brown. Once out of the oven, allow them to cool completely – this helps them set firmly, so the filling doesn’t seep through.
Step 5: Make the Cheesecake Filling
Beat the softened cream cheese in a bowl using a hand mixer on medium speed until it’s smooth and creamy. This is key to achieving that iconic cheesecake texture — no lumps allowed!
Step 6: Sweeten the Filling
Add powdered sugar and vanilla extract to the cream cheese and continue mixing until everything is fully blended. The powdered sugar ensures sweetness without graininess, and the vanilla adds a luscious aroma.
Step 7: Whip the Heavy Cream
In a separate bowl, whip the heavy whipping cream along with powdered sugar until stiff peaks form. This step lightens the filling, making each mini tart delightfully airy and smooth.
Step 8: Fold Whipped Cream into Cream Cheese Mixture
Gently fold the whipped cream into the cream cheese mixture with a spatula. Take your time to maintain that fluffy texture — this is what gives the filling a heavenly lift and creamy mouthfeel.
Step 9: Fill the Tart Shells
Once the crusts have cooled, spoon the cheesecake mixture into each tart shell. Smooth the tops with a spatula, and don’t be shy about filling them up slightly past the edges for an impressive height.
Step 10: Chill to Set
Refrigerate the assembled tarts for at least two hours. This chilling time lets the filling firm up properly, so every bite holds together perfectly without the filling sliding out.
Step 11: Add Your Toppings
Once chilled, crown your mini cheesecake tarts with toppings like fresh berries, chocolate shavings, caramel drizzle, or a spoonful of fruit preserves. These finishing touches add not only flavor contrasts but also eye-catching beauty.
Step 12: Serve and Enjoy
Serve the mini cheesecake tarts chilled. Each bite is a harmonious balance of crisp crust, creamy filling, and vibrant toppings – a mini dessert experience that’s bound to impress.
How to Serve Mini Cheesecake Tarts Recipe
Garnishes
Garnishing your Mini Cheesecake Tarts Recipe is where creativity can truly shine. Fresh berries provide a juicy, tangy pop that complements the rich filling brilliantly. Chocolate shavings or a drizzle of caramel add a decadent twist, while a dollop of fruit preserves offers a slightly tart sweetness that plays beautifully with the creamy base.
Side Dishes
Serve your mini tarts alongside a cup of freshly brewed coffee or a delicate tea to balance their sweetness. A light fruit salad or a citrus sorbet can also be wonderful companions, as their refreshing qualities cut through the richness and keep the palate feeling fresh.
Creative Ways to Present
Presentation elevates these little delights from simple treats to show-stoppers. Arrange the tarts on a beautiful platter with a dusting of powdered sugar, or on a tiered dessert stand for an elegant touch. You can also serve them in decorative paper liners or atop edible flower petals to impress guests with both taste and style.
Make Ahead and Storage
Storing Leftovers
If you have leftover mini cheesecake tarts (and who wouldn’t want some?), keep them in an airtight container in the refrigerator. They’ll stay fresh and creamy for up to three days, making for a perfect next-day indulgence.
Freezing
These tarts also freeze well! Place them on a baking sheet to freeze individually before transferring to a freezer-safe container. Frozen mini cheesecake tarts can be stored for up to one month. Just thaw them in the fridge overnight before serving to enjoy that smooth texture.
Reheating
Since these are best enjoyed chilled, reheating isn’t necessary or recommended. However, if you prefer them slightly less cold, simply let them sit at room temperature for 10-15 minutes before digging in.
FAQs
Can I use store-bought graham cracker crumbs?
Absolutely! Store-bought graham cracker crumbs work great and save time, but you can also make your own by crushing graham crackers if you prefer a fresher taste.
What can I substitute for heavy whipping cream?
If you can’t find heavy whipping cream, use whipping cream with at least 30% fat content. Avoid using milk or half-and-half as they won’t whip properly.
Can these mini tarts be made dairy-free?
With some ingredient swaps like dairy-free cream cheese and plant-based whipped cream, you can adapt the recipe to be dairy-free. Just be sure to test the texture as it may differ slightly.
How long do the Mini Cheesecake Tarts need to chill?
Chilling for at least two hours is essential to allow the filling to set properly. If you have more time, chilling overnight will provide an even firmer and more delicious result.
Can I make Mini Cheesecake Tarts Recipe gluten-free?
Yes! Use gluten-free graham cracker crumbs or substitute with finely crushed gluten-free cookies to keep the crust gluten-free without sacrificing flavor.
Final Thoughts
There is something so joyful about creating and sharing these Mini Cheesecake Tarts Recipe. The balance of textures and flavors in a petite form makes them a perfect treat any time you want to impress or indulge yourself without hours in the kitchen. Give this recipe a try and see just how easily you can elevate simple ingredients into a truly delightful dessert experience your friends and family will rave about!
“`
Print
Mini Cheesecake Tarts Recipe
- Prep Time: 20 minutes
- Cook Time: 7 minutes
- Total Time: 2 hours 27 minutes
- Yield: 12 mini tarts
- Category: Dessert
- Method: Baking
- Cuisine: American
Description
These Mini Cheesecake Tarts feature a buttery graham cracker crust filled with a smooth, creamy cheesecake mixture. Topped with fresh berries, chocolate shavings, caramel sauce, and fruit preserves, they make a perfect bite-sized dessert that’s easy to prepare and delightful to serve at any occasion.
Ingredients
For the Crust
- 1 ½ cups graham cracker crumbs
- ¼ cup granulated sugar
- 6 tablespoons unsalted butter, melted
For the Cheesecake Filling
- 8 oz cream cheese, softened
- ½ cup powdered sugar
- 1 teaspoon vanilla extract
- 1 cup heavy whipping cream
- 2 tablespoons powdered sugar (for whipped cream)
Toppings
- Fresh berries (blueberries, strawberries, raspberries, etc.)
- Chocolate shavings or drizzle
- Caramel sauce
- Fruit preserves (apricot, strawberry, etc.)
Instructions
- Preheat the Oven: Preheat your oven to 350°F (175°C) to prepare for baking the tart crusts.
- Mix the Crust Ingredients: In a medium bowl, combine the graham cracker crumbs, granulated sugar, and melted butter. Mix thoroughly until the crumbs are evenly coated and the mixture resembles wet sand.
- Form the Crusts: Spoon about 1 tablespoon of the crust mixture into each tart pan or muffin tin cup. Press the crumbs firmly into the bottom to form an even crust layer.
- Bake the Crust: Place the filled tart pans in the oven and bake the crusts for 5-7 minutes until they turn golden brown. Remove and let cool completely to ensure firmness for the filling.
- Prepare the Cheesecake Filling: Using a hand mixer, beat the softened cream cheese in a medium mixing bowl on medium speed until it becomes smooth and creamy.
- Add Sweeteners and Flavor: Blend in the powdered sugar and vanilla extract with the cream cheese until fully incorporated and smooth.
- Whip the Cream: In a separate bowl, whip the heavy cream with 2 tablespoons powdered sugar using an electric mixer until stiff peaks form. This should take about 2-3 minutes.
- Combine Filling: Gently fold the whipped cream into the cream cheese mixture using a spatula until the mixture is smooth and homogenous without deflating the air whipped into the cream.
- Assemble the Tarts: Once the crusts have cooled, spoon the cheesecake filling into each tart shell, smoothing the tops with a spatula. Fill slightly over the edge if you prefer taller tarts.
- Chill to Set: Refrigerate the assembled tarts for at least 2 hours to allow the cheesecake filling to fully set and firm up.
- Add Toppings: After chilling, adorn each tart with your choice of fresh berries, chocolate shavings, caramel drizzle, or fruit preserves to add flavor and decoration.
- Serve and Enjoy: Serve these mini cheesecake tarts chilled for a creamy, sweet, and refreshing dessert experience.
Notes
- You can substitute tart pans with muffin tins if necessary, lining with cupcake liners to prevent sticking.
- For best results, ensure cream cheese is softened to room temperature before mixing for a smoother filling.
- Feel free to experiment with different fruit toppings or sauces to customize flavors.
- Leftover tarts can be stored in an airtight container in the refrigerator for up to 3 days.


