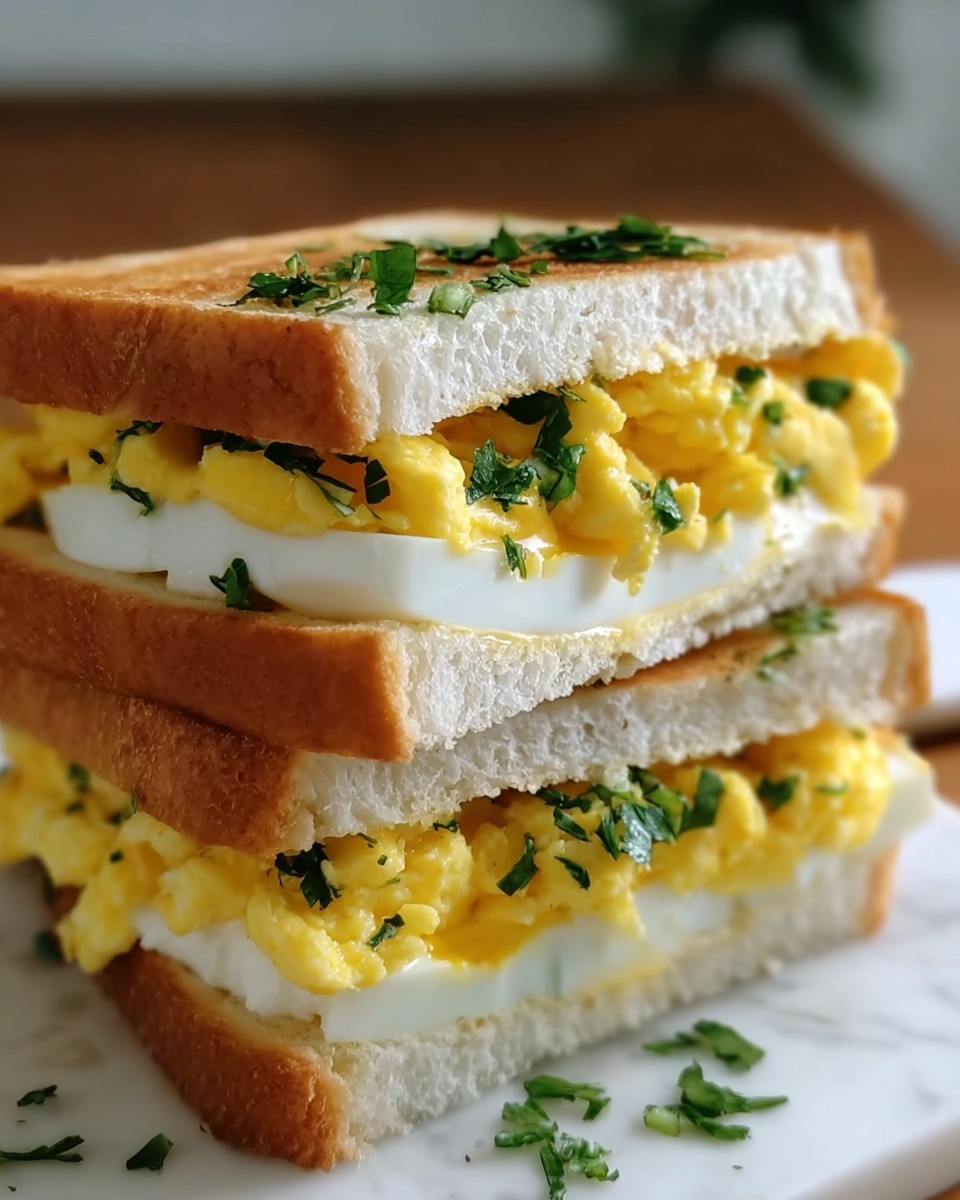
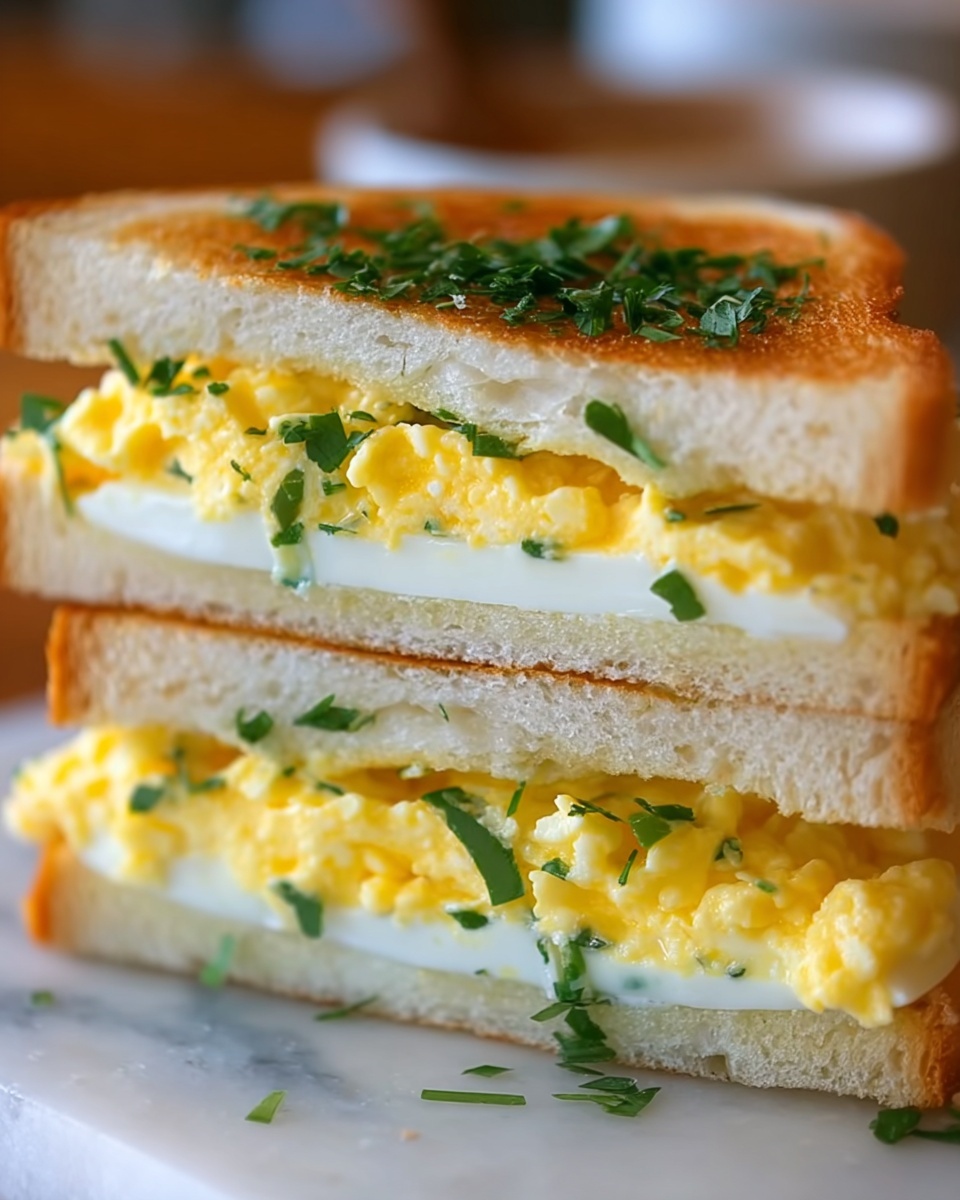
If you’ve ever craved a sandwich that feels like a warm, comforting hug, let me introduce you to the magic of the Japanese Egg Sandwich (Tamago Sando) Recipe. This simple yet unbelievably creamy and fluffy sandwich transforms everyday eggs into a velvety delight, all nestled between perfectly soft milk bread. It’s the kind of snack that’s both nostalgic and fresh, a staple in Japanese convenience stores for a reason. Every bite bursts with subtle sweetness, a hint of savory mayo, and that melt-in-your-mouth texture you didn’t know you were missing.

Ingredients You’ll Need
The beauty of this sandwich lies in its simplicity. Each ingredient is carefully chosen to build layers of flavor and texture without overwhelming the delicate egg salad. From the tender, rich eggs to the iconic Japanese milk bread, these essentials come together to create the perfect balance of creamy, fluffy, and buttery goodness.
- 6 large eggs: The star of the dish, bringing rich protein and a creamy texture once boiled and mashed.
- 1/4 teaspoon sugar: Adds a subtle sweetness that elevates the egg salad beyond ordinary.
- 1/4 teaspoon salt: Enhances and balances the flavors for that crave-worthy taste.
- 1/4 teaspoon ground black pepper: Adds just a whisper of warmth and spice.
- 1-2 teaspoons milk or plant milk (optional): Helps lighten the egg salad if using hard-boiled eggs, making it silkier.
- 4 tablespoons Japanese mayonnaise: The secret ingredient that keeps the salad incredibly creamy and slightly tangy.
- 4 slices Japanese milk bread: Soft, fluffy, and slightly sweet, this bread is essential to the sandwich’s comforting texture.
- 2 tablespoons unsalted butter, softened: Adds richness and moisture to the bread, making the sandwich extra indulgent.
- Chives, sliced (optional): A fresh, mild onion flavor perfect for garnish and extra color.
How to Make Japanese Egg Sandwich (Tamago Sando) Recipe
Step 1: Prepare the Ice Bath
Start by filling a large bowl with ice water – this is your cool-down station for the eggs, a crucial step to stop the cooking process instantly. It ensures that your eggs stay tender and easy to peel.
Step 2: Boil the Eggs Perfectly
Bring a medium-sized pot of water to a rolling boil. Using a ladle, gently lower the eggs into the water. Boil for 7 minutes if you want them medium-soft, luscious in the center, or 10 minutes for a firmer hard-boiled texture. This timing is everything for capturing that perfect creamy bite in your sandwich.
Step 3: Cool and Peel
Quickly transfer the eggs into the ice bath and let them chill for 2 minutes. This shocking cold water stops the cooking and makes peeling a breeze. Once cooled, peel your eggs with gentle care to keep the texture smooth.
Step 4: Mash the Eggs
Place the peeled eggs in a large bowl and mash them with a fork until fluffy but still a bit chunky. You want texture, not a paste.
Step 5: Mix in the Seasonings
Add the sugar, salt, pepper, Japanese mayonnaise, and if you’re using hard-boiled eggs, stir in the milk or plant milk. Mix everything thoroughly until creamy and beautifully blended. Taste and adjust the seasoning to make it just right for your palate.
Step 6: Butter the Bread Slices
Spread about 1/2 tablespoon of softened unsalted butter on each slice of Japanese milk bread. This step might seem small but it adds that luxurious moisture and flavor that cradles the egg salad beautifully.
Step 7: Assemble the Sandwich
Generously spread the egg salad on one slice of the buttered bread. Top it with the other slice, butter side down. Press the sandwich gently to keep everything together without squashing the soft filling.
Step 8: Trim and Garnish
Carefully cut off the crusts to reveal the perfect square of creamy egg goodness. If you love a pop of fresh color and flavor, sprinkle some sliced chives on top before cutting the sandwich in half. Serve immediately for the best experience.
How to Serve Japanese Egg Sandwich (Tamago Sando) Recipe
Garnishes
While the sandwich shines on its own, fresh chives or finely chopped parsley add a lovely herbal note and new layer of texture to balance the richness. A sprinkle of smoked paprika or a dash of togarashi can also offer a gentle, exciting kick.
Side Dishes
This sandwich pairs beautifully with a light green salad dressed in citrus vinaigrette or a small bowl of miso soup for a more authentic touch. Crispy pickles or simple vegetable chips also complement the creamy egg filling perfectly by adding crunch.
Creative Ways to Present
Try cutting the sandwich into cute triangles or bite-sized squares for an elegant party platter. You can also add layers of thin cucumber or avocado slices inside for extra freshness, turning the Japanese Egg Sandwich (Tamago Sando) Recipe into a stunning lunchbox or picnic star.
Make Ahead and Storage
Storing Leftovers
If you have any leftover sandwiches, wrap them individually in plastic wrap and store them in the fridge. They are best enjoyed within two days to preserve the softness of the bread and the creamy texture of the egg salad.
Freezing
Freezing this sandwich is not recommended since the bread will become soggy upon thawing, and the egg salad texture will degrade. For best results, prepare fresh or enjoy leftovers cold within a couple of days.
Reheating
Since this is best served chilled or at room temperature, reheating isn’t necessary. If you prefer the butter melted, gently warm the sandwich in a nonstick pan on low heat for about 30 seconds per side, but be careful not to overheat and dry out the filling.
FAQs
Can I use regular mayonnaise instead of Japanese mayonnaise?
While regular mayonnaise can work, Japanese mayonnaise has a slightly sweeter and tangier profile that really elevates the sandwich. If you don’t have it, add a tiny bit of sugar to regular mayo to mimic the flavor.
What type of bread is best for Tamago Sando?
Japanese milk bread, known as Shokupan, is soft, fluffy, and slightly sweet, making it ideal. If you can’t find it, a very soft white sandwich bread works, but avoid dense or crusty breads to maintain the sandwich’s signature texture.
Can I make this sandwich vegan or dairy-free?
To make a vegan version, try mashed silken tofu or chickpea mash in place of eggs, and use plant-based mayonnaise. For dairy-free, just swap out the butter and milk for vegan alternatives.
How do I get the perfect soft-boiled egg?
Boil your eggs for exactly 7 minutes once water is boiling, then cool immediately in ice water. This timing keeps the yolk creamy, which adds that luscious texture to the sandwich.
Can I add other ingredients to the egg salad?
Absolutely! Some diced cucumbers, a bit of chopped ham, or even a sprinkle of nori flakes add delightful new layers of texture and flavor. Just keep the additions subtle to maintain the sandwich’s classic character.
Final Thoughts
The Japanese Egg Sandwich (Tamago Sando) Recipe isn’t just another sandwich; it’s a celebration of simple ingredients transformed into undeniable comfort food. Its delicate balance of creamy eggs, fluffy bread, and just the right seasoning makes it a beloved treat you’ll want to make again and again. Trust me, once you try this recipe, it will quickly become a go-to anytime you want a little taste of homemade happiness.
Print
Japanese Egg Sandwich (Tamago Sando) Recipe
- Prep Time: 10 minutes
- Cook Time: 15 minutes
- Total Time: 25 minutes
- Yield: 4 sandwiches
- Category: Sandwich
- Method: Boiling
- Cuisine: Japanese
Description
This Japanese Egg Sandwich, or Tamago Sando, features soft, fluffy Japanese milk bread filled with a creamy, slightly sweet egg salad made from perfectly boiled eggs, Japanese mayonnaise, and subtle seasonings. It’s a beloved comfort food in Japan, perfect for a quick, satisfying lunch or snack.
Ingredients
Egg Mixture
- 6 large eggs
- 1/4 teaspoon sugar
- 1/4 teaspoon salt
- 1/4 teaspoon ground black pepper
- 1–2 teaspoons milk or plant milk (optional, for hard-boiled eggs)
- 4 tablespoons Japanese mayonnaise
Bread and Butter
- 4 slices Japanese milk bread
- 2 tablespoons unsalted butter, softened
Garnish
- Chives, sliced (optional)
Instructions
- Prepare Ice Bath: Fill a large bowl with ice water to cool the eggs quickly after boiling.
- Boil Eggs: Bring a medium-sized pot of water to a rolling boil. Carefully lower the eggs into the boiling water using a ladle and boil for 7 minutes for medium-soft boiled eggs or 10 minutes for hard-boiled eggs.
- Cool Eggs: Immediately transfer the boiled eggs to the ice bath. Let them sit for 2 minutes to stop the cooking process. Peel the eggs once cooled.
- Mash Eggs: Place the peeled eggs in a large bowl and mash them thoroughly with a fork until mostly smooth but slightly chunky.
- Mix Seasonings and Mayo: Add sugar, salt, pepper, and Japanese mayonnaise to the mashed eggs. If you used hard-boiled eggs, add 1-2 teaspoons of milk or plant milk to adjust creaminess. Mix everything well to combine.
- Adjust Flavor: Taste the egg salad and adjust the sugar, salt, or pepper according to your preference.
- Butter Bread: Spread about half a tablespoon of softened unsalted butter evenly on each slice of the Japanese milk bread.
- Assemble Sandwich: Spread the egg salad generously onto one slice of buttered bread.
- Close Sandwich: Place the second slice of bread on top with the buttered side facing down. Gently press the sandwich to seal.
- Trim Crusts: Carefully cut off the crusts from the sandwich to create clean edges.
- Garnish and Cut: Optionally sprinkle sliced chives over the egg filling before cutting the sandwiches in half for serving.
- Store: Wrap each sandwich tightly with plastic wrap and refrigerate for up to 2 days to keep fresh.
Notes
- Using Japanese milk bread is key for the authentic soft texture, but any soft white bread can be substituted.
- Japanese mayonnaise provides a richer and slightly tangy flavor compared to regular mayo.
- Boiling time can be adjusted to get your preferred egg yolk consistency: 7 minutes for medium-soft yolks, 10 minutes for fully hard-boiled.
- Adding milk or plant milk makes the egg salad creamier and lighter.
- Removing crusts is customary to achieve a delicate presentation.
- Best enjoyed fresh but can be stored refrigerated for up to 2 days.


