
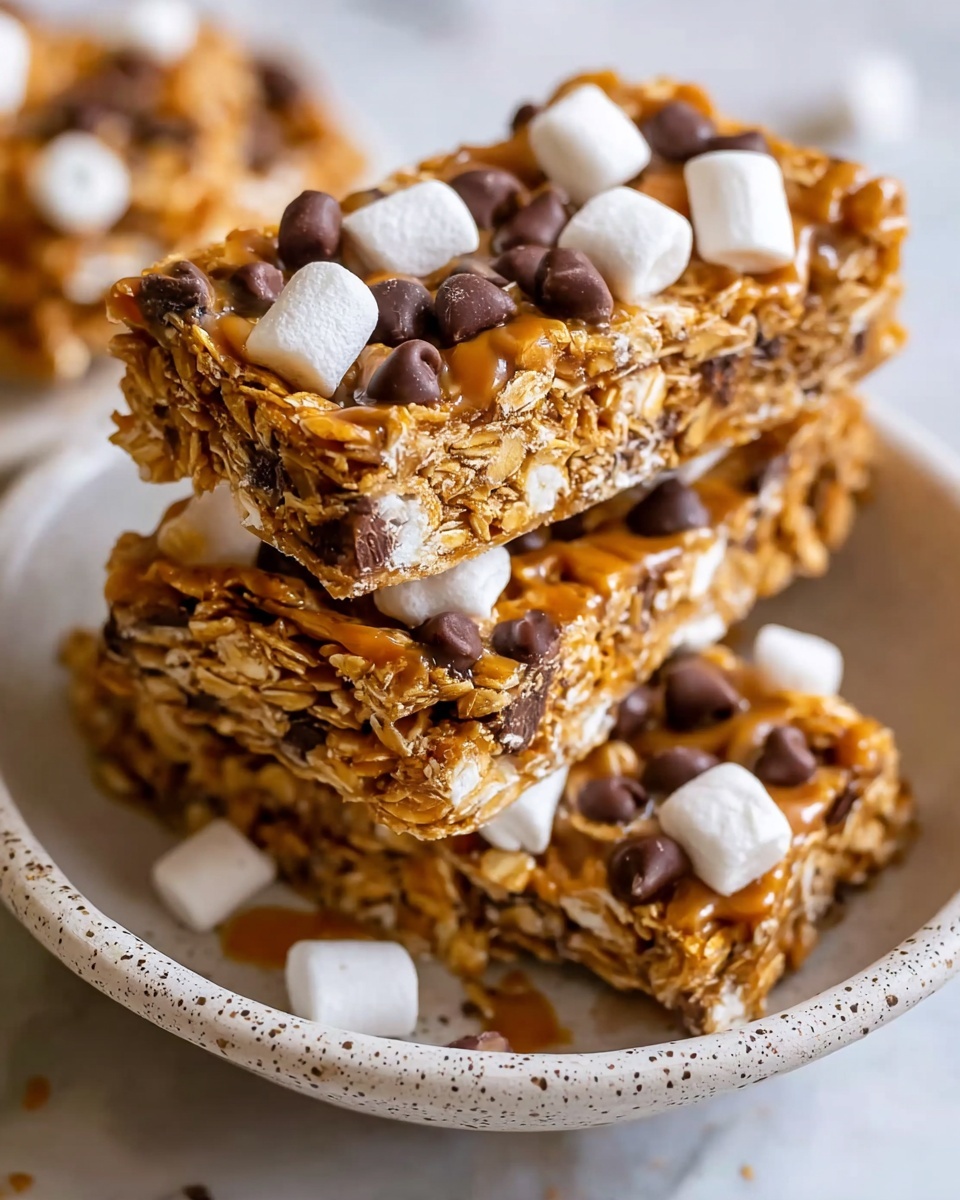
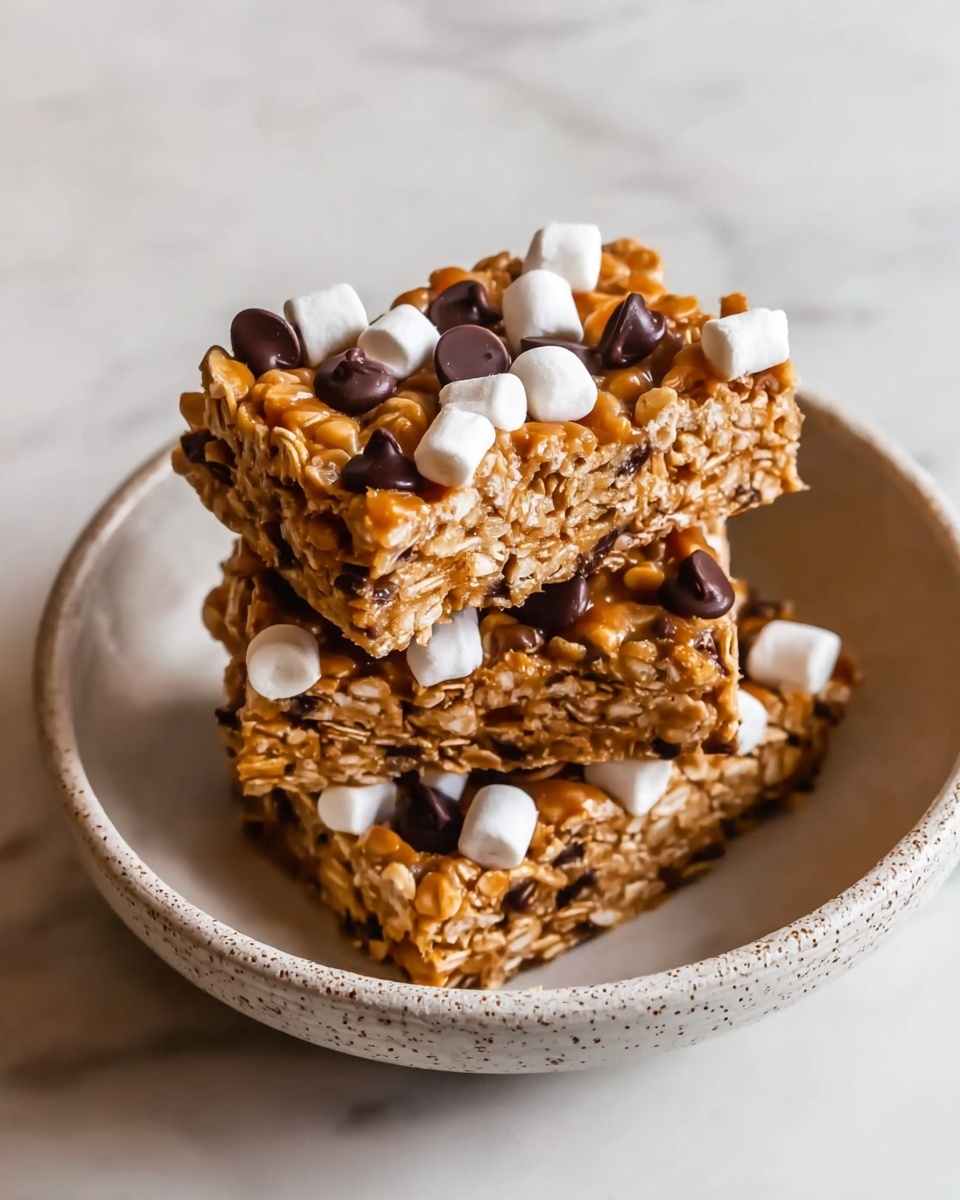
If you’re searching for a treat that’s both nostalgic and delightfully chewy, this Homemade Granola Bars with Chocolate Chips and Marshmallows Recipe is an absolute must-try. Imagine crunchy oats, crispy Rice Krispies, and buttery graham cracker crumbs all hugged together by warm honey and brown sugar, then studded with melty chocolate chips and fluffy marshmallows. These bars are perfect for a quick snack, an on-the-go breakfast, or a fun twist on classic s’mores flavors. I’m so excited to share how simple and rewarding it is to make these at home!
Ingredients You’ll Need
Gathering your ingredients is the first joyful step toward these chewy, crispy delights. Each element plays its unique part, building textures and flavors that blend beautifully into every bite.
- 6 tablespoons unsalted butter: Provides richness and binds the mixture with a smooth, creamy melt.
- 6 tablespoons brown sugar, packed: Adds sweetness and a hint of molasses flavor that deepens the overall taste.
- 2/3 cup honey: Acts as a natural sweetener and helps hold everything together with sticky goodness.
- 3 cups rolled oats: The hearty base that brings chewiness and wholesome texture to the bars.
- 1 1/2 cups Rice Krispies cereal: Adds light crunchiness that contrasts wonderfully with the chewy oats.
- 1/2 cup graham crackers, crushed: Gives subtle sweetness and adds a crumbly texture reminiscent of classic s’mores.
- 1/2 teaspoon salt: Balances sweetness and enhances all the flavors in the mix.
- 1/2 cup mini chocolate chips: The melty pockets of chocolate that bring indulgence to every bite.
- 1/2 cup cereal marshmallows: Little fluffy clouds that add that iconic marshmallow chew and a bit of nostalgia.
How to Make Homemade Granola Bars with Chocolate Chips and Marshmallows Recipe
Step 1: Prepare Your Pan
Start by spraying an 8×8 inch pan with vegetable oil to prevent sticking, then line the bottom with parchment paper. This makes it easy to lift out the bars once they’re set and keeps cleanup a breeze.
Step 2: Make the Sweet, Sticky Binder
In a medium pot, melt together the butter, brown sugar, and honey over medium heat. Let it come to a gentle boil and cook for about 2 minutes while stirring. This step caramelizes the sugar slightly and creates the perfect sticky syrup that will hold your bars together.
Step 3: Mix the Dry Ingredients
In a large bowl, combine the rolled oats, Rice Krispies cereal, crushed graham crackers, and salt. These dry ingredients bring a variety of textures and a perfectly balanced flavor foundation for your bars.
Step 4: Combine and Cool
Pour the warm butter-sugar-honey mixture over the dry ingredients and stir well to coat everything evenly. Let this mixture cool for about 20 minutes. This helps the hot liquid bind the ingredients without melting the marshmallows too early and lets the bars hold their shape better.
Step 5: Add the Marshmallows and Chocolate Chips
Gently fold in the mini marshmallows and chocolate chips. The timing here is key — adding them after the mixture has cooled slightly prevents the marshmallows from melting completely, maintaining their fluffy texture and adding bursts of sweetness throughout.
Step 6: Press and Chill
Firmly press the mixture into your prepared pan, making sure to compact it evenly to help the bars hold together once chilled. Refrigerate for at least 2 hours, allowing everything to set into irresistible bars ready to slice.
How to Serve Homemade Granola Bars with Chocolate Chips and Marshmallows Recipe
Garnishes
These granola bars are satisfying on their own, but you can elevate them further by adding a light drizzle of melted chocolate or sprinkling a pinch of sea salt on top just before chilling. The sea salt creates a beautiful salty-sweet contrast that diner favorites adore.
Side Dishes
Pair these bars with a cold glass of milk or a creamy vanilla yogurt for a balanced snack or breakfast. The refreshing creaminess complements the chewy texture and rich flavors perfectly, making every bite feel like a mini celebration.
Creative Ways to Present
For parties or gifts, cut these bars into fun shapes using cookie cutters or wrap them individually in parchment paper tied with twine for a personal touch. You can also layer them with sliced fresh strawberries or bananas for a playful breakfast parfait twist.
Make Ahead and Storage
Storing Leftovers
Store your homemade granola bars in an airtight container at room temperature for up to a week. Keeping them sealed preserves their chewy texture and prevents the chocolate chips from melting or the marshmallows from drying out.
Freezing
If you want to enjoy these bars over a longer period, freeze them by wrapping individually or in a single layer inside a freezer-safe bag or container. They freeze beautifully for up to 3 months. Just thaw at room temperature before enjoying.
Reheating
While these bars are delightful chilled or at room temperature, you can warm them slightly in the microwave for about 10-15 seconds to soften the chocolate chips and marshmallows if you prefer a gooier treat. Just be careful not to overheat, or they may become too sticky.
FAQs
Can I substitute other cereals for Rice Krispies?
Absolutely! Feel free to experiment with puffed wheat, cornflakes, or even granola clusters for a different texture, but keep in mind each will change the crunch factor slightly.
What if I don’t have graham crackers?
No worries! You can substitute with digestive biscuits, crushed vanilla wafers, or even some finely chopped nuts to add a pleasant crunch and flavor.
Can I use dark chocolate chips instead of mini chocolate chips?
Yes, dark chocolate chips work wonderfully and add a richer, sometimes slightly bitter contrast to the sweetness of the bars.
Are these granola bars gluten-free?
They can be, if you use certified gluten-free oats, Rice Krispies, and graham crackers or their gluten-free alternatives. Always double-check your product labels to be sure.
How sticky are these bars? Will they hold well for lunchboxes?
These bars are chewy but hold together nicely once chilled, making them perfect for lunchboxes or snacks on the go. Just keep them in a sealed container to maintain their texture.
Final Thoughts
I hope you’re as excited as I am for you to try this Homemade Granola Bars with Chocolate Chips and Marshmallows Recipe. It’s such a satisfying, fun way to bring a little homemade magic into your snacking routine. Simple ingredients, a breeze to make, and bursting with nostalgic flavors, these bars are sure to become a cherished favorite. Happy baking and even happier nibbling!
Print
Homemade Granola Bars with Chocolate Chips and Marshmallows Recipe
- Prep Time: 10 minutes
- Cook Time: 10 minutes
- Total Time: 2 hours 20 minutes
- Yield: 16 servings
- Category: Snack
- Method: Stovetop
- Cuisine: American
Description
A classic homemade granola bar recipe that combines oats, Rice Krispies, and graham crackers with a sweet butter, brown sugar, and honey mixture, finished with chocolate chips and marshmallows for a chewy, delicious snack.
Ingredients
Wet Ingredients
- 6 tablespoons unsalted butter
- 6 tablespoons brown sugar, packed
- 2/3 cup honey
Dry Ingredients
- 3 cups rolled oats
- 1 1/2 cups Rice Krispies cereal
- 1/2 cup graham crackers, crushed
- 1/2 teaspoon salt
Add-ins
- 1/2 cup mini chocolate chips
- 1/2 cup cereal marshmallows
Instructions
- Prepare the Pan: Spray an 8×8 inch pan with vegetable oil and line the bottom with parchment paper to prevent sticking and make removal easy.
- Melt Ingredients: In a pot over medium heat, melt the unsalted butter, brown sugar, and honey together until the mixture starts bubbling. Continue cooking and stirring for 2 minutes to thicken slightly.
- Mix Dry Ingredients: In a large bowl, combine rolled oats, Rice Krispies cereal, crushed graham crackers, and salt. Pour the hot butter-sugar-honey mixture over the dry ingredients and stir thoroughly to coat everything evenly. Allow the mixture to cool for about 20 minutes to slightly firm up.
- Add Marshmallows and Chocolate Chips: Gently fold in the mini cereal marshmallows and chocolate chips, taking care not to crush the marshmallows.
- Press and Chill: Press the mixture firmly and evenly into the prepared pan. Refrigerate for at least 2 hours to set before slicing into 16 bars.
Notes
- Make sure to let the mixture cool before adding marshmallows to prevent them from melting.
- Use parchment paper for easy removal and cleaner slicing.
- Store bars in an airtight container in the refrigerator for up to one week.
- You can substitute mini marshmallows with regular marshmallows cut into small pieces if needed.
- Customize by adding nuts or dried fruits if desired.

