If you’re craving a crunchy, juicy delight that never fails to satisfy, this Crispy Homemade Chicken Katsu Recipe is exactly what you need. It’s a beloved Japanese-style fried chicken that’s simple to make at home but delivers restaurant-quality results that will impress everyone at your table. With perfectly tender chicken encased in a golden panko crust and paired with tangy tonkatsu sauce, this dish is pure comfort food that’s crisply delicious in every bite.
Ingredients You’ll Need
The beauty of this Crispy Homemade Chicken Katsu Recipe lies in its straightforward ingredients, each playing a crucial role in bringing out the perfect balance of flavor, texture, and color. From the light, airy panko breadcrumbs creating that irresistible crunch to the humble seasoning enhancing every bite, you don’t need much to make magic happen in your kitchen.
- Boneless, Skinless Chicken Breasts: These form the tender and juicy base for the dish, perfect for pounding to an even thickness.
- Panko Breadcrumbs: Known for their extra crunch, they give the chicken that signature crispy coating.
- All-Purpose Flour: Helps the egg mixture stick to the chicken, creating a solid base for the breadcrumbs.
- Large Eggs: Act as a binder for the breadcrumbs to cling to the chicken evenly.
- Salt: Essential for enhancing the natural flavor of the chicken and the coating.
- Black Pepper: Adds a subtle heat and complexity to the seasoning.
- Vegetable Oil: Perfect for frying the chicken to golden perfection without overpowering the flavors.
- Tonkatsu Sauce: This sweet and tangy condiment is the classic dipping sauce that complements the crispy chicken beautifully.
How to Make Crispy Homemade Chicken Katsu Recipe
Step 1: Prepare the Chicken Breasts
Start by placing your boneless, skinless chicken breasts between two sheets of plastic wrap. Gently pound them out to about half an inch thick to ensure even cooking and tender results.
Step 2: Season the Chicken
Sprinkle salt and black pepper liberally over both sides of the chicken breasts. This simple seasoning step brings out the chicken’s natural flavors and enhances the overall taste.
Step 3: Set Up Your Dredging Station
Organize three shallow bowls: one with the all-purpose flour, one with the beaten eggs, and the last with panko breadcrumbs. This setup lets you move seamlessly through the breading process without fuss.
Step 4: Flour the Chicken
Coat each piece of chicken with flour, giving it a good shake afterward to remove any excess. This step ensures the egg sticks properly for the next layer.
Step 5: Dip in Egg
Immerse the floured chicken into the beaten eggs, making sure it is fully coated for the breadcrumbs to adhere well in the next step.
Step 6: Coat with Panko Breadcrumbs
Press the chicken into the panko breadcrumbs thoroughly, covering both sides evenly to create that signature crunchy crust once fried.
Step 7: Heat the Oil
In a large skillet, heat the vegetable oil over medium-high heat. The right heat is crucial for achieving a crisp exterior without absorbing too much oil.
Step 8: Fry the Chicken
Carefully place the breaded chicken breasts into the hot oil and fry for around 4 to 5 minutes on each side. Look for a golden brown color and ensure the chicken is cooked through before removing.
Step 9: Drain Excess Oil
Transfer the fried chicken to a paper towel-lined plate to soak up any extra oil, keeping the katsu light and crispy.
Step 10: Rest and Slice
Let the chicken rest for a few minutes before slicing it into strips. This helps retain juiciness and makes it easier to serve.
Step 11: Serve with Tonkatsu Sauce
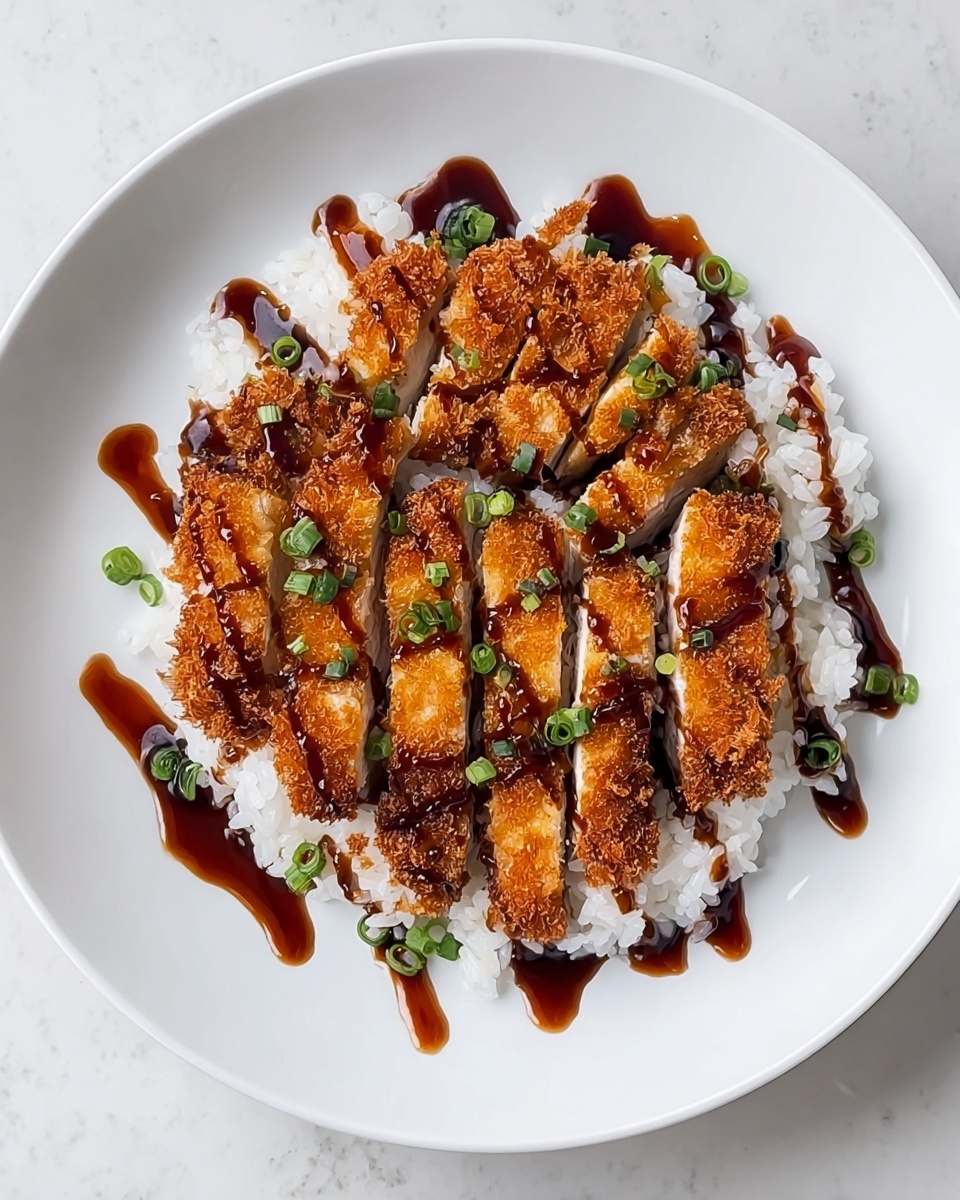
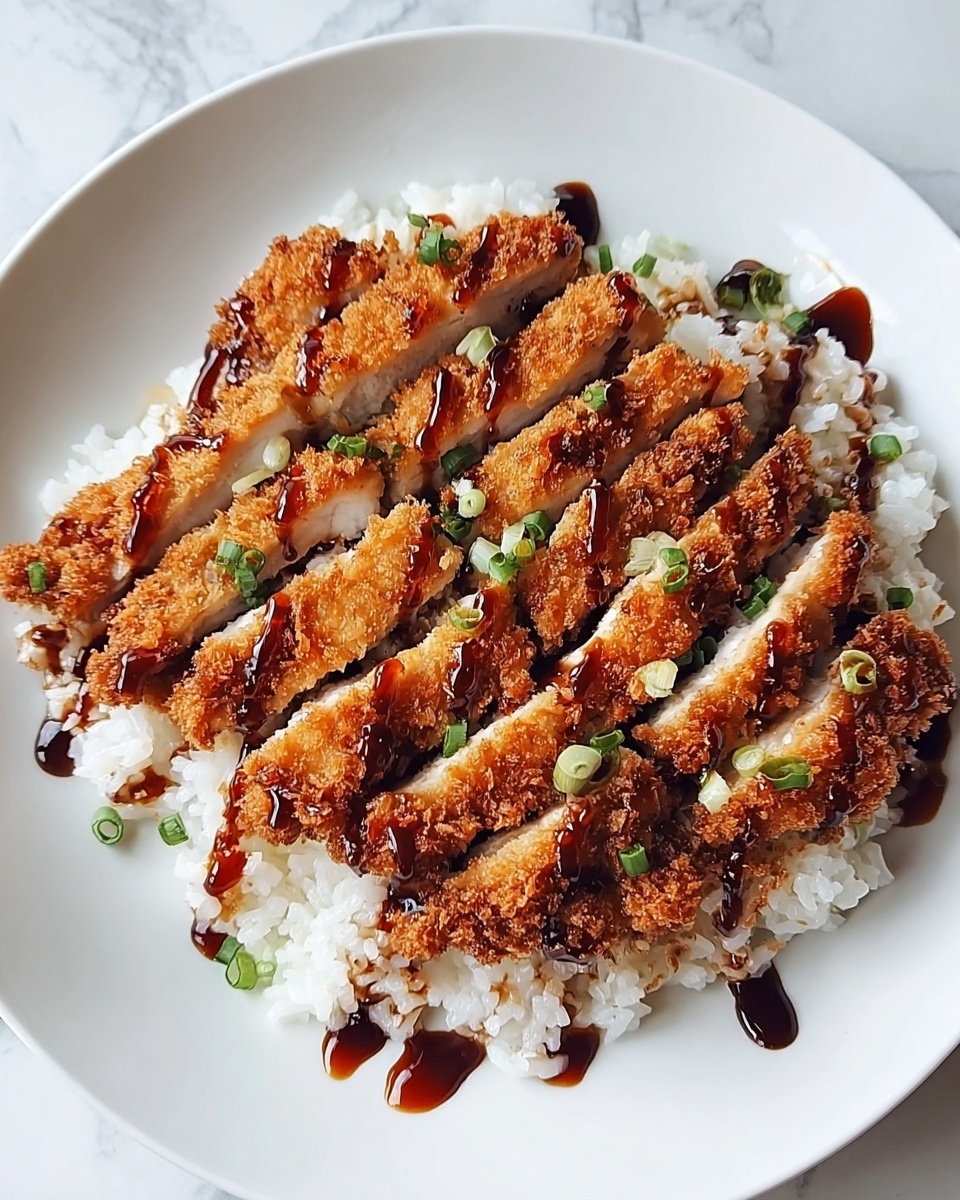
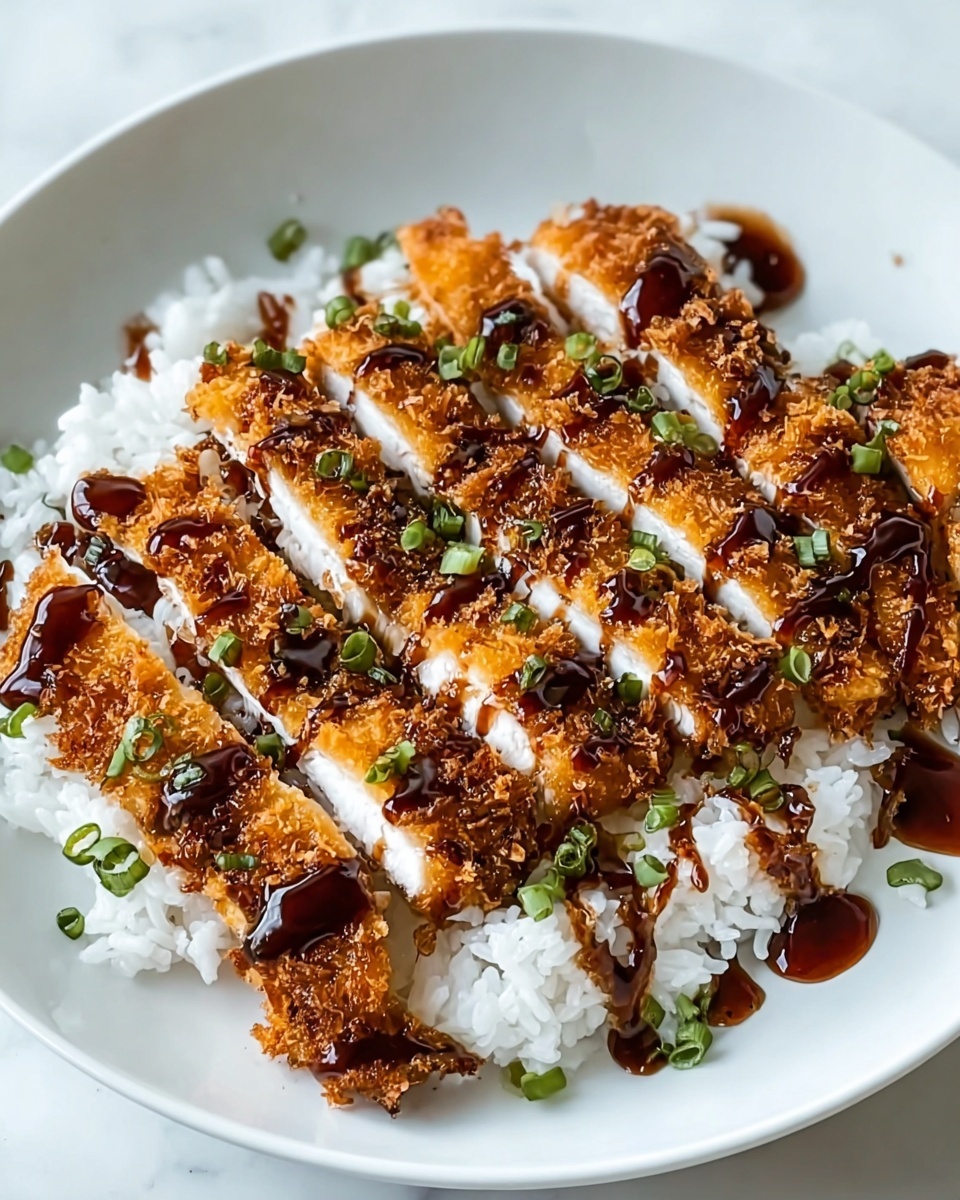
Drizzle your crispy chicken with tonkatsu sauce or serve it on the side for dipping. This sweet and tangy sauce is the perfect pairing with your homemade katsu.
How to Serve Crispy Homemade Chicken Katsu Recipe
Garnishes
A sprinkle of finely chopped green onions or toasted sesame seeds adds a fresh pop of color and a slight nutty crunch that elevates the dish visually and flavor-wise.
Side Dishes
Serve your chicken katsu with steamed white rice and a crisp cabbage salad dressed lightly in a sesame vinaigrette for a balanced meal that’s both satisfying and refreshing.
Creative Ways to Present
Consider transforming this recipe into a sandwich by placing the sliced chicken katsu inside a toasted bun with shredded lettuce and a drizzle of spicy mayo. Alternatively, add it atop a bed of mixed greens for a delightful salad entree.
Make Ahead and Storage
Storing Leftovers
Store leftover chicken katsu in an airtight container in the refrigerator for up to 3 days. Keep the sauce separate to preserve that perfect crispy texture when reheating.
Freezing
If you want to save your crispy katsu for longer, wrap each piece tightly in plastic wrap and place them in a freezer-safe bag. They can be frozen for up to 1 month without losing much crispiness.
Reheating
Reheat your chicken katsu in a toaster oven or regular oven at 350°F for about 10-12 minutes. This method helps maintain that irresistible crunch far better than a microwave.
FAQs
Can I use chicken thighs instead of chicken breasts?
Absolutely! Boneless, skinless chicken thighs will give you a slightly juicier katsu with a richer flavor. Just make sure to pound them evenly for consistent cooking.
What makes panko breadcrumbs different from regular breadcrumbs?
Panko is lighter and coarser, creating a much crunchier and airier coating compared to traditional breadcrumbs. This texture is key to the signature crispy finish of chicken katsu.
Is tonkatsu sauce necessary to serve with this recipe?
While tonkatsu sauce is the classic accompaniment, you can try alternatives like a tangy barbecue sauce, spicy mayo, or even a simple lemon wedge depending on your taste preferences.
Can I bake chicken katsu instead of frying?
You can bake it for a healthier version, but keep in mind that it won’t be quite as crispy as frying. To help, spray it lightly with oil and bake at a high temperature until golden.
How do I ensure the chicken stays juicy inside while the coating is crispy outside?
Pounding the chicken to even thickness and maintaining proper oil temperature during frying are key. This cooks the chicken evenly and seals in juices while creating a perfect crust.
Final Thoughts
I can’t recommend this Crispy Homemade Chicken Katsu Recipe enough for anyone who loves that satisfying crunch and juicy bite combo. It’s easy, quick, and wonderfully rewarding on your plate. So go ahead and give it a try—you’ll be making it again and again in no time!
Print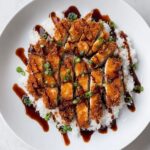
Crispy Homemade Chicken Katsu Recipe
- Prep Time: 15 minutes
- Cook Time: 30 minutes
- Total Time: 45 minutes
- Yield: 4 servings
- Category: Dinner
- Method: Frying
- Cuisine: Japanese
Description
Crispy Homemade Chicken Katsu is a classic Japanese dish featuring tender, pounded chicken breasts coated in a light flour and egg batter, then dredged in crunchy panko breadcrumbs and pan-fried to golden perfection. Paired with savory tonkatsu sauce, this recipe delivers a satisfying combination of textures and flavors perfect for a comforting meal.
Ingredients
Chicken
- 1 pound Boneless, Skinless Chicken Breasts (Approximately 2 chicken breasts)
Breading
- 1/2 cup All-Purpose Flour (Helps the egg adhere to the chicken)
- 2 large Eggs (Binding agent for the breadcrumbs)
- 1 cup Panko Breadcrumbs (For a crispy texture)
Seasoning
- 1 teaspoon Salt (For seasoning)
- 1/2 teaspoon Black Pepper (For seasoning)
Cooking
- 1 cup Vegetable Oil (For frying)
Serving
- 1/4 cup Tonkatsu Sauce (For serving)
Instructions
- Prepare the chicken: Place the chicken breasts between two sheets of plastic wrap and gently pound them to an even thickness of about 1/2 inch to ensure uniform cooking.
- Season the chicken: Season both sides of the chicken breasts liberally with salt and black pepper to enhance flavor.
- Set up dredging station: Arrange three shallow bowls — one with all-purpose flour, one with whisked eggs, and one with panko breadcrumbs.
- Coat with flour: Dredge each chicken breast in the flour, shaking off any excess to prevent a clumpy coating.
- Dip in egg: Submerge the floured chicken breasts into the whisked eggs, ensuring they are fully coated to help the breadcrumbs stick.
- Coat with breadcrumbs: Press the chicken breasts into the panko breadcrumbs, covering both sides thoroughly for maximum crispiness.
- Heat oil: Heat vegetable oil in a large skillet over medium-high heat until shimmering and hot enough for frying.
- Fry chicken: Carefully place the breaded chicken breasts into the hot oil and fry approximately 4-5 minutes on each side, or until golden brown and cooked through (internal temperature of 165°F).
- Drain excess oil: Remove the chicken from the skillet and place it on a paper towel-lined plate to absorb any excess oil.
- Rest and slice: Allow the chicken to rest a few minutes to retain juices before slicing into strips.
- Serve: Present the chicken katsu drizzled with tonkatsu sauce or serve the sauce on the side for dipping.
Notes
- For even cooking, make sure chicken breasts are pounded to uniform thickness.
- Use fresh panko breadcrumbs for the crispiest coating.
- Maintain medium-high heat for frying to ensure a golden crust without overcooking the chicken.
- Drain fried chicken on paper towels to remove excess oil and keep it crisp.
- Tonkatsu sauce can be substituted with Worcestershire sauce mixed with ketchup for a homemade alternative.
