If you are ready to indulge in something truly irresistible, this Chocolate Trifle with Cake, Pudding, and Fresh Berries Recipe is the ultimate dessert you need to try. Imagine layers of moist chocolate cake mingling beautifully with creamy chocolate pudding, topped with fluffy whipped cream, crunchy chocolate cookie bits, and a burst of freshness from juicy berries. It’s rich, luscious, and yet delightfully light with each spoonful, making it perfect for any celebration or just a special treat to brighten your day. Trust me, once you try this recipe, it will quickly become a staple that everyone requests again and again.
Ingredients You’ll Need
Getting the ingredients right for this dessert is key. Each one plays a vital role, whether it’s the deep chocolate flavor from the cake and pudding or the fresh bursts of color that the berries bring. These ingredients come together in a simple way to create a sophisticated and satisfying treat.
- Chocolate cake or brownie: Use a dense and rich cake for satisfying bites throughout the trifle.
- Chocolate pudding: Provides creamy texture and intense chocolate flavor that ties the layers together.
- Heavy cream: Whipped to soft peaks, it adds lightness and a luxurious mouthfeel.
- Powdered sugar: Sweetens the whipped cream without graininess.
- Vanilla extract: A subtle enhancer that complements the chocolate beautifully.
- Chocolate chips or shavings: Brings in delightful texture and bursts of chocolate in every bite.
- Crushed chocolate cookies: Adds an irresistible crunch as a contrast to the soft layers.
- Fresh berries (optional): Perfect for a pop of color and freshness that balances the richness.
- Mint leaves (optional): A fresh herbal note that complements the chocolate and berries.
How to Make Chocolate Trifle with Cake, Pudding, and Fresh Berries Recipe
Step 1: Prepare and Crumble the Cake
Start by baking your chocolate cake or brownies according to your favorite recipe or package instructions. Once baked and completely cooled, crumble the cake into bite-sized pieces. This creates the perfect base that soaks up the pudding and keeps every spoonful rich yet easy to enjoy.
Step 2: Whip the Cream
In a large bowl, whip the heavy cream together with powdered sugar and vanilla extract until soft peaks form. Make sure not to overwhip—the goal is a light, airy cream that gently spreads over the pudding, adding sweetness and fluffiness.
Step 3: Layer the Cake
In your trifle bowl or a wide glass dish, place a generous layer of the crumbled chocolate cake. This foundational layer anchors the dessert and will soak up the flavors from the layers above.
Step 4: Add Chocolate Pudding
Spread a smooth layer of chocolate pudding evenly over the cake. The pudding adds luscious creaminess that contrasts beautifully with the denser cake pieces below.
Step 5: Spoon on Whipped Cream
Gently spread a layer of your freshly whipped cream over the pudding, making sure this layer is soft and smooth. This will create a wonderful creamy highlight in every bite.
Step 6: Sprinkle with Crushed Cookies
Sprinkle crushed chocolate cookies over the whipped cream for a bit of crunch that adds texture and interest, making this trifle an exciting party for your taste buds.
Step 7: Add Chocolate Chips or Shavings
Scatter a layer of chocolate chips or shavings over the cookies. This deepens the chocolate experience and adds a pleasing little surprise in every spoonful.
Step 8: Repeat Layers and Finish
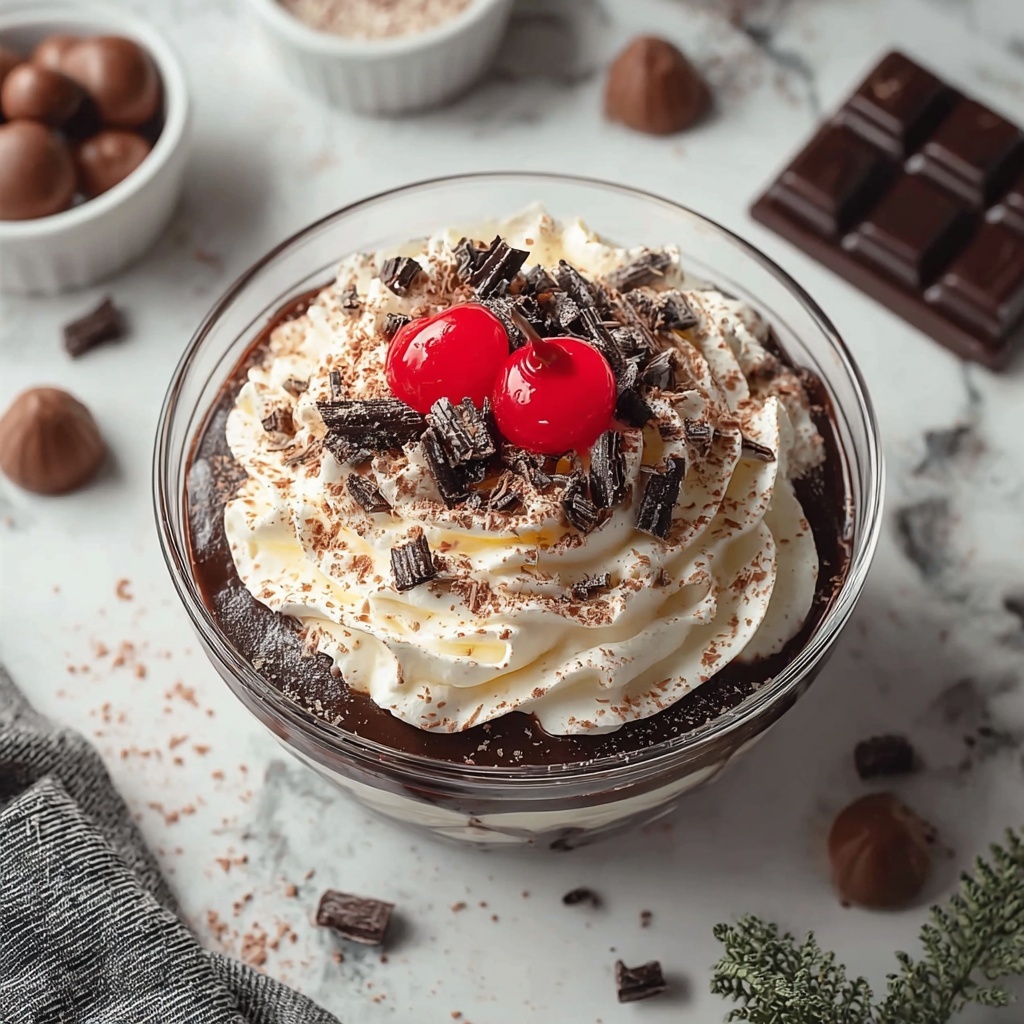
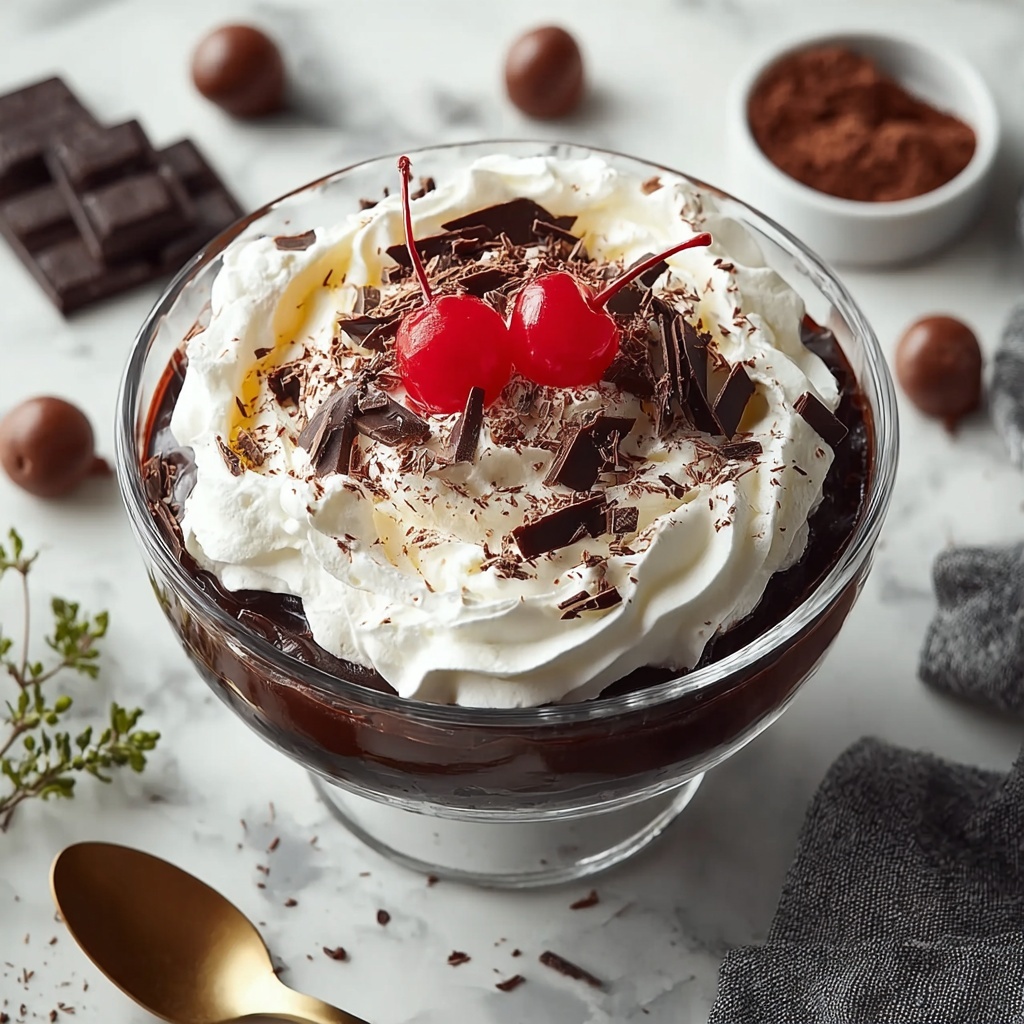
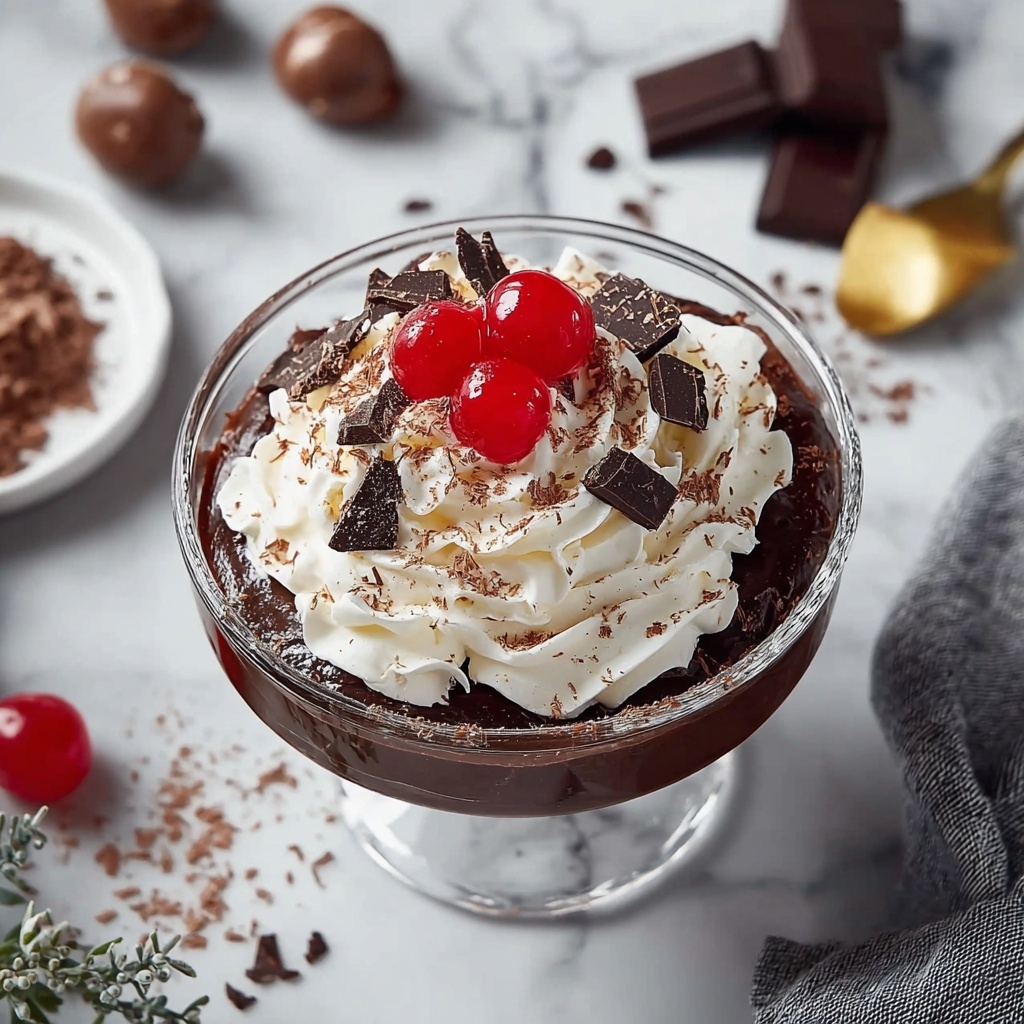
Keep building your trifle by repeating these layers until you fill your bowl, finishing with a layer of whipped cream on top. Garnish the final layer with more chocolate shavings or chips, along with fresh berries and mint leaves to bring a burst of fresh color and flavor.
Step 9: Chill and Serve
Refrigerate your trifle for at least two hours before serving to allow all the flavors to meld together. Serving chilled enhances the texture and highlights the delicious layers, making it utterly delightful.
How to Serve Chocolate Trifle with Cake, Pudding, and Fresh Berries Recipe
Garnishes
Go beyond the classic by adding a sprinkle of cocoa powder, extra mint leaves, or some edible flowers for a charming presentation. A few whole fresh berries nestled on top brighten the look and offer a fresh contrast to each mouthful.
Side Dishes
This trifle is quite rich on its own, but if you want to complement it, consider serving it with a simple cup of freshly brewed coffee or a light fruit salad. A sharp citrus sorbet also pairs wonderfully as a palate cleanser.
Creative Ways to Present
Layer this dessert in individual glass cups or jars for a stunning look that shows off all the textures and colors. You could even build mini trifles using small bowls or stemless wine glasses, perfect for party servings or a fun twist on traditional plating.
Make Ahead and Storage
Storing Leftovers
After enjoying your trifle, store any leftovers covered tightly with plastic wrap or in an airtight container in the refrigerator. The flavors actually get better as it sits, but consume within 3 days for optimal freshness and texture.
Freezing
Freezing is not recommended for this trifle because the whipped cream and fresh berries do not freeze well and will lose their delicate texture upon thawing.
Reheating
Since this is a cold dessert, reheating is not applicable. Simply take it out of the fridge a few minutes before serving if you prefer it slightly less chilled.
FAQs
Can I use a store-bought cake for this trifle?
Absolutely! Using a good-quality store-bought chocolate cake or brownies is a convenient shortcut and still results in a delicious trifle.
What kind of berries work best in this recipe?
Fresh strawberries, raspberries, blueberries, or blackberries all complement the chocolate beautifully. Use whichever you prefer or have on hand.
Is it possible to make this dessert dairy-free?
Yes, try using dairy-free pudding, whipped coconut cream, and a dairy-free cake to create a similar experience that suits your dietary needs.
How far in advance can I assemble the trifle?
You can assemble the trifle up to one day ahead and keep it refrigerated until ready to serve. This helps the flavors meld even more, making it taste even better the next day.
Can I add nuts for extra crunch?
Definitely! Toasted pecans, almonds, or hazelnuts would add a lovely crunch and complement the chocolate layers wonderfully.
Final Thoughts
Now that you have this fantastic Chocolate Trifle with Cake, Pudding, and Fresh Berries Recipe in your hands, it’s time to dive into making it your own. Whether you’re aiming to impress guests or enjoy a decadent treat after a long day, this dessert is a joyous celebration of textures and flavors. I promise you’ll fall in love with every heavenly layer and want to whip it up again soon!
Print
Chocolate Trifle with Cake, Pudding, and Fresh Berries Recipe
- Prep Time: 0h 30m
- Cook Time: 0h 30m
- Total Time: 3h 0m
- Yield: 8 servings
- Category: Dessert
- Method: No-Cook
- Cuisine: American
- Diet: Vegetarian
Description
A decadent and easy-to-make Chocolate Trifle featuring layers of chocolate cake, rich chocolate pudding, whipped cream, and crunchy chocolate cookie crumbles. This no-bake dessert is perfect for parties and special occasions, topped with fresh berries and mint for a vibrant finish.
Ingredients
Chocolate Cake Layer
- 1 chocolate cake or brownie, baked and cooled
Chocolate Pudding Layer
- 2 cups chocolate pudding
Whipped Cream Layer
- 1 cup heavy cream
- 2 tablespoons powdered sugar
- 1 teaspoon vanilla extract
Toppings and Garnish
- 1 cup chocolate chips or shavings
- 1 cup crushed chocolate cookies
- Fresh berries (optional) for garnish
- Mint leaves (optional) for garnish
Instructions
- Prepare the Cake: Bake or use a pre-baked chocolate cake or brownie according to your preference or package instructions. Let it cool completely, then crumble into bite-sized pieces for easy layering.
- Whip the Cream: In a large bowl, combine heavy cream, powdered sugar, and vanilla extract. Whip until soft peaks form, making sure not to overwhip to keep it light and fluffy.
- First Cake Layer: Place a generous layer of the crumbled chocolate cake or brownie at the bottom of a trifle bowl or wide glass dish to form the base of the trifle.
- Chocolate Pudding Layer: Spread an even layer of chocolate pudding over the cake crumbs using a spatula, ensuring full coverage for smooth texture contrast.
- Whipped Cream Layer: Carefully spread a layer of whipped cream over the pudding, smoothing gently to avoid mixing layers.
- Cookie Crumble Layer: Sprinkle crushed chocolate cookies evenly over the whipped cream to add crunch and texture to the dessert.
- Chocolate Chips/Shavings: Add a layer of chocolate chips or shavings for added richness and visual appeal.
- Repeat Layers: Continue layering in the same order—cake, pudding, whipped cream, cookies, chocolate—until the bowl is filled, finishing with a top layer of whipped cream.
- Garnish and Chill: Decorate the top with chocolate shavings or chips, fresh berries, and mint leaves if desired. Refrigerate for at least 2 hours to allow the flavors to meld and serve chilled for best taste.
Notes
- Ensure the cake or brownie is completely cooled before crumbling to prevent sogginess.
- You can prepare pudding from scratch or use store-bought for convenience.
- For a lighter version, substitute heavy cream with whipped topping.
- Fresh berries add a refreshing contrast but can be omitted if not preferred.
- This dessert can be made a day ahead for enhanced flavor melding.


