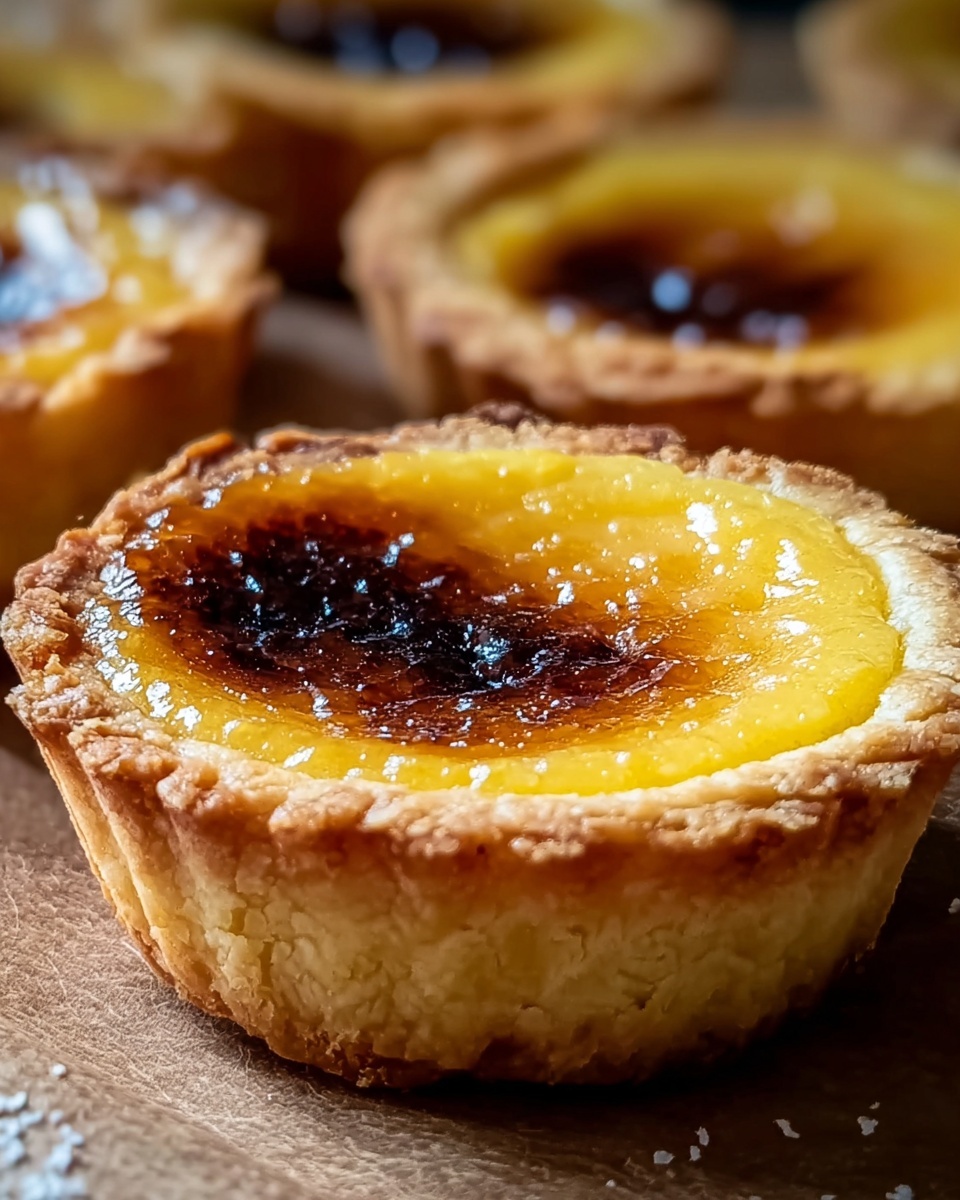
If you’ve ever dreamed of tasting a truly delightful Canadian classic, look no further than the Best Classic Canadian Butter Tarts Recipe. These little pastry gems boast a perfectly flaky shell filled with a sweet, buttery, gooey center that’s absolutely irresistible. Combining the richness of brown sugar and butter with the delicate crunch of nuts or the chewiness of raisins (if you choose), this recipe delivers pure comfort in every bite. Whether you’re sharing with friends or indulging on your own, these butter tarts bring a touch of Canadian nostalgia right to your kitchen.
Ingredients You’ll Need
Creating the perfect batch of butter tarts starts with a handful of simple yet essential ingredients. Each one plays a unique role in crafting that deliciously tender crust and lusciously sweet filling that make these tarts so memorable.
- All-purpose flour: The base for a tender, flaky pastry crust that holds the filling perfectly.
- Salt: Just a pinch enhances the flavors and balances the sweetness beautifully.
- Cold unsalted butter (for crust): Cubed to keep the pastry light and flaky, adding rich buttery flavor.
- Ice water: Helps bind the dough without warming it, essential for a flaky texture.
- Unsalted butter (melted for filling): Adds richness and creates the luscious gooey texture inside.
- Brown sugar: Gives the filling a deep, caramel-like sweetness that’s simply irresistible.
- Corn syrup: Keeps the filling smooth and prevents crystallization for that perfect gooey center.
- Vanilla extract: Adds warmth and depth, elevating the flavor profile.
- Egg: Provides structure and richness to the filling, helping it set just right.
- Chopped walnuts or pecans (optional): Adds a delightful crunch and nutty dimension.
- Raisins (optional): Bring a sweet, chewy contrast that some adore in their butter tarts.
How to Make Best Classic Canadian Butter Tarts Recipe
Step 1: Prepare the Pastry Dough
Start by combining the flour and salt in a large bowl to ensure even seasoning. Next, cut the cold unsalted butter into the flour using a pastry cutter or your fingers until the mixture resembles coarse crumbs. This technique is key to achieving that cherished flaky texture. Slowly add in the ice water, one tablespoon at a time, just until the dough clings together. Avoid adding too much water to keep your crust tender. Turn the dough onto a lightly floured surface, knead a few times, then wrap it tightly in plastic wrap before chilling it in the fridge for about 30 minutes. This resting time firms up the butter and relaxes the gluten, making pie crust magic happen.
Step 2: Form the Tart Shells
Once your dough is chilled, grease a muffin tin or line it with paper liners for easy removal later. Roll out the dough to about 1/8 inch thickness on a floured surface. Using a round cookie cutter or the rim of a glass, cut circles slightly larger than the muffin cups. Gently press each dough circle into the tin’s wells, ensuring there are no air bubbles or gaps. This creates the perfect vessel for your luscious filling, and the slightly larger dough size helps form the signature crimped edges butter tarts are known for.
Step 3: Prepare the Classic Butter Tart Filling
In a medium bowl, whisk together the melted butter, brown sugar, corn syrup, vanilla extract, egg, and a pinch of salt until smooth and well combined. This mixture is what makes the center of these tarts so delightful—gooey yet structured with just the right amount of sweetness and richness.
Step 4: Add Nuts or Raisins (Optional)
If you love a bit of texture, divide chopped walnuts, pecans, or raisins evenly among the tart shells. These optional additions bring exciting tastes and textures that make each bite a little surprise. Classic Canadian Butter Tarts often feature these mix-ins, though the buttery filling on its own is a stunner too.
Step 5: Fill and Bake
Carefully spoon the filling into each tart shell, filling them about three-quarters full to prevent bubbling over during baking. Place the muffin tin in a preheated oven and bake until the filling is bubbling and the pastry has turned a glorious golden brown. Watching these bake is part of the excitement—your kitchen will smell heavenly, and you’ll be counting down the minutes!
Step 6: Cool and Enjoy
Once baked, allow the butter tarts to cool in the pan for a few minutes. This resting step helps the filling set so it’s gooey but not runny when you take your first bite. Serve these at room temperature to fully appreciate their rich, buttery flavor and tender crust. Trust me, this recipe will have friends and family coming back for seconds.
How to Serve Best Classic Canadian Butter Tarts Recipe
Garnishes
While these tarts are delicious on their own, adding a light dusting of powdered sugar can create a charming presentation that invites a taste. For a festive touch, dollops of whipped cream or a drizzle of warm caramel sauce add an extra layer of indulgence without overpowering the classic flavors.
Side Dishes
Pair your warm butter tarts with a simple cup of freshly brewed coffee or black tea to balance their sweetness perfectly. For a brunch or dessert spread, fresh berries or a light vanilla ice cream complement the rich filling beautifully, creating a harmonious flavor experience.
Creative Ways to Present
Consider serving these tarts on a wooden platter lined with parchment paper for a rustic, inviting look. You can also arrange them alongside other small Canadian treats like Nanaimo bars or maple cookies to create a nostalgic dessert board celebrating Canadian classics. Miniature tart stands or tiered trays offer an elegant presentation that’s perfect for parties or special occasions.
Make Ahead and Storage
Storing Leftovers
Butter tarts keep well at room temperature for a day or two in an airtight container. For longer storage, refrigerate them to maintain freshness. Just allow refrigerated tarts to come back to room temperature before serving to enjoy that signature gooey filling.
Freezing
You can freeze butter tarts either baked or unbaked. For baked tarts, wrap each one carefully in plastic wrap and place in an airtight container or freezer bag. For unbaked tarts, freeze them on a tray first, then transfer to a bag so they keep their shape. Thaw overnight in the refrigerator before warming up or baking fresh.
Reheating
To bring buttery goodness back to life, warm your butter tarts in a preheated oven at 325°F (160°C) for about 8-10 minutes. This refreshes the crispness of the crust and reminds you of that just-baked feeling, ensuring every bite tastes spectacular.
FAQs
Can I make the crust gluten-free for the Best Classic Canadian Butter Tarts Recipe?
Absolutely! Using a gluten-free all-purpose flour blend works well if you stick to one designed for baking. Just keep in mind that the texture might be slightly different but still very tasty.
Are nuts or raisins necessary for the filling?
Not at all. Classic butter tarts are delicious on their own with the rich caramel-like filling. Nuts and raisins are traditional variations that add texture and personality, so add them based on your preference.
Can I use maple syrup instead of corn syrup?
While maple syrup adds wonderful flavor, it doesn’t have the same thickening properties as corn syrup. Using maple syrup might change the texture of the filling, making it less gooey, but it’s a lovely flavor twist if you’re feeling adventurous.
How long do butter tarts keep fresh?
Stored properly at room temperature, butter tarts stay fresh for about 2 days, and refrigerated, they last up to 5 days. Always keep them in an airtight container to prevent them from drying out.
What’s the best way to stop butter tarts from leaking during baking?
Filling the tart shells about three-quarters full prevents spillage. Also, using a sturdy pastry crust and baking on the middle rack helps the tarts cook evenly, reducing leaks.
Final Thoughts
There’s something truly special about the Best Classic Canadian Butter Tarts Recipe that makes it a beloved treat in many households. From the buttery crust to the rich and gooey filling, each tart is a delicious reminder of home. I encourage you to make them yourself and experience the joy and warmth these tarts bring to any occasion. Trust me, once you try this recipe, it’ll become a treasured favorite in your baking repertoire.
Print
Best Classic Canadian Butter Tarts Recipe
- Prep Time: 20 minutes
- Cook Time: 25 minutes
- Total Time: 45 minutes
- Yield: 12 tarts
- Category: Dessert
- Method: Baking
- Cuisine: Canadian
Description
This Best Classic Canadian Butter Tarts recipe features delicately flaky pastry shells filled with a rich, buttery, and sweet filling that may include chopped walnuts or pecans and raisins for added texture and flavor. These tarts are an iconic Canadian dessert, perfect for serving at tea time, holidays, or any occasion that calls for a nostalgic sweet treat.
Ingredients
For the Pastry Dough
- 1 1/2 cups all-purpose flour
- 1/2 teaspoon salt
- 1/2 cup unsalted butter, cold and cubed
- 1/4 cup ice water (more if needed)
For the Filling
- 1/2 cup unsalted butter, melted
- 1 cup packed brown sugar
- 2 tablespoons corn syrup
- 1 tablespoon vanilla extract
- 1 large egg
- Pinch of salt
- 1/2 cup chopped walnuts or pecans (optional)
- 1/2 cup raisins (optional)
Instructions
- Prepare the Pastry Dough: In a mixing bowl, combine the flour and 1/2 teaspoon salt. Cut the cold, cubed unsalted butter into the flour using a pastry cutter or your fingers until the mixture resembles coarse crumbs.
- Add Ice Water: Slowly add ice water a tablespoon at a time, mixing gently until the dough begins to come together.
- Knead and Chill Dough: Turn the dough out onto a lightly floured surface and knead it just a few times to bring it fully together. Wrap the dough in plastic wrap and refrigerate for 30 minutes to chill and rest.
- Preheat Oven and Prepare Tins: Preheat your oven to 375°F (190°C). Grease a 12-cup muffin tin or line the cups with paper liners.
- Form Tart Shells: Using a round cookie cutter or the rim of a glass, cut circles of the chilled dough slightly larger than the muffin cups. Gently press each circle into the muffin cups to form tart shells, ensuring the dough covers the bottom and sides evenly.
- Make Filling: In a separate bowl, whisk together melted butter, brown sugar, corn syrup, vanilla extract, egg, and a pinch of salt until smooth and creamy.
- Add Nuts and Raisins: If using walnuts or pecans and raisins, divide them evenly among the tart shells at the bottom.
- Fill Tart Shells: Pour the filling mixture carefully over the nuts and raisins in each tart shell, filling nearly to the top but not overflowing.
- Bake the Tarts: Bake in the preheated oven for 20 to 25 minutes or until the filling is bubbly and the pastry is golden brown.
- Cool and Serve: Remove the tarts from the oven and let them cool in the pan for about 10 minutes before transferring them to a wire rack to cool further. Serve at room temperature and enjoy the classic buttery sweetness.
Notes
- Use cold butter and ice water to keep the pastry flaky and tender.
- Chilling the dough before rolling helps prevent shrinking during baking.
- Adjust the amount of corn syrup for a lighter or richer filling sweetness.
- Nuts and raisins are optional but add traditional texture and flavor.
- These tarts can be stored in an airtight container at room temperature for up to 3 days or refrigerated for up to a week.
- Reheat briefly before serving to restore some of the soft texture.

