
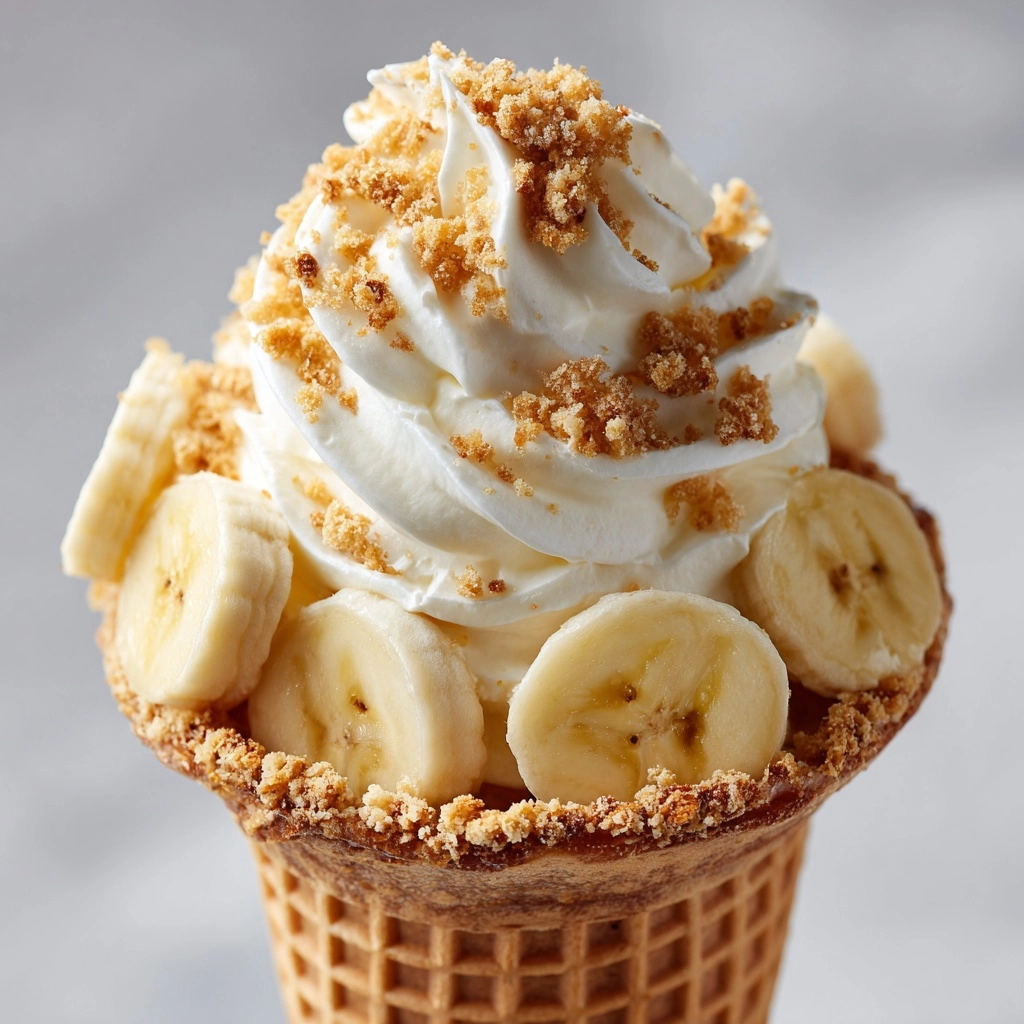
If you adore the creamy, dreamy flavors of banana pudding and the rich indulgence of cheesecake, then you are in for a real treat with this Banana Pudding Cheesecake Cones Recipe. This delightful no-bake dessert brings together the best of both worlds, served in a fun and charming waffle cone that adds a satisfying crunch. Imagine luscious banana pudding cheesecake filling nestled inside a perfectly crisp cone, topped with fresh bananas and crunchy vanilla wafers—each bite is like a little celebration. Whether you’re entertaining guests or craving a special sweet fix, this recipe will quickly become a beloved classic you’ll want to make again and again.
Ingredients You’ll Need
Getting ready to make these cones is a breeze with a handful of simple ingredients that each play a key role in the final flavor and texture. From the creamy cheesecake base to the sweet banana pudding, everything comes together beautifully to create this mouthwatering dessert.
- Heavy whipping cream: Whipped to stiff peaks, it adds lightness and fluffy texture.
- Cream cheese (softened): The rich foundation that lends tang and creaminess.
- Powdered sugar: Provides sweetness while keeping the mixture smooth.
- Instant banana pudding mix: Brings that unmistakable banana flavor and thickens perfectly.
- Cold milk: Activates the pudding mix and ensures a velvety consistency.
- Vanilla extract: Adds a warm, fragrant note that enhances all flavors.
- Waffle cones: The crunchy vessel that makes this dessert fun and portable.
- Crushed vanilla wafers: Adds a subtle crunch and classic flavor layer inside the cones.
- Banana slices: Fresh fruit that gives a burst of natural sweetness and color.
- Whipped cream for topping: A light, airy finish that elevates the look and taste.
- Extra vanilla wafers and banana slices for garnish: For the perfect picture-perfect touch.
How to Make Banana Pudding Cheesecake Cones Recipe
Step 1: Whip the Cream
Start by whipping your heavy cream until it reaches stiff peaks—this means when you lift the whisk, the cream holds its shape firmly. Set this aside for now; it’s going to give your filling that irresistible lightness that makes each bite feel like a cloud of deliciousness.
Step 2: Prepare the Cream Cheese Mixture
In a separate bowl, beat the softened cream cheese until it’s completely smooth and creamy. Add the powdered sugar and vanilla extract, then beat again until all combined. This mixture forms the rich and tangy base that balances the sweetness of the banana pudding.
Step 3: Make the Banana Pudding
Using another bowl, whisk the instant banana pudding mix with cold milk rigorously for about two minutes. You’ll notice the mixture starts to thicken nicely—this is the banana flavor magic that brings the cones to life.
Step 4: Combine Mixtures
Gently fold the banana pudding into the cream cheese mixture until fully incorporated. Next, carefully fold in the whipped cream, keeping as much airiness in the mixture as possible. This step is key for that perfect light and creamy texture.
Step 5: Assemble the Cones
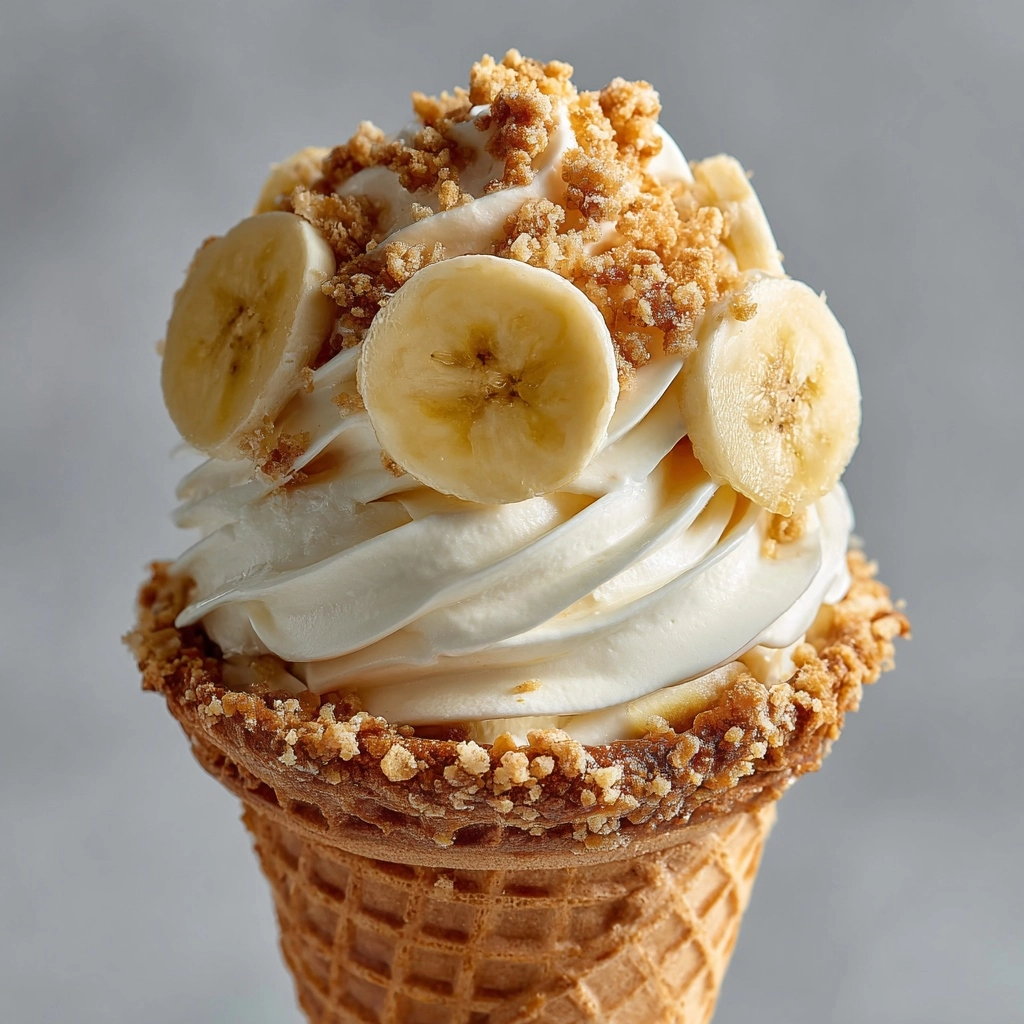
Take your waffle cones and fill each halfway with crushed vanilla wafers—this little layer adds a pleasant crunch and a nostalgic vanilla flavor. Then, spoon or pipe the luscious banana cheesecake filling into the cones until they’re full. Be generous and have fun with this part!
Step 6: Add Toppings
Finally, top each cone with a dollop of whipped cream, a slice of fresh banana, and a vanilla wafer for that beautiful finishing flair. Serve immediately to enjoy the crisp cone and creamy filling at their best, or chill until it’s time to impress your guests.
How to Serve Banana Pudding Cheesecake Cones Recipe
Garnishes
Don’t hold back when it comes to garnishes! A swirl of freshly whipped cream, a crisp vanilla wafer, and a perfectly sliced banana not only make these cones irresistible but also add texture and visual appeal that invites you to dig right in.
Side Dishes
Pair these cones with light, refreshing sides like a crisp green salad or a tangy fruit salad to balance the decadent sweetness. They also go wonderfully alongside a cup of coffee or iced tea for a delightful afternoon treat.
Creative Ways to Present
For a party, arrange the cones upright in a vase or a decorative stand to create a stunning display. You can try mini waffle cones for bite-sized versions that guests can enjoy in a single sweet mouthful. Drizzling caramel sauce or a sprinkle of toasted nuts over the top can take this dessert to an extra special level.
Make Ahead and Storage
Storing Leftovers
If you have leftovers, keep the filling separate from the cones to avoid sogginess. Store the creamy filling in an airtight container in the fridge for up to two days, and assemble just before serving to maintain that crisp cone texture.
Freezing
Although freezing the assembled cones can make the texture less ideal due to the crunchy cones becoming soft, you can freeze the banana cheesecake filling by itself in a container for up to one month. Thaw it overnight in the fridge before using.
Reheating
This dessert is best served cold, so no reheating is necessary. Simply let refrigerated filling sit at room temperature for a few minutes if it feels too firm, then gently stir to restore creaminess.
FAQs
Can I use fresh bananas in the filling?
While this recipe relies on instant banana pudding for that classic flavor and texture, you can add some finely mashed fresh bananas to the filling for extra natural banana taste, but be careful not to make it too runny.
Are there alternatives to waffle cones?
If you can’t find waffle cones, sugar cones or even sturdy chocolate-dipped cones can work well and add a unique twist to the dessert’s flavor profile.
Can I make this recipe vegan?
To make a vegan version, substitute the cream cheese with a plant-based alternative and use coconut cream instead of heavy cream. Choose a dairy-free vanilla pudding mix to keep it fully vegan.
How long can I prepare the cones in advance?
It’s best to assemble the cones just before serving to keep the waffle cones crisp. You can prepare the filling up to 24 hours in advance and keep it refrigerated until ready to use.
Can I add other flavors to the filling?
Absolutely! A dash of cinnamon or nutmeg can add warmth, and mixing in crushed pineapple or toasted coconut can give a fun tropical twist to your Banana Pudding Cheesecake Cones Recipe.
Final Thoughts
You simply cannot go wrong with the Banana Pudding Cheesecake Cones Recipe if you’re craving a fun, effortless dessert that feels both nostalgic and special. It’s a perfect blend of creamy, crunchy, and fruity that brings a smile with every bite. Give it a try, share it with your favorite people, and enjoy the happy moments that come with such a delightful treat!
Print
Banana Pudding Cheesecake Cones Recipe
- Prep Time: 20 minutes
- Cook Time: 0 minutes
- Total Time: 20 minutes
- Yield: 6 cones
- Category: Dessert
- Method: No-Cook
- Cuisine: American
- Diet: Vegetarian
Description
Delight in these no-bake Banana Pudding Cheesecake Cones combining creamy banana pudding cheesecake filling with crunchy waffle cones and vanilla wafers for a perfect summer treat that’s easy to prepare and irresistible.
Ingredients
Filling
- 1 cup heavy whipping cream
- 8 oz cream cheese, softened
- 1 cup powdered sugar
- 1 box (3.4 oz) instant banana pudding mix
- 1 ½ cups cold milk
- 1 tsp vanilla extract
Assembly
- 6 waffle cones
- 1 ½ cups crushed vanilla wafers
- 1 banana, sliced
- Whipped cream for topping
- Extra vanilla wafers and banana slices for garnish
Instructions
- Whip the Cream: In a large bowl, whip the heavy whipping cream until stiff peaks form, then set aside to maintain firmness.
- Prepare Cream Cheese Mixture: In another bowl, beat the softened cream cheese until smooth, then add powdered sugar and vanilla extract, mixing well to combine.
- Mix Banana Pudding: In a separate bowl, whisk the instant banana pudding mix with cold milk for 2 minutes until it begins to thicken for a smooth consistency.
- Combine Mixtures: Fold the banana pudding mixture into the cream cheese blend until evenly combined, then gently fold in the whipped cream to keep the filling light and airy.
- Assemble Cones: Fill each waffle cone halfway with crushed vanilla wafers to add crunch, then carefully spoon or pipe the banana cheesecake filling into the cones, filling them completely.
- Garnish and Serve: Top each cone with additional whipped cream, a slice of banana, and a vanilla wafer. Serve immediately or chill until ready to serve to maintain freshness.
Notes
- Fill cones just before serving to prevent sogginess.
- Use mini waffle cones for bite-sized or party servings.
- Add a drizzle of caramel sauce on top for extra sweetness and flavor.


